


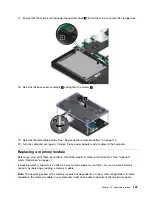


7. Place the notched end of the new memory module toward the contact edge side of the memory slot.
Then insert the memory module into the slot at an angle of about 20 degrees
1
. Pivot the memory
module downward until it snaps into place
2
. Ensure that the memory module is firmly installed in
the slot and cannot be moved easily.
Attention:
Do not touch the contact edge of the memory module. Otherwise the memory module
might get damaged.
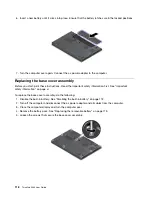
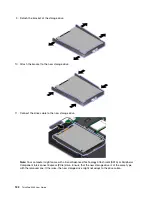
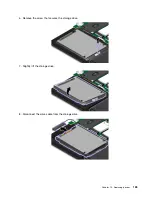
8. Reinstall the base cover assembly
1
and tighten the screws
2
.
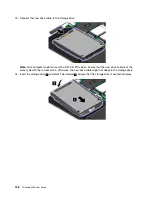
9. Reinstall the removable battery. See “Replacing the removable battery” on page 115.
10. Turn the computer over again. Connect the ac power adapter and all cables.
Replacing an M.2 wireless-WAN card
Before you start, print these instructions. Read the important safety information first. See “Important
safety information” on page vi.
Notes:
• The following information is only for user-installable modules.
• Depending on the model, your computer might look differently from the illustrations in this topic.
Attention:
Before you start installing an M.2 wireless-WAN card, touch a metal table or a grounded metal
object. This action reduces any static electricity from your body. Static electricity could damage the card.
131
Summary of Contents for ThinkPad X260
Page 1: ...ThinkPad X260 User Guide ...
Page 6: ...iv ThinkPad X260 User Guide ...
Page 66: ...50 ThinkPad X260 User Guide ...
Page 78: ...62 ThinkPad X260 User Guide ...
Page 96: ...80 ThinkPad X260 User Guide ...
Page 102: ...86 ThinkPad X260 User Guide ...
Page 120: ...104 ThinkPad X260 User Guide ...
Page 128: ...112 ThinkPad X260 User Guide ...
Page 154: ...138 ThinkPad X260 User Guide ...
Page 158: ...142 ThinkPad X260 User Guide ...
Page 168: ...152 ThinkPad X260 User Guide ...
Page 170: ...China RoHS 154 ThinkPad X260 User Guide ...
Page 175: ......
Page 176: ......