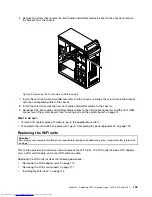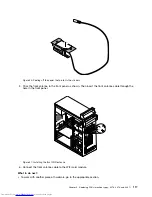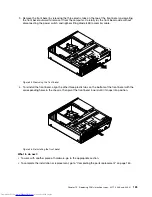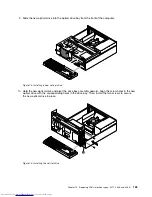
3. Remove the front bezel by releasing the three plastic tabs on the top of the front bezel and pivoting
the front bezel outward to remove it from the computer. Carefully lay the front bezel aside without
disconnecting the power switch and light-emitting diode (LED) assembly cable.
Figure 55. Removing the front bezel
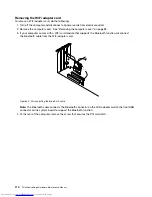
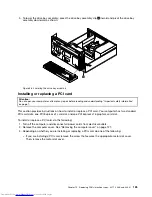
4. To reinstall the front bezel, align the other three plastic tabs on the bottom of the front bezel with the
corresponding holes in the chassis, then pivot the front bezel inward until it snaps into position.
Figure 56. Reinstalling the front bezel
What to do next:
• To work with another piece of hardware, go to the appropriate section.
• To complete the installation or replacement, go to “Completing the parts replacement” on page 160.
Chapter 10
.
Replacing FRUs (machine types: 3377, 3386, and 3388)
123
Summary of Contents for ThinkCentre Edge 92
Page 1: ...ThinkCentre Edge Hardware Maintenance Manual Machine Types 3376 3377 3378 3386 3387 and 3388 ...
Page 6: ...2 ThinkCentre Edge Hardware Maintenance Manual ...
Page 13: ...Chapter 2 Safety information 9 ...
Page 14: ... 18 kg 37 lb 32 kg 70 5 lb 55 kg 121 2 lb 10 ThinkCentre Edge Hardware Maintenance Manual ...
Page 18: ...14 ThinkCentre Edge Hardware Maintenance Manual ...
Page 19: ...1 2 Chapter 2 Safety information 15 ...
Page 20: ...1 2 16 ThinkCentre Edge Hardware Maintenance Manual ...
Page 26: ...22 ThinkCentre Edge Hardware Maintenance Manual ...
Page 27: ...1 2 Chapter 2 Safety information 23 ...
Page 31: ...Chapter 2 Safety information 27 ...
Page 32: ...1 2 28 ThinkCentre Edge Hardware Maintenance Manual ...
Page 36: ...32 ThinkCentre Edge Hardware Maintenance Manual ...
Page 124: ...120 ThinkCentre Edge Hardware Maintenance Manual ...
Page 166: ...162 ThinkCentre Edge Hardware Maintenance Manual ...
Page 170: ...166 ThinkCentre Edge Hardware Maintenance Manual ...
Page 175: ......

