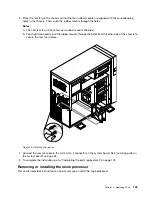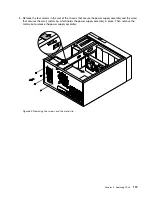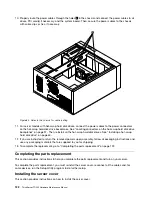
10. Properly route the power cables through the holes
1
in the chassis and connect the power cables to all
drives, PCI card(s) if necessary, and the system board. Then, secure the power cables to the chassis
with cable clips or ties, if necessary.
Figure 85. Holes in the chassis for cable routing
11. For server models with hot-swap hard disk drives, connect the power cables to the power connectors
on the hot-swap hard disk drive backplanes. See “Locating connectors on the hot-swap hard disk drive
backplanes” on page 37. Then, reinstall all the hot-swap hard disk drives. See “Installing a hot-swap
hard disk drive” on page 60.
12. If you are instructed to return the removed power supply assembly, follow all packaging instructions and
use any packaging materials that are supplied to you for shipping.
13. To complete the replacement, go to “Completing the parts replacement” on page 122.
Completing the parts replacement
This section provides instructions to help you complete the parts replacement and turn on your server.
To complete the parts replacement, you must reinstall the server cover, reconnect all the cables and, for
some devices, run the Setup Utility program to do further setup.
Installing the server cover
This section provides instructions on how to install the server cover.
122
ThinkServer TD230 Hardware Maintenance Manual
Summary of Contents for and 1040
Page 1: ...ThinkServer TD230 Hardware Maintenance Manual Machine Types 1027 1029 1039 and 1040 ...
Page 2: ......
Page 3: ...ThinkServer TD230 Hardware Maintenance Manual Machine Types 1027 1029 1039 and 1040 ...
Page 16: ...10 ThinkServer TD230 Hardware Maintenance Manual ...
Page 20: ...14 ThinkServer TD230 Hardware Maintenance Manual ...
Page 44: ...38 ThinkServer TD230 Hardware Maintenance Manual ...
Page 148: ...142 ThinkServer TD230 Hardware Maintenance Manual ...
Page 166: ...160 ThinkServer TD230 Hardware Maintenance Manual ...
Page 168: ...162 ThinkServer TD230 Hardware Maintenance Manual ...
Page 172: ...166 ThinkServer TD230 Hardware Maintenance Manual ...
Page 185: ......


