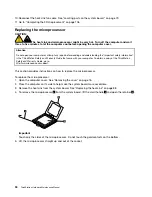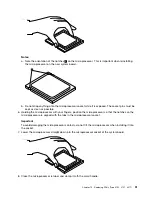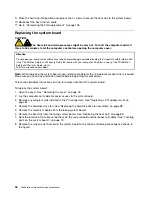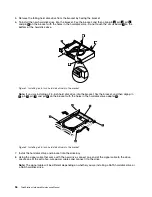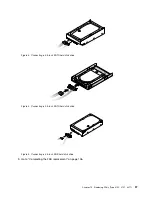
6. Install the new front panel connectors assembly into the chassis and secure it with the screw.
7. Reconnect the cables to the system board.
8. Go to “Completing the FRU replacement” on page 106.
Replacing the power switch/LED assembly
Attention
Do not open your computer or attempt any repair before reading and understanding the “Important safety information”
in the
ThinkStation Safety and Warranty Guide
that came with your computer. To obtain a copy of the
ThinkStation
Safety and Warranty Guide
, go to:
http://www.lenovo.com/support.
This procedure describes how to remove and replace the power switch/LED assembly.
1. Remove the computer cover. See “Removing the cover” on page 76.
2. Remove the front bezel. See “Removing the front bezel” on page 80.
3. Disconnect the power switch/LED assembly cable from the system board. See “Locating parts on the
system board ” on page 79.
4. Note the power switch/LED assembly cable routing and the position of the two LEDs.
5. Remove the switch and the LEDs from the bezel.
6. Route the cable for the new power switch/LED assembly through the hole in the chassis and to the
system board.
7. Install the new power switch/LED assembly into the bezel. Make sure that the LEDs are in the correct
position.
8. Connect the power switch/LED cable to the system board.
9. Reinstall the front bezel.
10. Go to “Completing the FRU replacement” on page 136.
Replacing the battery
Attention
Do not open your computer or attempt any repair before reading and understanding the “Important safety information”
in the
ThinkStation Safety and Warranty Guide
that came with your computer. To obtain a copy of the
ThinkStation
Safety and Warranty Guide
, go to:
http://www.lenovo.com/support.
Your computer has a special type of memory that maintains the date, time, and settings for built-in features,
such as serial-port assignments (configuration). A battery keeps this information active when you turn
off the computer.
The battery normally requires no charging or maintenance throughout its life; however, no battery lasts
forever. If the battery fails, the date, time, and configuration information (including passwords) are lost. An
error message is displayed when you turn on the computer.
This section provides information on how to replace the battery.
To change the battery, do the following:
1. Open the computer cover. See “Removing the cover” on page 76.
2. Access the system board.
3. Locate the battery. See “Locating parts on the system board ” on page 79.
104
ThinkStation Hardware Maintenance Manual
Summary of Contents for 4157 - ThinkStation S20 - 2 GB RAM
Page 1: ...ThinkStation Hardware Maintenance Manual Machine Type 4105 4155 4157 4158 4217 4218 ...
Page 2: ......
Page 3: ...ThinkStation Hardware Maintenance Manual Machine Type 4105 4155 4157 4158 4217 4218 ...
Page 15: ...Chapter 2 Safety information 9 ...
Page 19: ...Chapter 2 Safety information 13 ...
Page 20: ...1 2 14 ThinkStation Hardware Maintenance Manual ...
Page 21: ...Chapter 2 Safety information 15 ...
Page 27: ...Chapter 2 Safety information 21 ...
Page 31: ...Chapter 2 Safety information 25 ...
Page 38: ...32 ThinkStation Hardware Maintenance Manual ...
Page 56: ...50 ThinkStation Hardware Maintenance Manual ...
Page 80: ...74 ThinkStation Hardware Maintenance Manual ...
Page 93: ...Chapter 10 Replacing FRUs Type 4105 4157 4217 87 ...
Page 124: ...118 ThinkStation Hardware Maintenance Manual ...
Page 264: ...258 ThinkStation Hardware Maintenance Manual ...
Page 268: ...262 ThinkStation Hardware Maintenance Manual ...
Page 274: ...268 ThinkStation Hardware Maintenance Manual ...
Page 275: ......
Page 276: ...Part Number 53Y4348 Printed in USA 1P P N 53Y4348 53Y4348 ...

