
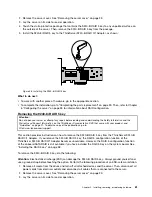

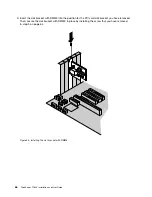
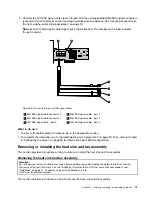


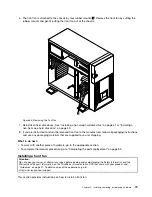

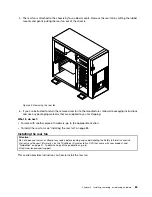
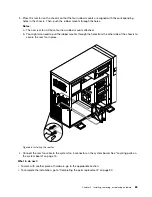
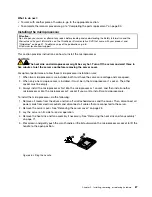


• If you have installed a second microprocessor and you are removing the heat sink and fan assembly
for microprocessor 2, disconnect the heat sink and fan assembly cable from the system fan 1
connector on the system board. See “Locating parts on the system board” on page 15. Then, remove
the four screws
1
that secure the heat sink and fan assembly.
Figure 58. Screws that secure the heat sink and fan assembly for microprocessor 2
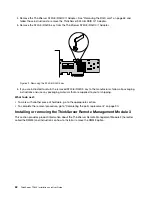
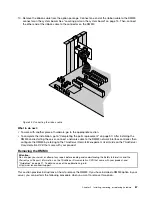
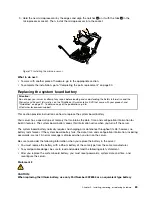
6. Lift the heat sink and fan assembly off the system board.
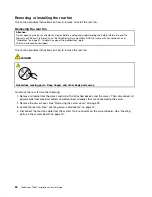
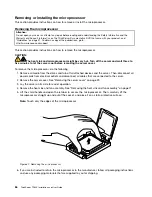
Notes:
a. You might have to gently twist the heat sink and fan assembly to free it from the microprocessor.
b. When handling the heat sink and fan assembly, do not touch the thermal grease
1
on the bottom of it.
Figure 59. Heat sink and fan assembly
7. If you are instructed to return the removed heat sink and fan assembly to the manufacturer, follow all
packaging instructions and use any packaging materials that are supplied to you for shipping.
74
ThinkServer TD230 Installation and User Guide
Summary of Contents for 102912U
Page 1: ...ThinkServer TD230 Installation and User Guide Machine Types 1027 1029 1039 and 1040 ...
Page 2: ......
Page 3: ...ThinkServer TD230 Installation and User Guide Machine Types 1027 1029 1039 and 1040 ...
Page 12: ...x ThinkServer TD230 Installation and User Guide ...
Page 16: ...4 ThinkServer TD230 Installation and User Guide ...
Page 32: ...20 ThinkServer TD230 Installation and User Guide ...
Page 106: ...94 ThinkServer TD230 Installation and User Guide ...
Page 136: ...124 ThinkServer TD230 Installation and User Guide ...
Page 140: ...128 ThinkServer TD230 Installation and User Guide ...
Page 153: ......
Page 154: ......


