Page 14
XP14 SERIES
(VALVE STEM SHOWN CLOSED)
INSERT HEX WRENCH HERE
SERVICE PORT CORE
SERVICE PORT CAP
ANGLE-TYPE SERVICE VALVE
(FRONT-SEATED CLOSED)
STEM CAP
(VALVE STEM SHOWN OPEN)
INSERT HEX WRENCH HERE
ANGLE-TYPE SERVICE VALVE
(BACK-SEATED OPENED)
1 - Remove stem cap with an appropriately sized wrench.
2 - Use a service wrench with a hex-head extension (3/16” for liquid
line valve sizes and 5/16” for vapor line valve sizes) to back the
stem out counterclockwise as far as it will go.
When service valve is
CLOSED
, the service port is
open to the line set and indoor unit.
When service valve is
OPEN
, the service port is
open to line set, indoor and outdoor unit.
NOTE -
A label with specific torque requirements may be affixed to
the stem cap. If the label is present, use the specified torque.
OPERATING ANGLE-TYPE SERVICE VALVE
FIGURE 16
1
2
3
4
5
6
7
8
9
10
11 12
1/12 TURN
A service port cap protects the service port core from contamination
and serves as the primary leak seal.
1 - Remove service port cap with an appropriately sized wrench.
2 - Connect gauge set to service port.
3 - When testing is completed, replace service port cap and tighten
as follows:
S
With torque wrench, finger tighten and torque
cap per table 2.
S
Without torque wrench finger tighten and
use an appropriately sized wrench to turn
an additional 1/6 turn clockwise.
1
2
3
4
5
6
7
8
9
10
11 12
1/6 TURN
Reinstall Stem Cap
Stem cap protects the valve stem from damage and serves as the
primary seal. Replace the stem cap and tighten as follows:
S
With torque wrench, finger tighten and
then torque cap per table 2.
S
Without torque wrench, finger tight
en and use an appropriately sized
wrench to turn an additional 1/12
turn clockwise.
ACCESS SERVICE PORT
FIGURE 17
Checking Refrigerant Charge
The XP14 unit is factory-charged with enough HFC-410A
refrigerant to accommodate a 15-foot length of refrigerant
piping.
Charge should be checked and adjusted us
ing the tables provided on the charging procedure
sticker on the unit access panel.
Detailed information
is given in the XP14 Installation and Service Procedures
manual, which is available on DaveNet.
Defrost System
The defrost system includes a defrost thermostat (S6)
and a defrost control (CMC1).
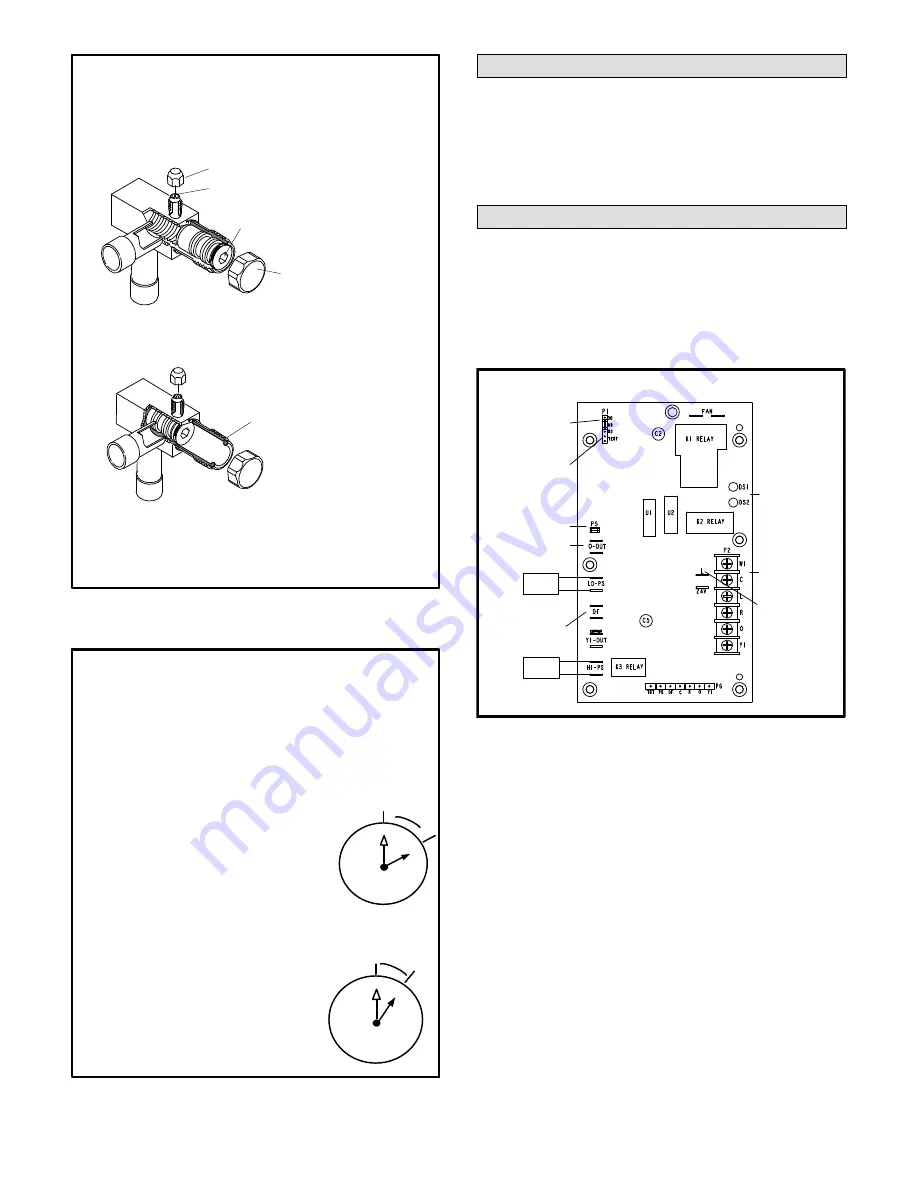
DEFROST CONTROL (CMC1)
This defrost control includes the combined functions of a
time/temperature defrost control, defrost relay, time
delay, diagnostic LEDs and a terminal strip for field wiring
connections.
24V TERMINAL
STRIP
CONNECTIONS
DIAGNOSTIC
LEDS
HIGH PRESSURE
SWITCH
TEST
PINS
DEFROST TIMING
PINS (P1)
REVERSING
VALVE
DEFROST
THERMOSTAT (S6)
LOW PRESSURE
SWITCH
COMPRESSOR
DELAY PINS
S4
S87
SERVICE LIGHT
CONNECTIONS
DEFROST CONTROL (CMC1)
FIGURE 18
The defrost control provides automatic switching from
normal heating operation to defrost mode and back.
When the defrost thermostat is closed, the control accu
mulates compressor run time at 30-, 60- or 90- minute
field-adjustable intervals. When the selected compressor
run time interval is reached, the defrost relay is energized
and defrost begins.
Defrost Control Timing Pins (P1)
Each timing pin selection provides a different accumu
lated compressor run time period for one defrost cycle.
This time period must occur before a defrost cycle is ini
tiated. The defrost interval can be adjusted to 30 (T1),
60 (T2), or 90 (T3) minutes (see figure 18). The maxi
mum defrost period is 14 minutes and cannot be ad
justed.
NOTE -
Defrost control part number is listed near the
P1
timing pins.
S
Factory default is 90 minutes.
S
If the timing selector jumper is missing, the defrost
control defaults to a 90-minute defrost interval.


