8.2 Distance
measurement
In conjunction with the M80 stereo microscope, reticule with measuring pitches and
movable objective adaptor, the distance from the cut edge to the area of interest of
the sample can be determined.
8.2.1 Calibrating the reticule
The reticule is only magnified by the eyepiece. The total magnification of the
specimen does however depend on the objective lens, magnification changer (zoom),
eyepiece and additional tube possibly used (e.g. coaxial light sources) and changes
whenever these factors are altered. The true dimensions of the specimen can only be
established once the calibrated value has been defined.
The calibration value of each of your optics/magnification combinations used has to
be established only once. Keep a table of the appropriate calibration values.
When working with a stereo microscope with engage able zoom settings (Leica M80)
or adjustable stops (Leica S6), the specific magnifications can always be re-produced
exactly (refer to directions for use of the stereo microscope).
Swivel the pivot arm to the front face observation (chapter 7.4.). Place stage
micrometer onto the specimen holder (without specimen) use plasticine or similar for
fixing or use the glass slide holder offered by Leica. Select the magnification with
which you will later want to take measurements (the highest value will provide
measurements that are more accurate).
Turn eyepiece with reticule anticlockwise until it reaches the stop. Slowly turn
eyepiece with reticule clockwise until you can clearly see the measuring lines of the
reticule. Observe the stage micrometer through the eyepiece with the reticule (keep
the other eye closed) and focus.
Check whether the eyepiece is free of parallax by looking into the eyepiece with
reticule and slightly move your head. The reticule and sample (stage micrometer)
must not move towards one another, i.e. they must be clearly focused in one plane
(free of parallax). If this is not the case, please repeat the process.
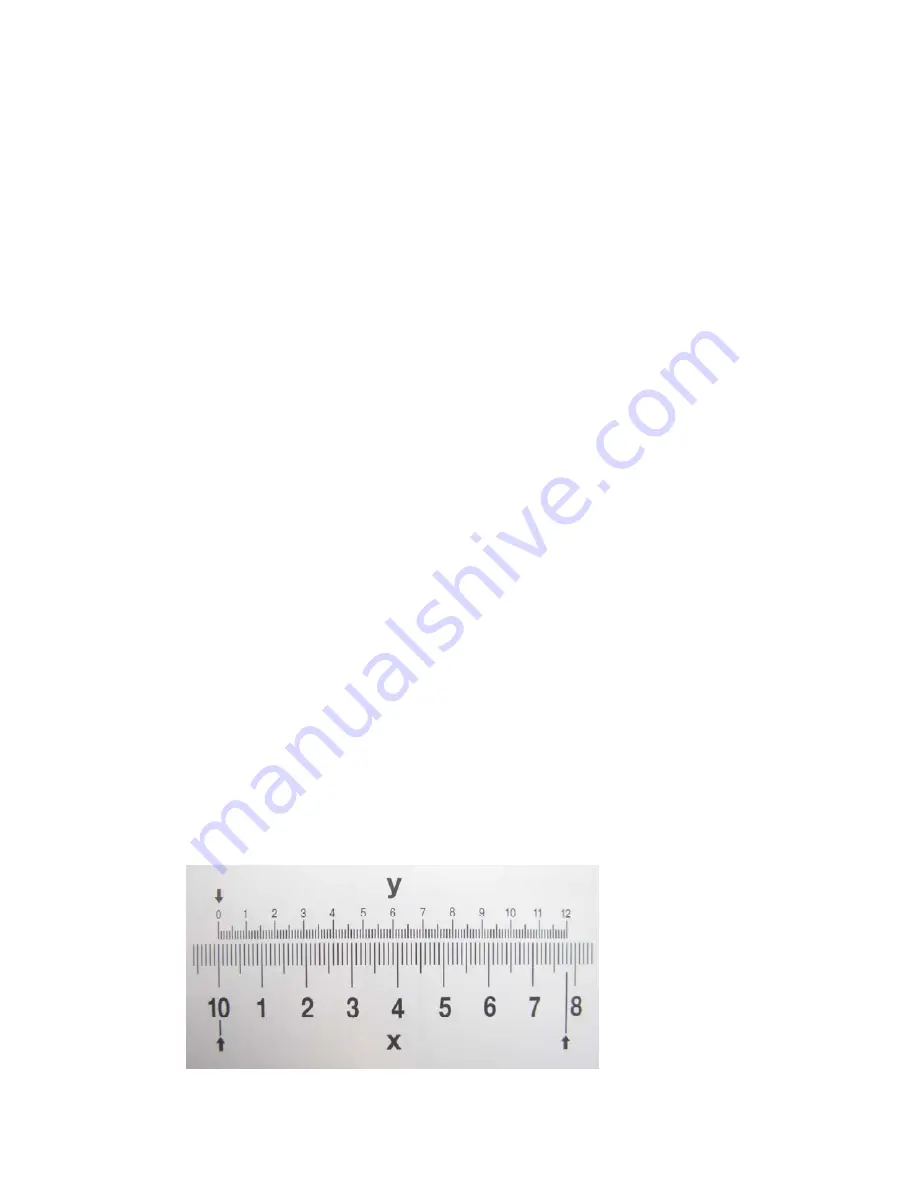
Align stage micrometer (x) close to and in parallel with the eyepiece graticule (y). Use
the set screws of the movable objective adaptor to align the pitch lines.
Page 30 Operating Manual Leica EM TXP 10/10


