background image

LAUNCH  

Installation Instruction for Economical Symmetric Floor-plate 2-post Lift


13 


Summary of Contents for TLT235SB

Page 1: ...te layout 5 5 2 3 Install the powerside column 5 5 2 4 Install the floor plate 6 5 2 5 Install the offside column 6 5 2 6 Install and adjust the balancing steel cables 7 5 2 7 Install the power unit 7...

Page 2: ...cause direct or indirect damage to the machine and injury on operators z To do the installation and adjustment the personnel must have certain electrical knowledge z The operators must undergo special...

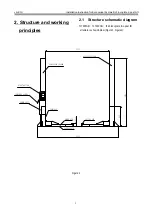
Page 3: ...and working principles 2 1 Structure schematic diagram TLT235SB TLT240SB the Floor plate two post lift structure is shown below Figure 1 Figure2 SWING ARM FLOOR PLATE CARRIAGE 3370 min110 LIFTING PAD...

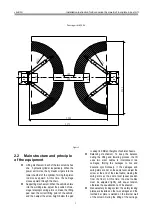
Page 4: ...point of the vehicle and then adjust the screw height below the pad to adapt to different heights of vehicle chassis z Balancing mechanism To keep the balance during the lifting and lowering process...

Page 5: ...treated properly 5 Installation 5 1 Important notice z The wrong installation will cause the lift damage or personal injury The manufacturer will not undertake any responsibilities for any damage caus...

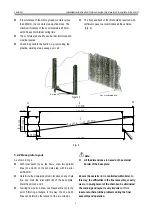
Page 6: ...4 3 5 Fig 4 5 2 2 Base plate layout As shown in Fig 4 z With total width A as the basis draw two parallel lines 1 and 2 on the concrete slab with the error within 3mm z Determine the powerside column...

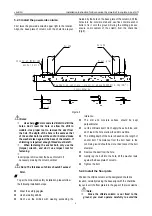
Page 7: ...only use the torque wrench and don t use impact tool for fastening Insert proper shims under the base of column if necessary making the column vertical Note The thickness of shims shouldn t exceed 5mm...

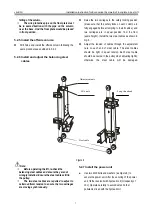
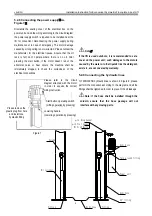
Page 8: ...teel cables as shown in Fig 6 z Adjust the tension of cables through the adjustment nuts on each end of steel cable The steel cables should be tight in equal tension Each steel cable should be ensured...

Page 9: ...f the lift is used outdoors it is recommended to set a cover on the power unit such damages to the motors caused by the water or other liquids like the detergent acid etc are not covered by warranty 5...

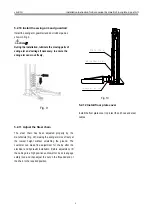
Page 10: ...sted properly by the manufacture Fig 10 making the swing arm move freely at the lowest height without scratching the ground The customer can make fine adjustment for chains after the electrical and hy...

Page 11: ...d the carriage rises stop pressing the button then the carriage will stop In order to lower down the carriage first pull the steel rope for the safety locks on the two carriages one time for each In c...

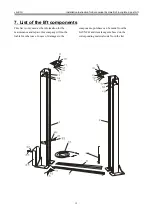
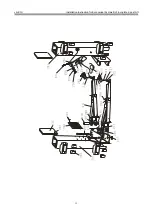
Page 12: ...f the lift components This list is only used as the information for the maintenance and repair Our company will not be liable for other uses In case of damages to the components purchase can be made f...

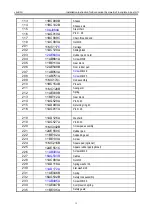
Page 13: ...LAUNCH Installation Instruction for Economical Symmetric Floor plate 2 post Lift 12...

Page 14: ...LAUNCH Installation Instruction for Economical Symmetric Floor plate 2 post Lift 13...

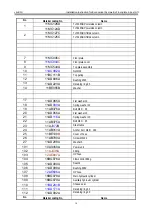
Page 15: ...r 17 11AD065A Flat washer 12 18 11AD090A Spring washer 12 19 11AB376A Bolt M12 35 20 11AD056A Flat washer 10 21 11AD116A Spring washer 10 22 11AB375A Bolt M10 25 23 11AJ072B Steel cable 24 11AB969A An...

Page 16: ...ssembly 210 11BC154B Pin axle 211 11MC128B Swing arm 212 11AE039B Spring 213 11BE112A Gear block 214 11AG528A Pin 5X40 215 11AD093A Returning ring 40 216 11AG011A Pin 3 26 218 11AD126A Washer 8 219 11...

Page 17: ...lve 5 safety valve 6 manual lowering valve 7 Sevo flow control valve 8 hose 9 hydraulic cylinder 10 level gauge 11 air filter Working principles of hydraulic system When the button is pressed to start...

Reviews: