background image


Larson Electronics LLC     www.LarsonElectronics.com     [email protected]


9419 E US HWY 175, Kemp, TX 75143 - P: (800) 369-6671 - F: (903) 498-3364  


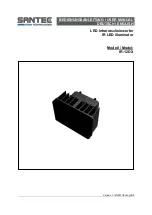
Mounting Light on Easy Mount 

1.


Tighten the four special lug bolts into the four pre-drilled holes underneath the pan-tilt by 
turning clockwise. 

2.


Turn knob of the locking bolt counterclockwise to loosen the movable plate of the Easy 
Mount.  

3.


Dial lever counterclockwise to align the four holes on the movable plate to the bigger side of 
the four corresponding keyholes on locking base. 

4.


Insert the four lug bolts underneath the pan-tilt into the aligned holes on the Easy Mount. 
You may prefer to place the light so that the power input cable of the light faces the ‘back 
side” of your installation. Because the light can pan in all directions, it does not really matter 
which what the light is placed on the Easy Mount. 

5.


Dial lever clockwise to align the four holes on the movable plate to the smaller side fo the 
four corresponding keyholes on locking base. Turn the knob of the locking bolt clockwise 
until tight to tighten the movable plate of the Easy Mount. Make sure the light is locked in 
place.  

6.


Connect the power to the light according to the instructions in the Connecting Power to the 
Light section. The light is ready to use. 

Dismounting the Light from Easy Mount 

1.


Disconnect power from the light. 

2.


Turn knob of the locking bolt counterclockwise to loosen the movable plate of the Easy Mount. 

3.


Dial the lever counterclockwise to align the four holes on the movable plate to the bigger side 
of the four corresponding keyholes on locking base. 

4.


Dismount the light from the locking base of the Easy Mount. Store the light in a secure place. 

Self-Reset of the Light 

Whenever power to the light is turned on, the light will start a self-resetting procedure. The light will 
blink once. The pan-tilt will pan and tilt the light and automatically set the light to a neutral position. 
CAUTION: During the self-resetting process, 

DO NOT

 try to stop the automatic movement by force. 

DO 

NOT

 use the remote control to attempt to control the light functions and 

DO NOT

 remove power to the 

light. After several seconds, the light will stop and then will be ready to use.  

REMOTE CONTROL 

Each light comes with one wireless handheld remote control.    

Summary of Contents for RCL360-LED-40

Page 1: ...o remain steady regardless of battery discharging status For example a 24V 26AH rechargeable battery can power a 40W light continuously at regular intensity for up to 60 hours This light may also be powered directly by an optional 110 220 VAC to 12 24 VDC converter An optional adapter cable is available to connect these searchlights to cigarette lighter sockets of automobiles A specially coated te...

Page 2: ...to the normal functioning of the light when it is used in extreme high or low temperatures beyond that range The magnetic mount can withstand wind speed up to 60 mph We DO NOT recommend operating a magnetically mounted light on any object that may move at a high speed STROBE WARNING Exposure to strobe lights may cause dizziness disorientation and nausea A small percentage of people suffer from pho...

Page 3: ...ing a switch to the DC power source circuit to turn power to the light on off easily Securely connect the exposed RED wire from the pan tilt to the positive terminal of the connection cable from your DC power source Securely connect the exposed BLACK wire form the pan tilt to the negative terminal of the connection cable from your DC power source Insulate the connections to avoid any electrical sh...

Page 4: ...sy Mount Permanently on Flat Surface Typical application of this method is where the locking base of the standard Easy Mount is permanently mounted on a flat surface while the light can be attached or detached quickly for security and storage purpose Tighten four stainless steel M6 screws of appropriate head size and length not supplied at the four outer holes on the locking base of the Easy Mount...

Page 5: ...kwise until tight to tighten the movable plate of the Easy Mount Make sure the light is locked in place 6 Connect the power to the light according to the instructions in the Connecting Power to the Light section The light is ready to use Dismounting the Light from Easy Mount 1 Disconnect power from the light 2 Turn knob of the locking bolt counterclockwise to loosen the movable plate of the Easy M...

Page 6: ... the bottom edge will come on This indicator light will become green when charging is complete Unplug the USB cable Charing the remote control only when the red light starts to blink will extend the useful life of the rechargeable battery A rechargeable battery is usually good for about 1 000 charges Power ON OFF Remote While the remote control is off press and hold Remote Control Power Switch unt...

Page 7: ...he two groups can be selected individually or together When a group selection button is on selected the remote control functions will apply to all of the lights included in that group NOTE While a remote control can pair with many lights a light can be paired with one Select Group button of one remote control Always send a light together with its paired remote control If a light is paired with a n...

Page 8: ...light under the chosen Select Group of Lights button will blink f Press Remote Control Power Switch once The red indicator light under the chosen Select Group of Lights button will become steady g Press remote Control Power Switch again The light will be off and starts its self reset process The programming is finished h TEST SETUP Use the remote control to operate the light with the chosen group ...

Reviews: