IND-MD-TM-CS-TH-KT
Larson Electronics, LLC
Phone: (800) 369-6671
Fax: (903) 498-3364
www.larsonelectronics.com
16 of 21
3.
Alarm sensitivity
: Including three modes: advanced, standard, and custom. In the first two modes, the
minimum alarm targets are 4 and 8 pixels, respectively, and cannot be changed
;
When selecting the custom
mode, the size of the minimum alarm target can be selected by dragging the left mouse button and the scroll wheel.
4.
Number of alarm targets
:
Setting the number of alarm individuals displayed on the image, and the
maximum number is 8.
5.
Alarm delay time
:
In order to avoid the alarm caused by accidental temperature difference, the delay time
is set to collect the temperature change within a period of time, so as to reduce the alarm error.
6.
Transparency of temperature scale
:
Set the transparency of the temperature mark, ranging from 0 to 9,
0 is full transparency.
7.
Face recognition switch
:
The switch is on by default. When the preset hot object is detected, if the switch is turned
on, the system will first determine whether the hot object is a face. If it is judged to be a face, it will grab the picture
to alarm, otherwise it will not grab the picture to alarm.
8.
High temperature tracking
:
This switch is turned on by default. When a hot object is found in the detection area,
the system will automatically track the hot object and the cursor will always follow.
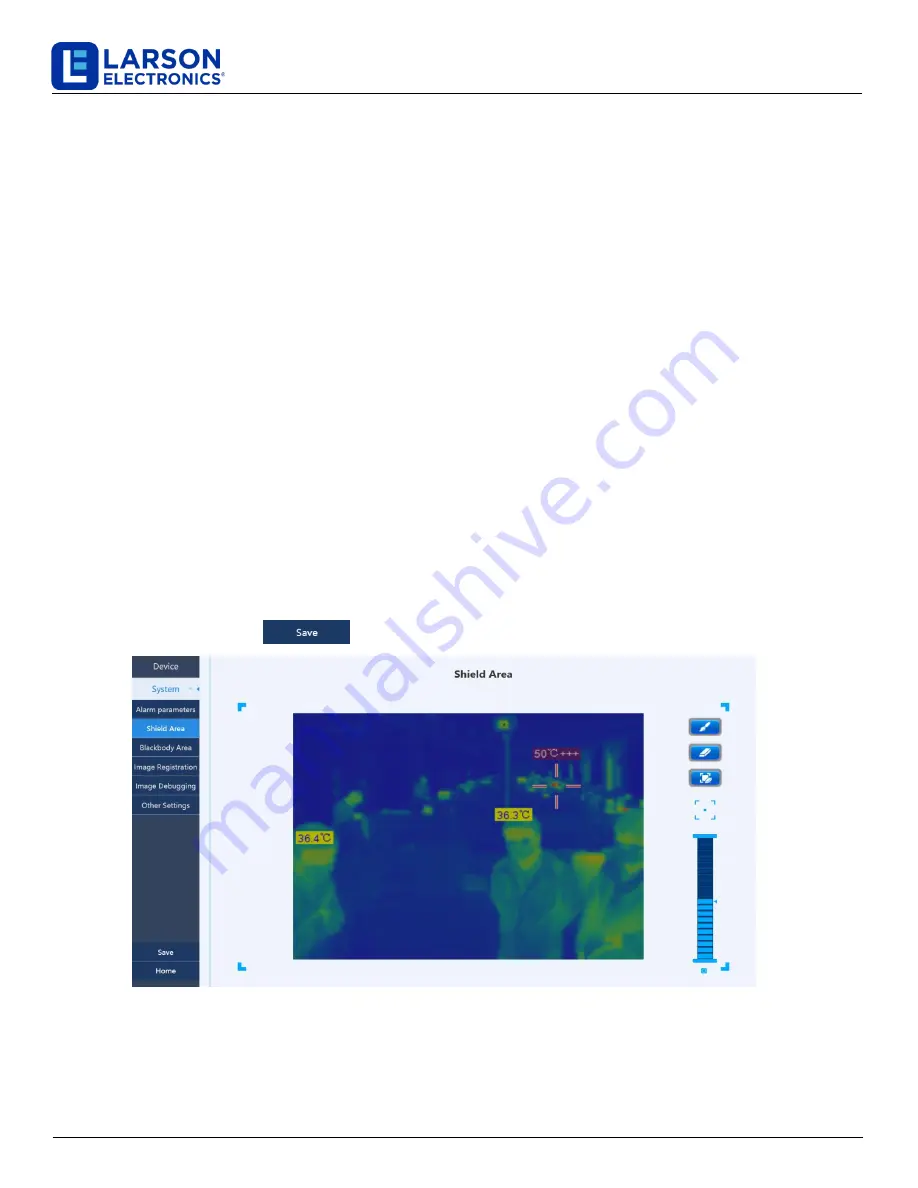
4.2.2 Settings of shielding area
There are always some hot heat sources in the monitoring area
,
such as the light box,billboard, fast-food
restaurants etc
,
the temperature of these heat sources is similar to human body, which can easily lead to false
alarms in the system.In order to remove these disturbances, these heat sources can be shielded and the area is not
alerted.
1. Click “Settings” in the main screen—>“system setting”—>“shielding area”
,
enter the screen of shielding area, see
FIG 4-7.
2. By dragging the left mouse button to depict the rectangle method, the high temperature interference source from
the infrared image shielding.
3. Click the save button
on the left side of the window to save.
FIG. 4-7 Settings of shielding area


