Hardened Managed Ethernet Switch
40 User’s Manual
Click the text box and type a new address to change the DNS Server.
(Need to choose “Enable” from the “DNS Server” drop-down menu.)
8.
Submit: Click “Submit” button when you finished DNS Server.
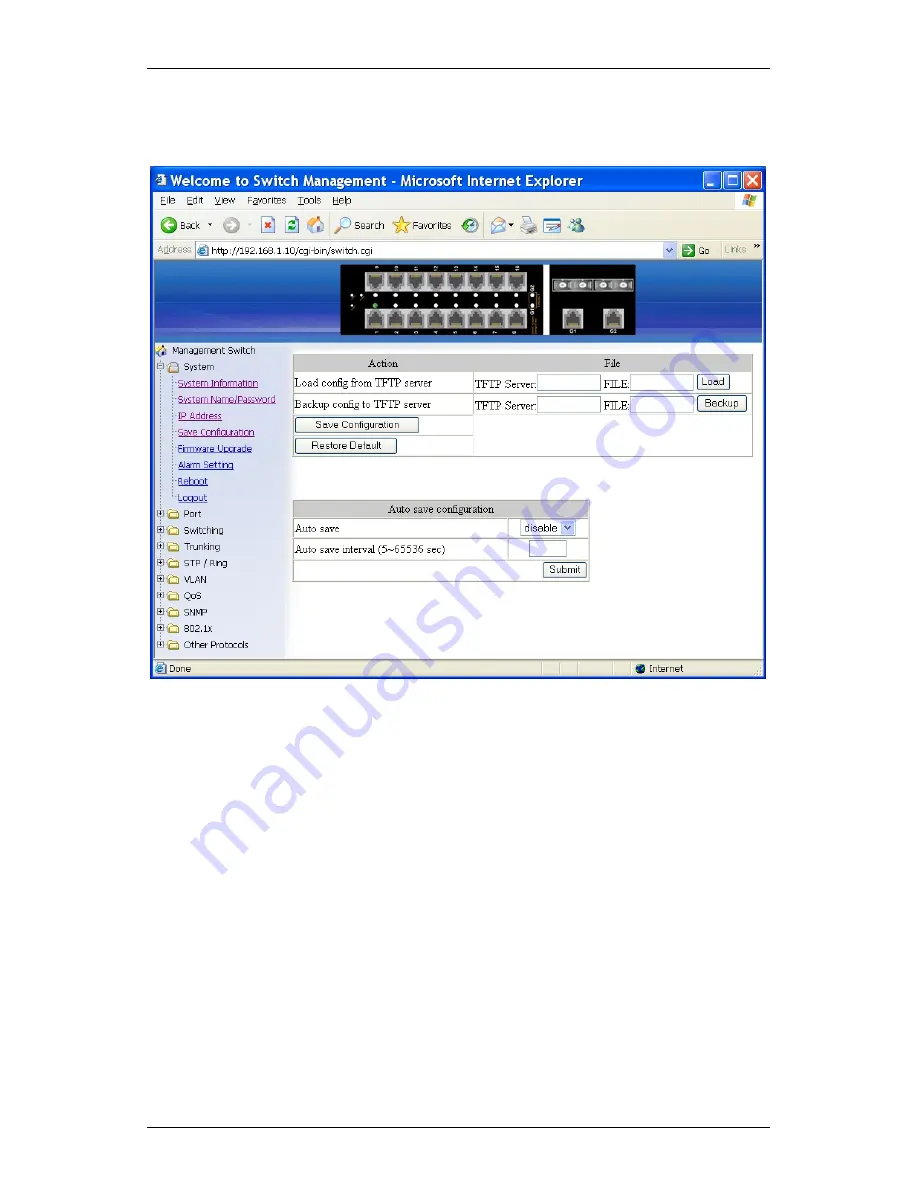
Save Configuration
1.
Load config from TFTP server:
Click in “TFTP Server” text box and type the TFTP server IP address
from where the file will be obtained.
Click in “FILE” text box and type the name of the file that will be
obtained.
Click “Load” button to load the file from the TFTP server.
2.
Backup config to TFTP server:
Click in “TFTP Server” text box and type the TFTP server IP address to
where the file will be back upped.
Click in “FILE” text box and type the name of the file that will be back
upped.
Click “Backup” button to backup the file to the TFTP server.
3. Save Configuration: Click “Save Configuration” button to save your
configuration settings.
4. Restore Default: Click “Restore Default” button to restore the default
settings of the switch.
5. Auto save: Click “Auto save” drop-down menu to choose “Disable” or
“Enable” from the “Auto save” drop-down list to disable or enable Auto
save for the switch.
Summary of Contents for L-EX73000
Page 8: ...Hardened Managed Ethernet Switch 8 User s Manual ...
Page 43: ...Hardened Managed Ethernet Switch User s Manual 43 ...
Page 45: ...Hardened Managed Ethernet Switch User s Manual 45 ...
Page 63: ...Hardened Managed Ethernet Switch User s Manual 63 ...
Page 65: ...Hardened Managed Ethernet Switch User s Manual 65 ...
Page 69: ...Hardened Managed Ethernet Switch User s Manual 69 ...
Page 73: ...Hardened Managed Ethernet Switch User s Manual 73 ...
Page 81: ...Hardened Managed Ethernet Switch User s Manual 81 ...
Page 89: ...Hardened Managed Ethernet Switch User s Manual 89 Other Protocols ...


