LaCie
rugged
XL
• D
esign
by
N
eil
P
oulton
Optional Formatting and Partitioning
User Manual
page 21
3.3. Formatting for Mac Users
CAUTION:
Following these steps will erase everything from
the hard disk. If you have information that you want to protect
or continue to use, back up this information before performing
these steps.
1. Select
Utilites
from the Go menu in Finder.
2. Open Disk Utility.
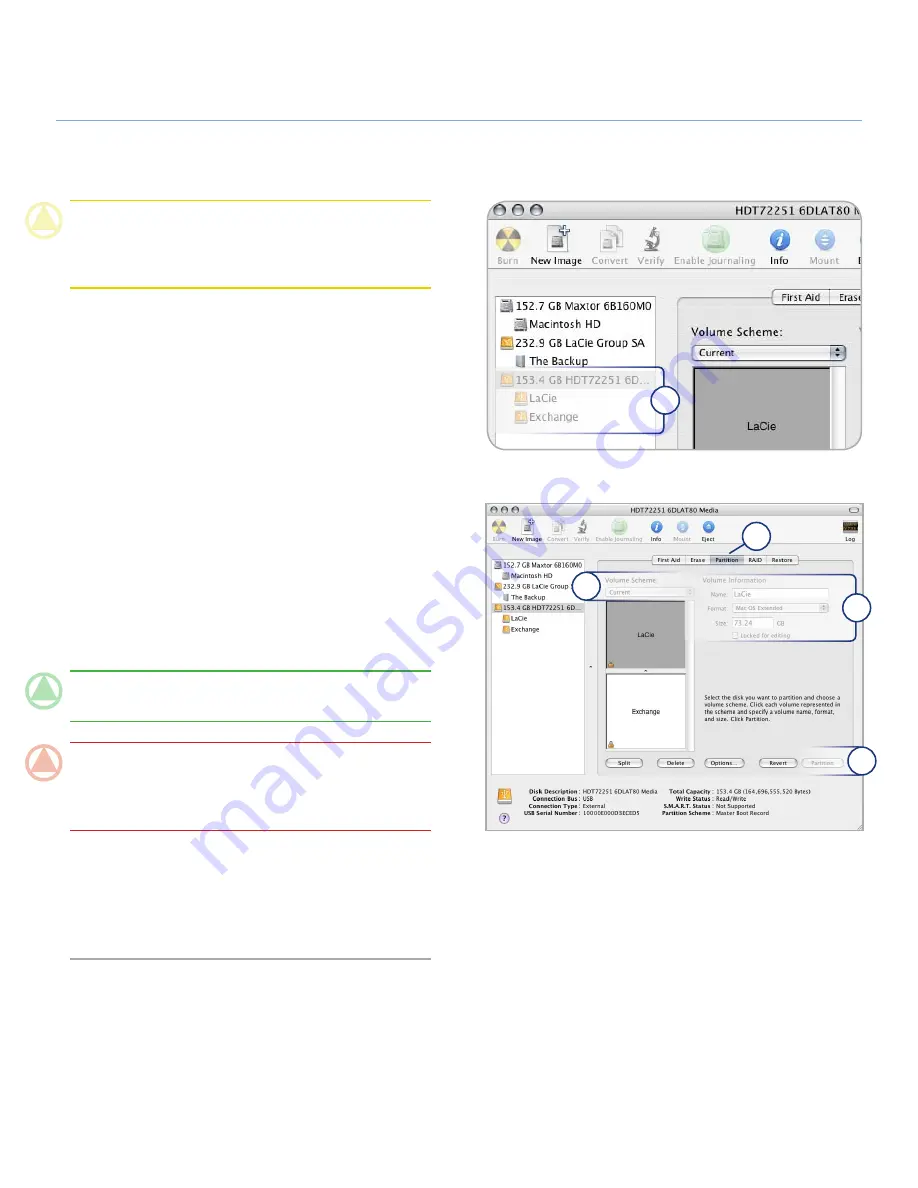
3. In the disk list on the left side of the Disk Utility window, find
the disk corresponding to your LaCie Rugged XL. For each
disk there is a listing for the drive controller and one for each
volume on the disk. Select the listing for the controller (ex.
“153.4 GB HDT72251…” in Fig. 3.3-A).
4. Select the
Partition
tab.
5. From the
Volume Scheme
menu, choose the number of
partitions you want to divide the drive into (16 maximum).
You can adjust the size of each partition using the slide bar
between the partitions in the
Volume Scheme
area.
6. In the
Volume Information
section, enter a name for each
volume (partition) and choose the volume format (Mac OS
Extended, Mac OS Standard, UNIX File System, or MS-DOS).
TECHNICAL NOTE:
To share a volume with Windows users,
select MS-DOS (FAT32) format.
IMPORTANT INFO:
Apple recommends that unless you
have a specific reason to use the UNIX File System (UFS), you
should use the Mac OS Extended format because it provides a
more familiar experience to Macintosh users.
7. Click
Partition
. Click
Partition
again to close the alert mes-
sage and continue.
8. Mac Disk Utility will format and partition the disk according
to your settings, and your drive will be ready to use.
Figure 3.3-A
Figure 3.3-B
3
4
7
5
6


