background image

LaCie d2 Network 

Administering Your LaCie d2 Network

User Manual 

page 39

4.5.4.  Disks

Attached external hard drives and their partitions appears as shares 
on  the  Browse  page.  See  section 

3.1.  Accessing  Shared  Folders

Attaching  external  disks  expands  the  available  storage  capacity 
through the network.

TECHNICAL NOTE:

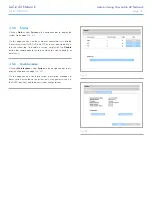
 When shares are created from partitioned ex-

ternal  hard  drive  volumes,  they  are  initially  named  with  a  series  of 
numbers and letters (a, 

Fig. 57

). You can rename the shares on the 

Shares page.  The name of external drives will remain on the Shares 
page even when the disk is not connected.

Once the drive is recognized, users can be assigned access just like 
other shares (by default, users will have read/write access). See sec-
tion 

4.2. Users

.

Formatting External Disks

In order to use an external drive to back up the d2 Network, it must 
be formatted in FAT32 (4GB file size limitation), FAT (2GB file size 
limitation),  HFS+,  EXT3,  EXT2,  REISERFS  or  XFS.    NTFS  volumes 
cannot be used to back up the d2 Network because this file system 
format is read-only when connected to the d2 Network.

It is possible to format external volumes into the XFS file system using 
the d2 Network Web Administration pages.  To format disks in XFS 
from the Web Administration pages, click System > External disks 
and click the 

Format disk

 button (b, 

Fig. 57

). The disk will subse-

quently become available for backups.  See 

4.7. Backup

 for details.

IMPORTANT INFO:

 After reformatting a disk, you may have to 

reboot the d2 Network and/or the USB hard drive in order for it to 
be recognized by the system.

continued on the next page

Fig. 57 

Summary of Contents for 301414U - d2 Network NAS Server

Page 1: ...cess to Shares 21 3 3 Administration Page Browse 22 3 3 1 Uploading Files 22 3 3 2 Downloading Files 23 3 3 3 Deleting Files 23 3 3 4 Logging Out 23 3 4 Connecting an External Hard Disk 24 4 Administe...

Page 2: ...4 5 7 System Log 44 4 5 8 Wake on LAN WOL 45 4 6 Download 46 4 7 Backup 47 4 8 Browse 48 4 9 Import Snapshot 48 4 10 Multimedia 49 5 LED Indicators 50 6 Email Notification Triggers 51 7 Troubleshooti...

Page 3: ...uency energy and if not installed and used in accordance with the instructions may cause harmful interfer ence to radio communications However there is no guarantee that interference will not occur in...

Page 4: ...placing your device in an environment that is too cold or humid may damage the unit Always unplug the device from the electrical outlet if there is a risk of lightning or if it will be unused for an e...

Page 5: ...arge glowing blue button adds more than character it functions as a 1 click data sharing button for automatic file transfers from a USB or eSATA hard drive Just push the button your data is automatica...

Page 6: ...le 3 Power supply 4 Utilities CD ROM 5 Quick Install Guide IMPORTANT INFO Please save your packaging In the event that the d2 Network should need to be repaired or serviced it must be returned in its...

Page 7: ...r Firefox 1 2 2 Mac Users Mac OS X 10 2 500 MHz G4 or higher G5 Intel Core Duo or Intel Core 2 Duo 512MB RAM or greater Ethernet switch or hub 10 100 or better Web browser Internet Explorer Safari Fir...

Page 8: ...xternal casing to be hot to the touch Vertical Horizontal Rackmount Heat dissipation is maximized when the drive is in the vertical posi tion If you have several LaCie drives stacked on each other ple...

Page 9: ...etwork allows you automati cally back up an attached external hard drive onto the d2 Network Simply plug the hard disk into a USB or eSATA port on the back of the d2 Network and push the button All da...

Page 10: ...Ethernet Cable Gigabit Ethernet Cables And Connectors The cables and connectors used to attach Gigabit Ethernet devices are as follows Fig 03 Ethernet Cable Ends TECHNICAL NOTE LaCie recommends Cat 5E...

Page 11: ...ge 11 Follow these steps to power on the LaCie d2 Network and to log on to the administration pages Step 1 2 1 Turning On the d2 Network Step 2 2 2 Connecting the Ethernet Cable Step 3 2 3 Connecting...

Page 12: ...the AC adapter supplied with your specific La Cie device Do not use a power supply from another LaCie device or another manufacturer Using any other power cable or power supply may cause damage to th...

Page 13: ...to your computer Fig 05 1 Turn the drive on See 2 1 Turning On the d2 Network 2 Connect the Ethernet cable to the Ethernet port on the back of the LaCie d2 Network 3 Connect the other end of the Ether...

Page 14: ...an info bubble containing the name of the device will appear When Network Assistant finds your LaCie d2 Network you can con nect to any of the shares on the d2 Network log in to the Admin istration Pa...

Page 15: ...admin NOTE This password can be changed from the Administration Page refer to 4 2 Users 5 Click Log on Continue to section 4 Administering Your LaCie d2 Network Mac Users 1 Double click LaCie Network...

Page 16: ...nt for information on installing the network configuration software 1 Start LaCie Network Assistant see section 2 3 Connecting Us ing LaCie Network Assistant 2 Windows Users Click on the LaCie Network...

Page 17: ...has been assigned a letter in My Computer 1 Right click the LNA icon in the task bar and select Network Configuration 2 Select the Volumes tab 3 Right click a volume and select Unmount Alternately if...

Page 18: ...u quickly connect to the shared folder s on your LaCie d2 Network To access shared folders all users 1 Run the LaCie Network Assistant LNA Click on the LNA icon in the system tray Windows users Fig 15...

Page 19: ...ssistant section 2 3 Connecting Using LaCie Network Assistant For FTP access type ftp LaCie d2 or ftp IP address In the logon window that opens type Login admin Password admin This user name and passw...

Page 20: ...twork Browser Chooser or Con nect to Server In Chooser click the Appleshare icon Your server should appear in the list with the default name LaCie d2 Select it and press OK Linux Users Under KDE open...

Page 21: ...d the user name and pass word will have access FTP access also provides you a way to access your files remotely In order to make your d2 Network accessible via the internet config ure your router to a...

Page 22: ...n them access All shares are listed on the left side of the page a Fig 19 To see the files in a share click on the share name b Fig 20 Administrators to return to d2 Network administration click the A...

Page 23: ...load File saves to the default downloads direc tory 4 FireFox and Safari File downloads to the default downloads directory 3 3 3 Deleting Files To delete a file from a share 1 Click on the share folde...

Page 24: ...rive must be formatted in one of the file formats listed above with the exception of NTFS NTFS volumes cannot be used to back up the d2 Network because this file system format is read only when connec...

Page 25: ...nt of folder access privileges Section 4 3 Groups Add delete or edit groups add users to groups assign group access privileges Section 4 4 Shares Create delete or edit shares change ac cess restrictio...

Page 26: ...e d2 Fig 27 or http IP address Fig 28 Find the IP address by running the LaCie Network Assistant section 2 3 Connecting Using LaCie Network Assistant TECHNICAL NOTE The IP address of your LaCie d2 Net...

Page 27: ...an proceed from the beginning in your own language English Fran ais Deutsch Italiano Espa ol Dutch Svenska Dansk Japanese 4 1 2 Administration Home Page When you log into LaCie d2 Network administrati...

Page 28: ...disk failure see chart in section 6 Email Notification Triggers TECHNICAL NOTE The d2 Network has an integrated SMTP server that sends emails through port 25 This service is thus disabled if port 25 i...

Page 29: ...d last name in the First name and Last name fields This information only appears to the administrator as part of the User Profile on this page 4 Check Password to require the user to log in with a pas...

Page 30: ...hares tab on the user s User Profile page 2 Select Read Write Read Only or No Access for each share Fig 36 No Access is selected by default 4 2 3 Setting Group Membership All of the groups on your d2...

Page 31: ...er U belongs to groups G1 and G2 and has access to share S If G1 has read only access to S and G2 has read write access to S then U will have read write access to S If U has read only access to S and...

Page 32: ...iate access to shares You can specify which shares groups can access which users belong to which groups and enable or disable entire groups 4 3 1 Adding Groups To add a group 1 Click Add on the Groups...

Page 33: ...rivileges for more information To set group access to shares Fig 43 1 Click the Shares tab on the group s Group Profile page a 2 Select Read Write Read Only or No Access for each share b No Access is...

Page 34: ...elect Enabled from the Status menu to make the share acces sible Select Disabled to create the share but make it inacces sible b 4 To make the share accessible in read write mode to anyone unclick the...

Page 35: ...share could take just a few seconds to several minutes depending on the size of the share CAUTION Deleting a share deletes all files contained within the share folder Back up any data you want to save...

Page 36: ...ting user accounts Integrating the d2 Network with your Active Directory allows the d2 Network to streamline the creation of users groups and access privileges To connect click on System Join Domain E...

Page 37: ...contain the fol lowing characters a z A Z 0 9 and must begin with a letter To change the Windows workgroup highlight the workgroup name delete it and enter a new name Click Apply b Fig 52 Click the E...

Page 38: ...tings for your LaCie d2 Network Please check with your network administrator for more information about your network and which parameters you should use For more information see section 2 4 Configurin...

Page 39: ...will have read write access See sec tion 4 2 Users Formatting External Disks In order to use an external drive to back up the d2 Network it must be formatted in FAT32 4GB file size limitation FAT 2GB...

Page 40: ...on and Stamford b are volumes of an external drive that is currently connected as indicated by the blue Status indicators IMPORTANT INFO External hard disks must be formatted in one of the supported s...

Page 41: ...and view download or de lete the system log To disable a service simply click the Disable button that corresponds to the service which you wish to disable or deselect it 4 5 6 Maintenance Click on Mai...

Page 42: ...ternet Explorer users The XML defining the configuration will open in the browser window To save the configuration select File Save as In the Save as type menu in the Save As dialog select XML Files x...

Page 43: ...b in Maintenance a Fig 65 3 Click New Update b Fig 65 4 Click Browse and select an update file from your computer 5 Click Apply During the system update you will not have access to the device and user...

Page 44: ...s option is available ONLY if the power switch is set to the AUTO position IMPORTANT INFO Any data transfers underway during a shut down will be interrupted and data may be lost Make sure no users are...

Page 45: ...etwork LAN For WOL to work the power switch must be in the AUTO position This function is accessed using the LaCie Network Assistant software Follow these steps to activate WOL 1 Click the LNA icon in...

Page 46: ...rent file using your PC Mac and importing it into a torrent client in this case the d2 Network Access the Download menu by clicking the Download tab in the left navigation menu Enabling and Initiating...

Page 47: ...FS disks are read only and FAT FAT32 disks have file size limits 2GB and 4GB respectively due to their file system limitations To back up files 1 Connect an external USB or eSATA hard disk see section...

Page 48: ...t future backups will only copy new or modified files TECHNICAL NOTE Backed up data is neither compressed nor en crypted and can be accessed from other computers or NAS network attached storage 4 8 Br...

Page 49: ...pliant digital media appliances Such appliances include Playstation 3 Xbox360 many LCD TV and stereos or Digital Media Adapters DMA To activate the UPnP and DLNA protocols follow these steps 1 Navigat...

Page 50: ...e fully initialized Long blue 2 5s short pause 0 25s Backup import operation in progress will cease once operation has concluded Blinking red 0 3s 0 3s for 3 seconds total During a backup operation th...

Page 51: ...fication Triggers Download Machine Temperature Snapshot 1 Download completed 1 High temperature 1 Error creating share 2 Critical temperature 2 No external devices detected 3 No temperature sensed 3 E...

Page 52: ...ble www lacie com Problem Question to Ask Solution The system is not recognized by the computer Does your computer s configuration meet the minimum system require ments Check section 1 2 Minimum Syste...

Page 53: ...red Folders Is your network DHCP enabled If your network is DHCP enabled please refer to sections 2 3 Connect ing Using LaCie Network Assistant If your network is not DHCP enabled you will need to man...

Page 54: ...d2 Network serial number Located on a sticker at the back of drive or on the original packaging LaCie d2 Network file format Mac users Select the hard drive icon and press Command I or press the Contr...

Page 55: ...ie com fr contact LaCie Germany Contact us at http www lacie com de contact LaCie Italy Contact us at http www lacie com it contact LaCie Japan Contact us at http www lacie com jp contact LaCie Nether...

Page 56: ...for any loss of data during the use of this device or for any of the problems caused as a result LaCie will not under any circumstances be liable for direct special or consequential damages such as bu...

Reviews: