• Linux kernel 2.6.28 or newer.
• GNU C Compiler
• libusb-1.0 library and development files (header files)
Installation
To install the driver from source code, first unzip the contents of the Exodriver source code. Then run the following commands in a
terminal (replace <Exodriver-Source-Directory> with the directory you unzipped the Exodriver source code to):
cd <Exodriver-Source-Directory>
sudo ./install.sh
Follow the install script’s instructions to install the driver.
For more Exodriver installation information go to the Exodriver page at labjack.com/support/linux-and-mac-os-x-drivers. The
source code download’s README, INSTALL.Linux and INSTALL.MacOSX also provides more information. If you run into
problems, first take a look at the comments section of the Exodriver page as the issue may have been helped with previously.
After installation, to test your U3 connect it to your computer with a USB cable. The USB cable provides data and power. Build and
run one of the examples from the source code download. Alternatively, install LabJackPython (at
labjack.com/support/labjackpython) and run one of its examples.
1.1 - Control Panel Application (LJControlPanel)
The application LJControlPanel is included with the installation package below
LabJack Windows Driver and Software Installation Package
Name: LabJack-2014-10-14.exe
Size: 49.99 MB
Upload date: 2014-10-14 12:45
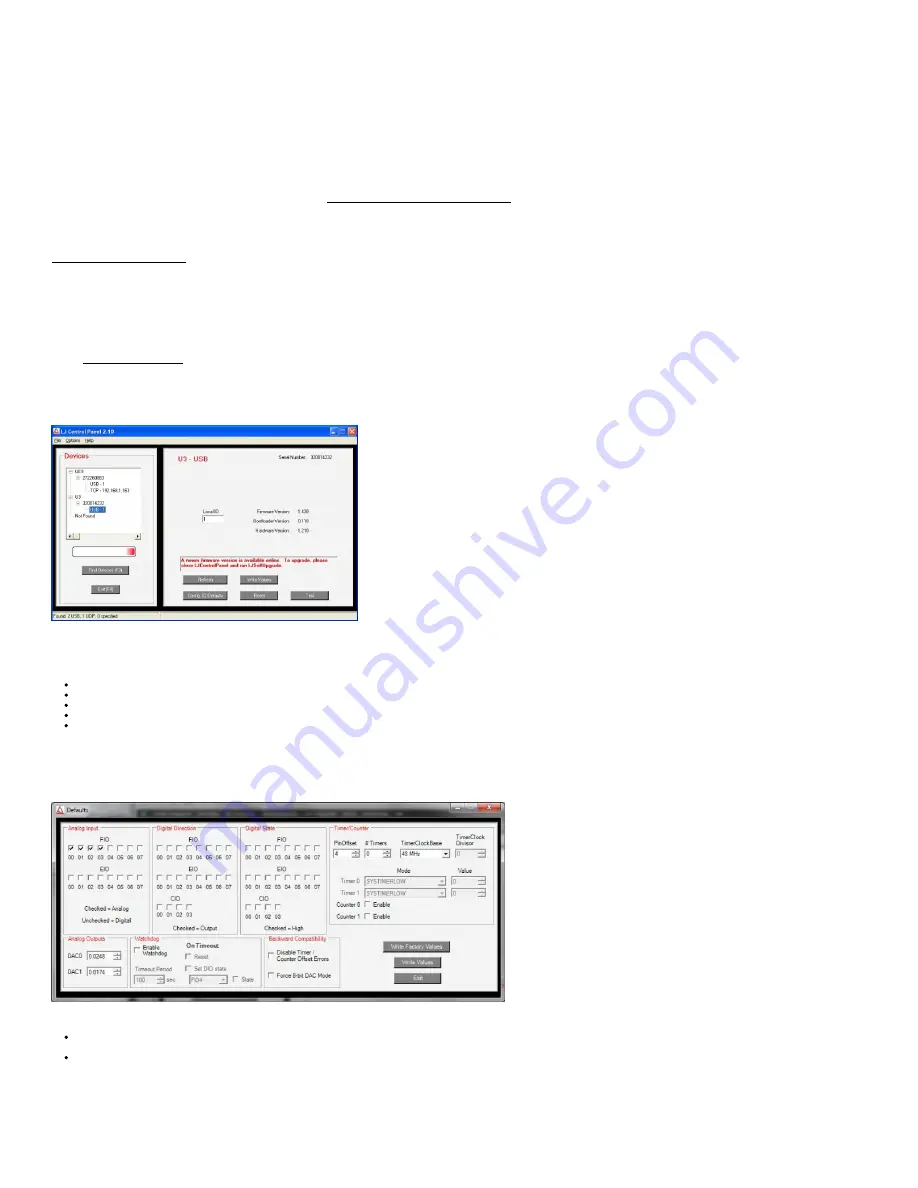
The LabJack Control Panel application (LJCP) handles configuration and testing of the UD series hardware. Click on the “Find
Devices” button to search for connected devices.
Figure 1-1. LJControlPanel Main Window
Figure 1-1 shows the results from a typical search. The application found two devices. The USB connection for a U3 has been
selected in Figure 1-1, bringing up the configuration window on the right side.
Refresh: Reload the window using values read from the device.
Write Values: Write the Local ID from the window to the device.
Config Defaults: Opens the window shown in Figure 1-2.
Reset: Click to reset the selected device.
Test: Opens the window shown in Figure 1-3.
Config Defaults:
This option provides control over the condition of the device at power-up or reset. Figure 1-2 shows a U3-HV with the factory
default power-up configuration, which means AIN0-AIN3 set to analog input, FIO4 to CIO3 set to digital input, analog outputs set to
minimum voltage (near 0), and timers/counters/watchdog disabled.
Figure 1-2. LJControlPanel U3 Configure Defaults Window
Write Factory Values: Clicking this will set everything back to the factory defaults and write those factory defaults to
nonvolatile memory.
Write Values: Change any desired settings, and then click this to write the new settings to nonvolatile memory.
Test Panel:
Figure 1-3 shows the test window for a U3 device. This window continuously (once per second) writes to and reads from the
selected LabJack.
3


