8-21
Setup and Registration (System Menu) > System Menu
Printing Jobs
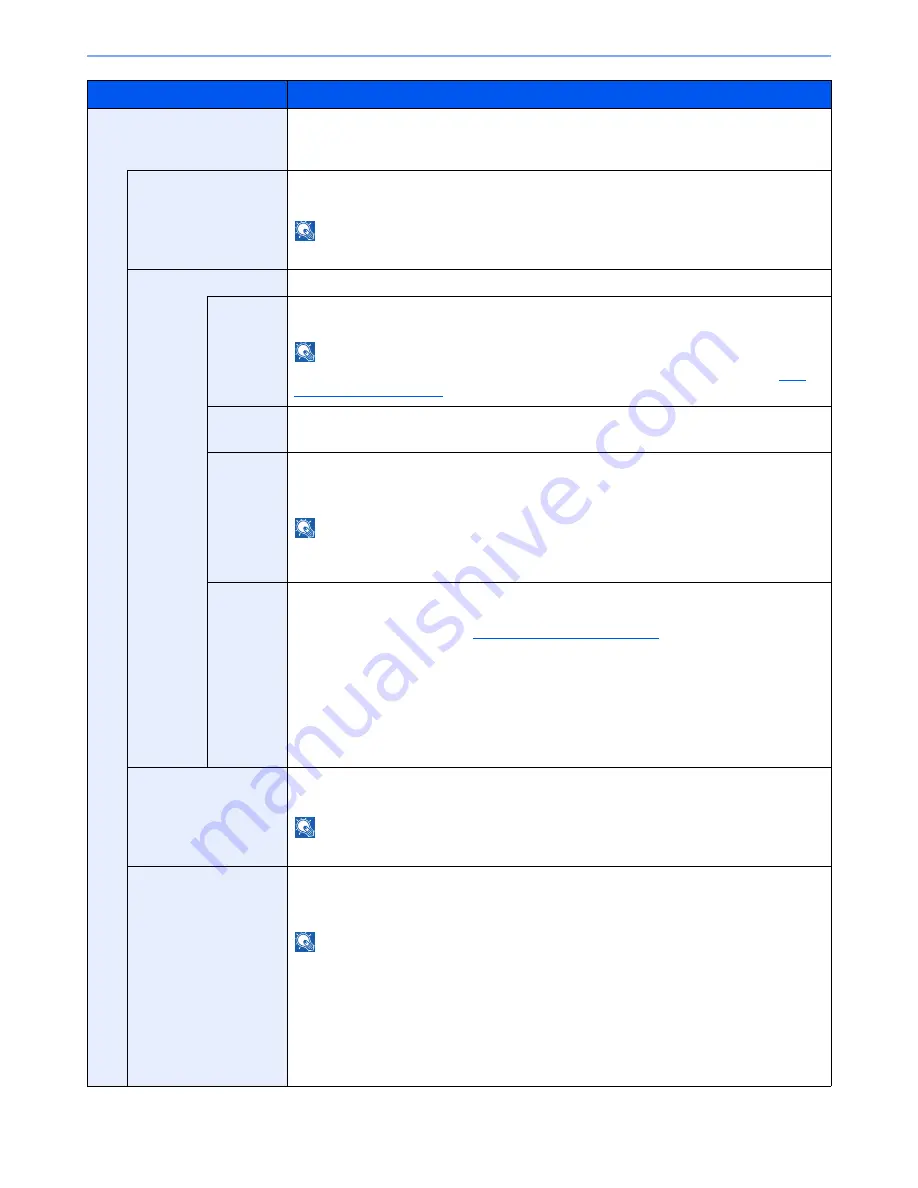
Configure settings for stamps when a document is printed.
After configuring the setting, return to the Copying Functions or Custom Box (Printing a
Document) screen from System Menu, and press the [
Reset
] key.
Text Stamp
Select whether to print a text stamp on all printing jobs.
Value
: Off, On
NOTE
When [On] is selected, the Text Stamp settings cannot be changed when printing.
Edit Text Stamp
Set the default text stamp.
Stamp
Select a text string to be stamped from templates, or press [Stamp] and enter a maximum of
32 characters for the text string.
NOTE
Templates that have been set will appear. For details on registering templates, refer to
Text
(Text Stamp) on page 8-20
.
Stamp
Method
Select the stamp method for the text stamp.
Value
: Each Print Page, Each Original Page
Position
Set the text stamp position.
Value
: Top Left, Top Middle, Top Right, Middle Left, Center, Middle Right, Bottom Left,
Bottom Middle, Bottom Right, Detail
NOTE
Press [Detail] to set the stamp position using numeric values, and to set the stamp position and
angle when a stamp is placed on the back side of the paper in duplex printing.
Font
Set the font of the text stamp.
Value
Size: Font sizes registered in
Font (Text Stamp) on page 8-20
are displayed.
Character Border: Off, Circle, Rectangle, Underline
Style: None, Bold, Italic, Bold/Italic
Font: Courier, Letter Gothic
Color: Black, White
Density: 10 to 100% (in 10% increments)
Display Pattern: Transparent, Clipping, Overwrite
Bates Stamp
Select whether to print a bates stamp on all printing jobs.
Value
: Off, On
NOTE
When [On] is selected, the Bates Stamp settings cannot be changed when printing.
Edit Bates Stamp
Set the default Bates Stamp.
Value
: Date, User Name, Serial Number, Numbering, Text 1, Text 2, Date Format,
Numbering Default, Position, Font
NOTE
To set [Text 1] or [Text 2], press [Change] below and enter a maximum of 32 characters for the
text string.
To set [Date], press [Date Format] and set the date display format.
To set [Numbering], press [Numbering Default] and set the starting sequence number
(1 to 9999999).
Press [Detail] in "Position" to set the stamp position using numeric values, and to set the stamp
position to be placed on the back side of the paper in duplex printing.
Item
Description
Summary of Contents for TASKalfa 6501i
Page 1: ...OPERATION GUIDE 6501i 8001i ...
Page 22: ...xxi Banner Tray Option 11 28 Glossary 11 29 Index Index 1 ...
Page 42: ...xli Menu Map ...
Page 60: ...1 18 Legal and Safety Information Notice ...
Page 108: ...2 48 Installing and Setting up the Machine Transferring data from our other products ...
Page 180: ...4 18 Printing from PC Printing Data Saved on the Printer ...
Page 440: ...9 42 User Authentication and Accounting User Login Job Accounting Unknown ID Job ...
Page 447: ...10 7 Troubleshooting Regular Maintenance 3 4 5 6 CLICK ...
Page 480: ...10 40 Troubleshooting Troubleshooting Cassettes 3 and 4 1 2 3 4 2 1 B1 B2 ...
Page 481: ...10 41 Troubleshooting Troubleshooting Multi Purpose Tray 1 2 3 4 ...
Page 483: ...10 43 Troubleshooting Troubleshooting Duplex unit 1 2 ...
Page 484: ...10 44 Troubleshooting Troubleshooting Duplex Unit and Cassette 1 1 2 3 CLICK ...
Page 486: ...10 46 Troubleshooting Troubleshooting Fixing unit 1 2 A1 ...
Page 488: ...10 48 Troubleshooting Troubleshooting Right tray 1 2 3 A1 ...
Page 489: ...10 49 Troubleshooting Troubleshooting Bridge Unit 1 2 ...
Page 492: ...10 52 Troubleshooting Troubleshooting Tray B 1 2 3 Tray C 1 D2 D3 ...
Page 493: ...10 53 Troubleshooting Troubleshooting Conveyor 1 2 Mailbox Option 1 D2 D3 1 2 ...
Page 496: ...10 56 Troubleshooting Troubleshooting 5 Cassette 5 Option Side Feeder 3 000 sheet 1 2 2 1 ...
Page 502: ...10 62 Troubleshooting Troubleshooting Staple cartridge holder B C 1 2 3 4 2 1 CLICK ...
Page 544: ...Index 10 Index ...
Page 545: ......
Page 548: ...First edition 2013 7 2N7KDEN100 ...


