3-53
Preparation before Use > Registering Destinations in the Address Book
Adding a Destination on One Touch Key (One Touch Key)
Assign a new destination (contact or group) to an one touch key. A maximum of 1,000 destinations can be registered.
1
Display the screen.
1
Press the [
System Menu
] key.
2
Press in the following sequence: [
], [Edit Destination], and then [Add/Edit] in "One Touch Key".
2
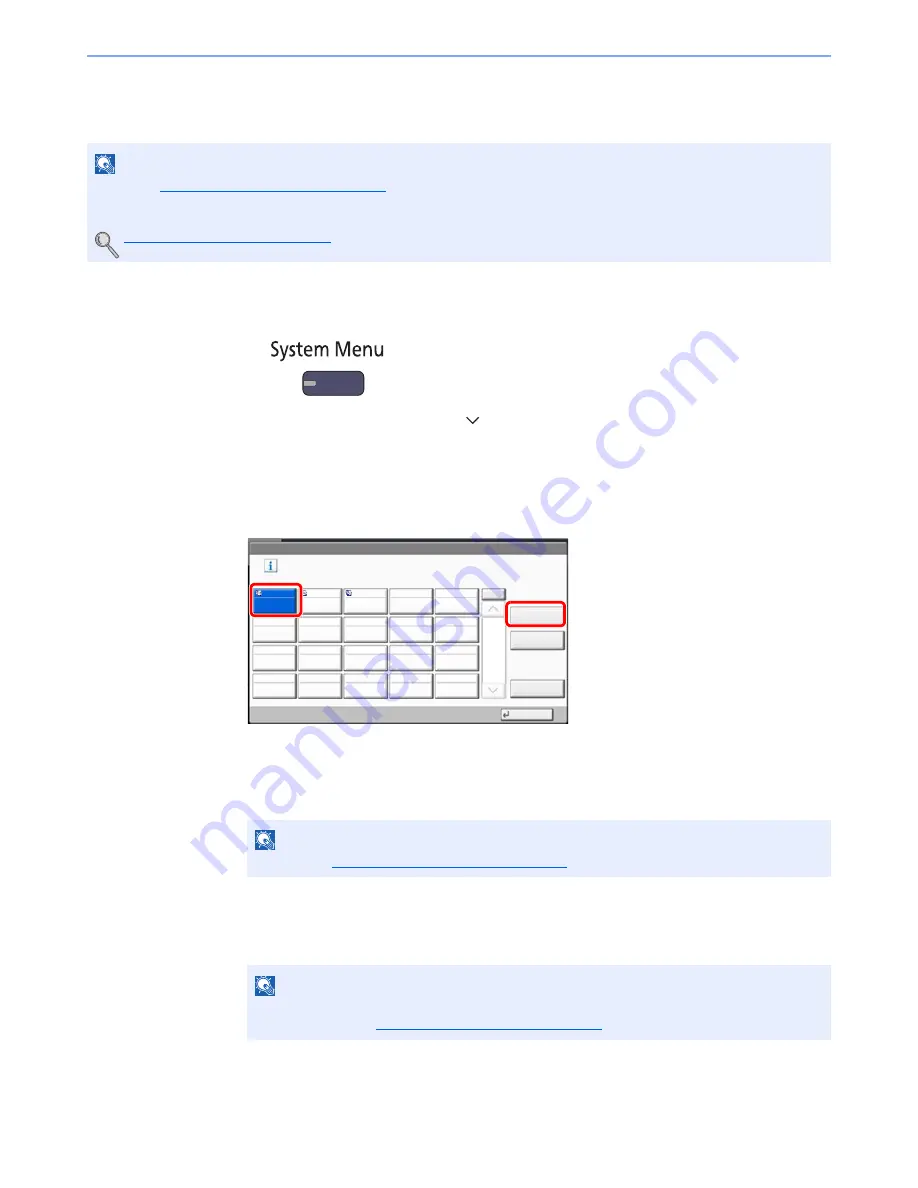
Add One Touch Keys.
1
Select a One Touch Key number (0001 to 1000) for the destination, and press [Add/Edit].
Pressing [
Quick No. Search
] key or [No.] enables direct entry of a One Touch Key number.
Select a One Touch Key with no registered destination.
2
Press [Change] of "Display Name".
3
Enter the One Touch Key name (up to 24 characters) displayed in the send base screen,
and press [OK].
4
Press [Change] of "Destination". The address book appears.
5
Select a destination (contact or group) to add to the One Touch Key number, and press [OK].
Pressing [Detail] shows the detailed information of the selected destination.
6
Press [Save].
The destination will be added to the One Touch Key.
NOTE
• Refer to
Specifying Destination on page 5-26
for use of One Touch Key.
• You can add One Touch keys and change their settings on Command Center RX.
Registering Destinations (page 2-42)
NOTE
Refer to the
Character Entry Method on page 11-9
for details on entering characters.
NOTE
Destinations can be sorted or searched by destination name or address number.
For details, refer to
Specifying Destination on page 5-26
.
Edit Destination - One Touch Key
Add a One Touch key.
Add/Edit
No.
Delete
Detail
1/50
Close
0001
0002
0003
0004
0005
0006
0007
0008
0009
0010
0011
0012
0013
0014
0015
0016
0017
0018
0019
0020
AAA
BBB
CCC
2
1
Summary of Contents for TASKalfa 6501i
Page 1: ...OPERATION GUIDE 6501i 8001i ...
Page 22: ...xxi Banner Tray Option 11 28 Glossary 11 29 Index Index 1 ...
Page 42: ...xli Menu Map ...
Page 60: ...1 18 Legal and Safety Information Notice ...
Page 108: ...2 48 Installing and Setting up the Machine Transferring data from our other products ...
Page 180: ...4 18 Printing from PC Printing Data Saved on the Printer ...
Page 440: ...9 42 User Authentication and Accounting User Login Job Accounting Unknown ID Job ...
Page 447: ...10 7 Troubleshooting Regular Maintenance 3 4 5 6 CLICK ...
Page 480: ...10 40 Troubleshooting Troubleshooting Cassettes 3 and 4 1 2 3 4 2 1 B1 B2 ...
Page 481: ...10 41 Troubleshooting Troubleshooting Multi Purpose Tray 1 2 3 4 ...
Page 483: ...10 43 Troubleshooting Troubleshooting Duplex unit 1 2 ...
Page 484: ...10 44 Troubleshooting Troubleshooting Duplex Unit and Cassette 1 1 2 3 CLICK ...
Page 486: ...10 46 Troubleshooting Troubleshooting Fixing unit 1 2 A1 ...
Page 488: ...10 48 Troubleshooting Troubleshooting Right tray 1 2 3 A1 ...
Page 489: ...10 49 Troubleshooting Troubleshooting Bridge Unit 1 2 ...
Page 492: ...10 52 Troubleshooting Troubleshooting Tray B 1 2 3 Tray C 1 D2 D3 ...
Page 493: ...10 53 Troubleshooting Troubleshooting Conveyor 1 2 Mailbox Option 1 D2 D3 1 2 ...
Page 496: ...10 56 Troubleshooting Troubleshooting 5 Cassette 5 Option Side Feeder 3 000 sheet 1 2 2 1 ...
Page 502: ...10 62 Troubleshooting Troubleshooting Staple cartridge holder B C 1 2 3 4 2 1 CLICK ...
Page 544: ...Index 10 Index ...
Page 545: ......
Page 548: ...First edition 2013 7 2N7KDEN100 ...


