1.4. Setting Up and Interfacing
1-18
11—Print a Status Page
Test that the printer works by printing out a status page as follows.
1.
Switch on the printer’s power. The message display should indicate
ý6HOIýWHVW
.
☛
When the printer is first switched on after the toner container is installed, there will
be a delay of several minutes (approx. 10 minutes) before the printer will be ready to
print. During this period, the toner indicator
will flash and the message display will
show
ý3OHDVHýZDLW
.
2.
Wait until the ON LINE indicator is also lit and the message display indicates
ý5HDG\
.
3.
Press the
STATUS
key. The printer should print a page listing the positions of margins,
memory allocation, and other information.
A sample status printout is shown in
Chapter 2
in this manual.
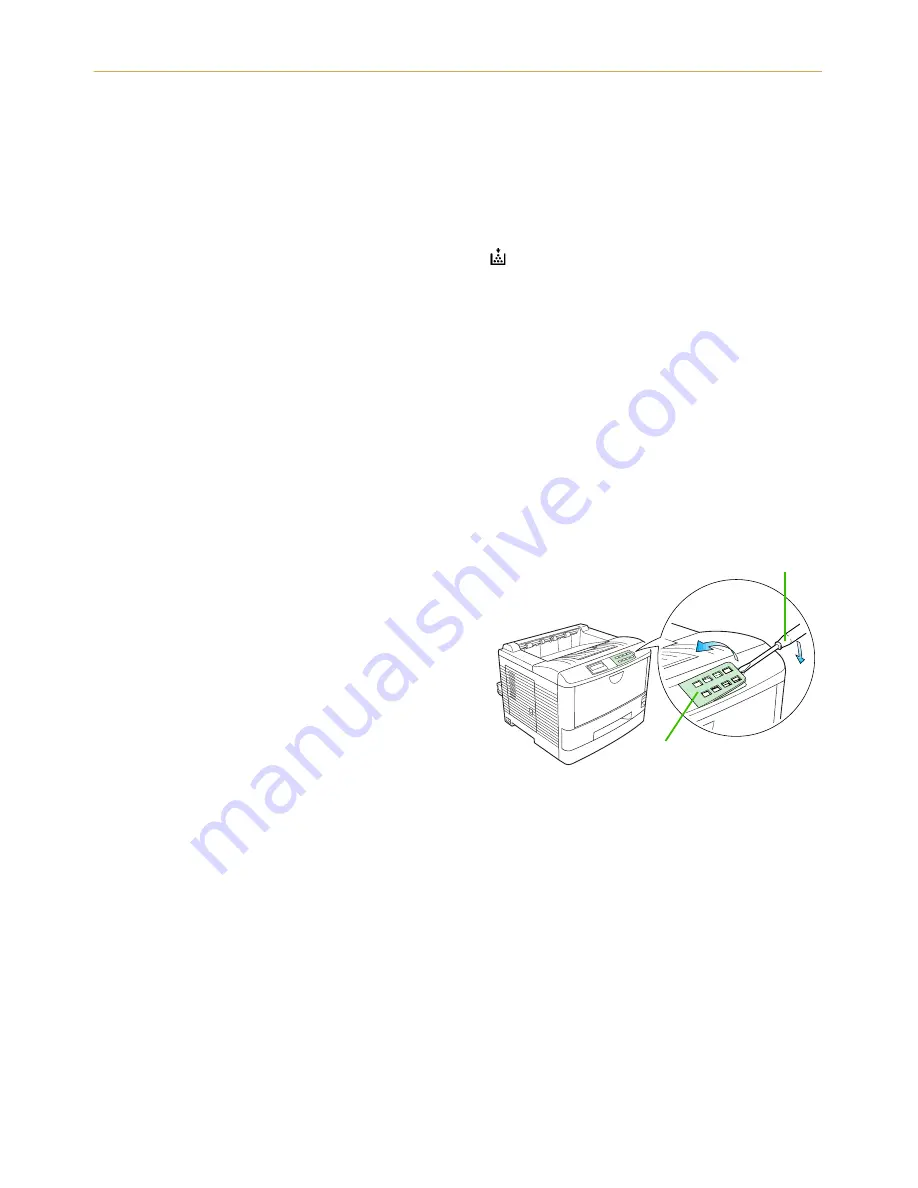
12—Replacing the Control Panel
The English panel attached to the printer’s control panel can be replaced by other language
panels (local panels). When necessary, replace the panel as follows. (In some areas, local
panels are not provided.)
1.
Remove the panel with a device such as a
screwdriver as shown in the figure.
2.
Set the local panel in place and attach by
pressing lightly with your hand.
13—Set the Emulation Mode
The printer emulates the operation of five other printers. It is factory-set to emulate the
PCL 6 at power-up. If you primarily use software that supports PCL 6, or that supports the
Kyocera printer itself, the factory setting is the one you want. If you primarily use software
that supports another printer, it is convenient to change the printer’s power-up emulation
mode.
The emulation mode can be changed from the printer control panel. To change the emula-
tion mode, refer to the
Mode Select Menu
diagram on the last page of this manual.
Panel
Screwdriver


