background image

10-23E

Repair manual  KTM 250-610 Racing

Art.-Nr

.  3.206.023-E

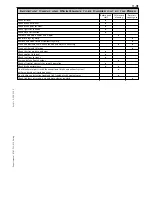
BASIC CARBURATOR SETTING

450 SMR

525 SMR

540 SXS

610 CRATE

Type

Keihin FCR-MX 4122A Keihin FCR-MX 4125A Keihin FCR-MX 4122A Keihin FCR-MX 4122A

Main jet

185

185

185

190

Jet needle

OBDTP

OBDTP

OBDTP

OBDTP

Idling jet

40

42

42

45

Main air jet

200

200

200

200

Idling air jet

100

100

100

100

Needle position

4

th 

from top

4

th 

from top

4

th 

from top

4

th 

from top

Starting jet

85

85

85

85

Mixture control screw open

1,0

1,5

1,0

1,5

Slide

15

15

15

15

Performance restrictor

Stop pump membrane

858 / 2,15 mm

858 / 2,15 mm

858 / 2,15 mm

858 / 2,15 mm

Hot start device

2,2 mm

2,5 mm

2,2 mm

2,2 mm

Summary of Contents for 250 EXC

Page 1: ...NUALE O USO MANUEL D UTILISATION MANUAL DE INSTRUCCIONES REPARATURANLEITUNG REPAIR MANUAL MANUALE DI REPARAZIONE MANUEL DE REPARATION MANUAL DE REPARACION FEDERBEIN SHOCK ABSORBER AMMORTIZZATORE AMMORTISSEUR AMORTIGUADOR GABEL FORK FORCELLA FOURCHE HORQUILLA ...

Page 2: ...OWNER S MANUAL MANUALE D USO MANUEL D UTILISATION MANUAL DE INSTRUCCIONES ART NR 3 211 39 250 EXC RACING 400 EXC RACING 450 SX MXC EXC RACING 525 SX MXC EXC RACING OWNER S MANUAL 2005 ...

Page 3: ...er Maintenance work on the chas sis and engine must be performed If maintenance work should become necessary during a competition it should be performed by a trained mechanic KTM strongly recommends that all service work to your KTM should be performed by a qualified KTM dealer For your own safety use KTM approved parts and accessories only KTM is not liable for damage that arises in connection wi...

Page 4: ...amage or consequential damage caused by manipulations or conversions to the motorcycle The use of the motorcycle under extreme conditions e g on extremely muddy and wet terrain can lead to higher than average wear on components such as the drive train or the brakes In this case it may become necessary to service or replace wear parts before the service limit specified in the maintenance schedule h...

Page 5: ...nt fork 28 Cleaning the dust sleeves of the telescopic fork 28 Checking and adjusting the steering head bearing 28 Changing the fork offset caster SX 29 Checking and adjusting the steering head bearing 30 Check chain tension 31 Correct chain tension 31 Chain maintenance 32 Chain wear 32 General information about KTM disc brakes 33 Adjusting the free travel at the hand brake lever 34 Checking the b...

Page 6: ...ber is stamped on the right side of the steering head tube Enter this number in the field on page no 1 Engine number engine type The engine number and the engine type are stamped into the left side of the engine below the engine sprocket Enter this number on page 1 ...

Page 7: ...ay it cause valve motion to be recognized by the stronger resistance which the hand decompression lever encounters Hand brake lever The hand brake lever 3 is mounted on the handlebars on the right and actuates the front wheel brake The adjusting screw B can be used to change the basic position of the hand brake lever see Maintenance Short circuit button SX MXC The short circuit button 4 turns off ...

Page 8: ...starter button 2 will actuate the E starter Emergency OFF switch EXC Australia The red emergency OFF switch 3 is arranged adjacent to the throttle grip In this position the E starter is operational and the engine can be started In this position the E starter and ignition circuits are interrupted The E starter cannot be actuated and the engine will not start not even if you attempt to start it with...

Page 9: ...d SPEED ODO display modes are activated in the condition at delivery SPEED H is displayed whenever the display is activated and the front wheel is not turning It automatically changes to the SPEED ODO display mode as soon as the front wheel starts turning SPEED displays the speed H displays the engine s service hours The service hour counter starts to count as soon as you start the engine The disp...

Page 10: ...e hold button 3 secs set the clock menu To set the clock see Setting the clock Activating and deactivating display modes In the display mode SPEED H press and hold the button for 3 seconds to access the SETUP menu The active functions will be displayed The blink ing function can be activated by pressing the button and deactivated by pressing the button Press and hold the button 3 seconds to store ...

Page 11: ...these figures is acti vated by the first impulse received from the wheel sensor when the front wheel starts to turn and stops 3 seconds after the last impulse is received when the front wheel has stopped The TR1 A1 and S1 figures are automatically cleared after passing 999 9 button no function button no function briefly press button changes to the next display mode hold button 3 secs clears the TR...

Page 12: ...2 figures The displayed figure can deviate from the actual average speed if the TR2 figure was changed manually or if S2 was not stopped after the trip button no function button no function briefly press button changes to the next display mode hold button 3 secs changes to the next display mode SPEED S1 display mode stop watch 1 S1 shows the traveling time based on TR1 and continues to run wheneve...

Page 13: ... speedometer functions from the handlebar Motorcycle is standing Motorcycle is driving OVERVIEW OF THE ELECTRONIC SPEEDOMETER FUNCTIONS display briefly press button briefly press button briefly press button hold button 3 secs X SPEED H no function no function next display mode displays the SETUP menu X X SPEED CLK no function no function next display mode Setting the clock menu X X SPEED LAP start...

Page 14: ...will be opened through which the engine may take in additional air The result is a lean fuel air mixture of the type needed for hot starts To deactivate the hot start device push the hot start button back into its basic position 1 2 3 Fuel tap OFF In this position the fuel tap is closed No fuel can flow to the carburetor ON During operation the twist grip must be turned to ON This means that the f...

Page 15: ...position see maintenance work Side stand Push the side stand to the ground with your foot and load it with the motor cycle Make sure that you put your bike on solid ground and in a secure posi tion For off road riding you can use the rubber band 1 to additionally secure the center stand in its folded up position Steering lock The handlebar can be locked by means of the lock located on the steering...

Page 16: ...sion of shock absorber SX The shock absorber on the SX models can synchronize the compression damping in the low and high speed range separately Dual Compression Control Low and high speed refers to the movement of the shock absorber during com pression and not to the speed of the motorcycle The low and high speed technology overlaps The low speed setting is primarily for slow to normal shock abso...

Page 17: ... NEVER TRY TO TAKE THE SHOCK ABSORBER APART OR TO DO ANY MAINTENANCE WORK YOURSELF SEVERE INJURIES COULD BE THE RESULT NEVER UNSCREW THE BLACK SCREW CONNECTION 2 24MM Rebound damping of shock absorber SX MXC EXC By using the adjusting screw 3 the degree of damping of the rebound can be adjusted Turn the knob clockwise to increase damping turn it counter clockwise to reduce damping during reboundin...

Page 18: ... clutch lever the handbrake lever and the footbrake pedal to the positions that are most convenient for you Get used to handling the motorcycle on an empty parking lot or open space before starting on a longer drive Also try to drive as slowly as possible and in a standing position to improve your feeling for the vehicle Do not drive along off road tracks which go beyond your abi tily and experien...

Page 19: ...ires showing cuts or dents must be replaced The tread depth must comply with the legal regulations Also check the air pressure Insufficient tread and incorrect air pressure deteriorate the driving performance 5 BRAKES Check correct functioning of the braking system Check for sufficient brake fluid in the reservoir The reservoirs have been designed in such a way that brake fluid does not need to be...

Page 20: ...at to do when the engine is flooded In the event of a fall more fuel than necessary may get into the engine In order to pump the engine free pull the hand decompression lever fully rev up the engine actuate the kickstarter 5 to 10 times or actuate the E starter 2 times for 5 seconds each Then start the engine as described above If the engine fails to start unscrew the spark plug and dry it NOTE Th...

Page 21: ... RIDES ON SALT STREWED OR DIRTY ROADS CAN ALSO DELAY THE BRAK ING EFFECT THE BRAKES MUST BE PULLED UNTIL THEY ARE CLEAN DIRTY BRAKE DISCS CAUSE INCREASED TEAR OF BRAKE PADS AND BRAKE DISCS WHEN YOU BRAKE THE BRAKE DISCS BRAKE PADS BRAKE CALIPER AND BRAKE FLUID HEAT UP THE HOTTER THESE PARTS GET THE WEAKER THE BREAKING EFFECT IN EXTREME CASES THE ENTIRE BRAKING SYSTEM CAN FAIL IF THE RESISTANCE IN ...

Page 22: ... function smooth operation and adjust free travel of handbrake foot brake lever z z Check tightness of brake system screws z z CHASSIS Check shock absorber and fork for leaks and function z z Clean fork dust bellows z Bleed fork legs z Check swing arm bearings z Check adjust steering head bearings z z Check tightness of chassis screws triple clamps fork leg axle passage z z WHEELS Check spoke tens...

Page 23: ...rk dust bellows regularly z Clean and lubricate chain check tension and adjust if necessary z z Clean air filter and filter box z Check tires for pressure and wear z Check cooling fluid level z Check fuel lines for leaks z Drain and clean float chamber z Check all control elements for smooth operation z Check brake performance z z Treat blank metal parts with the exception of brake and exhaust sys...

Page 24: ...check z z z Replace the camshaft bearings z z z Check the length of the valve springs z z z Check the spring cap for wear z z z Check the eccentricity of the valve disk z z z Check the valve guides for wear z z z Check the radial clearance of the rocker arm rollers z z z Check the elongation of the timing chain z z z Check the chain tensioner tooting for damage visual check z z z z z z Check the e...

Page 25: ...l check z z z Replace the camshaft bearings z z z Check the length of the valve springs z z z Check the spring cap for wear z z z Check the eccentricity of the valve disk z z z Check the valve guides for wear z z z Check the radial clearance of the rocker arm rollers z z z Check the elongation of the timing chain z z z Check the chain tensioner tooting for damage visual check z z z z z z Check the...

Page 26: ...pressure spray directly at the pivot bearing A 3 1 2 MAINTENANCE AND ADJUSTING WORK MARKED WITH AN ASTERISK REQUIRES EXPERT SKILLS AND TECHNICAL KNOW HOW FOR YOUR OWN SAFETY ALWAYS HAVE SUCH WORK PERFORMED BY A SPECIALIZED KTM DEALER WHERE YOUR MOTORCYCLE WILL BE OPTIMALLY SERV ICED BY APPROPRIATELY QUALIFIED SKILLED STAFF WHEN CLEANING THE MOTORCYCLE DO NOT USE A HIGH PRESSURE CLEANING UNIT IF PO...

Page 27: ...the fixed point again to establish dimension B The static sag is the difference between dimensions A and B EXAMPLE Motorcycle jacked up dimension A 600 mm Motorcycle on ground unloaded dimension B 565 mm Static sag 35 mm If the static sag is lower the spring preload of the shock absorber must be reduced if the static sag is higher the spring preload must be increased See chapter Changing the sprin...

Page 28: ... and 5 mm see spare parts catalog The fork springs may not be pretensioned by more than 20 mm The preload adjuster used in the SX models can easily be retrofitted for the telescopic forks of the MXC EXC models NOTE WP precisely adjusts the spring pressure by inserting pretension spacers Fluctuations in production are compensated with pretension spacers in vari ous heights This can cause the fork s...

Page 29: ... To check put the motorcy cle on a stand so that the front wheel is off the ground Now try to move the fork forward and backward For readjusting loosen the five pinch bolts 3 of the top triple clamp and turn steering stem bolt clockwise 4 until there is no more play Don t tighten the steering stem bolt all the way otherwise the bearings will be damaged With a plastic hammer lightly tap on the trip...

Page 30: ...t fork leg with a cable tie to keep the brake line from kinking see illustration Loosen the clamp screws and take the fork legs out of the triple clamps Loosen the collar screw 2 on the lower triple clamp 2 turns Remove the blind screw 1 from the upper triple clamp loosen the clamp screw and upper triple clamp on the seat Remove the O ring 3 and the pro tection ring 4 Tap gently on the lower tripl...

Page 31: ...usting the steering head bearing Check steering head bearing for play periodically To check put the motorcy cle on a stand so that the front wheel is off the ground Now try to move the fork forward and backward For readjusting loosen the five pinch bolts 1 of the top triple clamp and turn steering stem bolt 2 clockwise until there is no more play Don t tighten the steering stem bolt all the way ot...

Page 32: ...SE CONTROL OF THE MOTORCYCLE Correct chain tension Loosen collar nut 1 loosen lock nuts 2 and turn right and left adjusting screws 3 equally far Tighten lock nuts To ensure the correct alignment of the rear wheel the marks at the left and right chain adjusters must be positioned identically in relation to the reference marks B Tighten the counter nut of the adjusting screws Before tightening thr c...

Page 33: ... CHAIN MASTERLINK CLIP THE CLOSED SIDE OF THE MASTERLINK CLIP MUST POINT IN RUNNING DIRECTION Also check sprockets and chain guides for wear and replace if necessary Chain wear To check the chain wear observe the following indications Shift the gear into idling and pull the upper chain strand with approx 10 15 Kilograms 33 lb upwards see figure Now one can measure a space of 18 chain reels at the ...

Page 34: ...heck the thickness of the brake disk at several points BRAKE DISCS SUFFERING FROM WEAR GREATER THAN 0 4 MM 0 016 IN CONSTITUTE A SAFETY RISK HAVE THE BRAKE DISCS REPLACED IMMEDI ATELY AS SOON AS THEY REACH THE WEAR LIMIT HAVE ANY REPAIRS ON THE BRAKE SYSTEM BE PERFORMED BY A KTM DEALER BRAKE FLUID RESERVOIRS The brake fluid reservoirs on the front and rear wheel brakes have been designed in such a...

Page 35: ...IS CASE CONSULT AN AUTHORIZED KTM DEALER IMMEDIATELY Refilling the front brake fluid reservoir Loosen screws 2 and remove lid 3 and membrane 4 Place hand brake cylinder in a horizontal position and fill the brake fluid reser voir to 5 mm 0 2 in below the rim with clean brake fluid DOT 5 1 e g Motorex Brake Fluid DOT 5 1 Replace membrane and lid tighten screws Rinse off spilled or overflowing brake...

Page 36: ...lay before the piston rod can move the piston in the brake cylin der to be recognised from the resistance on the foot brake pedal IF THIS FREE PLAY IS NOT PRESENT THEN PRESSURE CAN BUILD UP IN THE BRAKE SYSTEM WHEN DRIVING CAUSING THE REAR WHEEL TO BRAKE THE BRAKING SYSTEM OVERHEATS AND MAY EVEN FAIL COMPLETELY IN EXTREME CASES Checking the rear brake fluid level The reservoir for the rear brake d...

Page 37: ...KING ON THE BRAKING SYSTEM ALWAYS ACTUATE THE HAND BRAKE LEVER OR FOOT BRAKE LEVER RESPECTIVELY TO ENSURE THAT THE BRAKE PADS WILL LIE AGAINST THE BRAKE DISK AND THE PRESSURE POINT IS ESTABLISHED Dismounting and mounting the front wheel To remove the front wheel jack the motorcycle up on its frame so that the front wheel no longer touches the ground Loosen the 2 clamping screws 4 on the left side ...

Page 38: ...eel is remounted in the reverse order Before tightening the col lar nut to 80 Nm push the rear wheel forwards so that the chain tensioners lie on the tension screws IF YOU DON T HAPPEN TO HAVE A TORQUE WRENCH AT HAND MAKE SURE YOU HAVE THE TIGHTENING TORQUE CORRECTED BY A KTM DEALER AS SOON AS POSSIBLE A LOOSE AXLE MAY LEAD TO AN UNSTABLE DRIVING BEHAV IOR OF YOUR MOTORCYCLE AFTER MOUNTING THE REA...

Page 39: ...ur tires DO NOT MOUNT TIRES WHICH HAVE NOT BEEN APPROVED BY KTM OTHER TIRES COULD HAVE ADVERSE EFFECTS ON THE WAY YOUR MOTORCYCLE BEHAVES FRONT AND REAR WHEELS MAY ONLY BE FITTED WITH TIRES HAVING THE SAME TREAD LAYOUT USE HOMOLOGATED TIRES FOR YOUR OWN SAFETY REPLACE DAMAGED TIRES IMMEDIATELY WORN TIRES CAN HAVE A NEGATIVE EFFECT ON HOW YOUR MOTORCYCLE PERFORMS ESPECIALLY ON WET SURFACES IF AIR P...

Page 40: ... BATTERY WHILE THE ENGINE IS RUNNING THIS WILL DESTROY THE RECTIFIER REGULATOR THE BATTERY MUST BE INSTALLED WITH THE TERMINALS FACING THE FRONT AS SHOWN IN THE ILLUSTRATION OTHERWISE ELECTROLYTE CAN ESCAPE BATTERY STORAGE When preparing the motorcycle for a longer period of standstill remove the battery and recharge it Storage temperature 0 35 C 30 95 F Do not expose to direct sunlight Charging t...

Page 41: ... to have it inspected by a KTM dealer The fuse capacity is 10 Ampere UNDER NO CIRCUMSTANCES IS A STRONGER FUSE ALLOWED TO BE INSTALLED OR A FUSE ALLOWED TO BE REPAIRED AN IMPROPER TREATMENT COULD DAM AGE THE WHOLE ELECTRICAL INSTALLATION Replacing headlight lamp parking light lamp Loosen both rubber bands and tilt headlight mask to the front Pull the park ing light lamp with holder 4 carefully out...

Page 42: ...of 50 antifreeze liquid and 50 water is used as coolant However the antifreeze protection must be at least 25 C 13 F This mixture offers antifreeze protection but also good corrosion protection and should therefore not be replaced by pure water THE COOLING SYSTEM MUST BE BLED AFTER DRAINING THE COOLING LIQ UID OR AFTER ADDING MORE THAN 0 25 L 0 06 US GALLONS COOLING LIQUID SEE BELOW FOR THE COOLIN...

Page 43: ...er packing Push the inner pipe containing the packing into the silencer such that the slot engages the web A Use a blunt ended object to stuff the glassfiber yarn packing all the way into the silencer and mount the front cap C To change the rear silencing mat start by removing the front packing and the inner exhaust pipe Then drill open the rivets and remove the end cap NOTE In every exhaust repai...

Page 44: ...t them in the filter box aligning in a central posi tion and fix with the filter retaining bracket 10 mm 6 8 7 10 11 1 2 3 2 3 4 5 Checking the adjustment of the hand decompression release cable Start the engine and at idling speed slowly pull the hand decompression lever until you can feel the thumping of the rocker arm on the lever The back lash until said thumping should be approx 10mm measured...

Page 45: ...ur KTM dealer 50ml KTM USES BIODEGRADABLE HYDRAULIC OIL FOR THE HYDRAULIC CLUTCH CON TROL NEVER MIX BIODEGRADABLE HYDRAULIC OILS WITH MINERAL OILS NEVER REFILL WITH MINERAL HYDRAULIC OIL OR BRAKE FLUID Bleeding of the hydraulic clutch If the clutch lever starts to feel unresponsive the clutch control system needs to be bled You will need a bleeder syringe special tool and biodegradable hydraulic o...

Page 46: ...re control screw has been screwed in up to the stop without causing any change in rotational speed a smaller idling jet has to be installed b the engine dies when the mixture control screw is still open by 2 turns a larger idling jet needs to be selected Naturally in cases of jet changes you have to start your adjusting work from the beginning 5 Then use the adjusting wheel to set the desired idle...

Page 47: ...mp 3 draws engine oil from the oil sump of the transmission This engine oil flows through an oil line 5 into the cylin der head for camshaft lubrication 6 the oil quantity is controlled by the jet screw 7 An oil duct branches off to the long oil filter 8 where the coarser particles contained in the engine oil are filtered away Then the engine oil arrives at the short oil filter 9 which also filter...

Page 48: ...nd allow the oil to drain into a receptacle Clean plug with magnet thoroughly Once the entire oil has been drained clean the sealing surface mount the plug together with the sealing ring and tighten it to 20 Nm CLEANING THE SHORT OIL SCREEN The short oil screen 2 is accommodated in the hex socket plug 3 at the engine bottom Insert a pin type key into the plug and tap on the key a few times with a ...

Page 49: ...e motorcycle on its side and fill the oil filter housings about halfway with engine oil Fill oil filter with oil place the long oil filter in the front and the short filter in the back of the filter box Grease the O rings 4 of the oil filter covers and mount the covers Mount the screws and tighten them to 6 Nm Position the brake fluid container and tighten the screw to 8 Nm Return the motorcycle t...

Page 50: ...he engine free pull the hand decompres sion lever fully rev up the engine actuate the kickstarter 5 to 10 times or actuate the E starter 2 times for 5 seconds each Then start the engine as described above If the engine fails to start unscrew the spark plug and dry it Clean and dry the spark plug or exchange it respectively Adjust spark plug electrode gap to 0 6 mm Dismount spark plug connect ignit...

Page 51: ...fficient cooling liquid Not enough air stream Cooling system has not been bled Radiators very dirty Foam formation in cooling system Bent cooling hose Thermostat defective Refill cooling liquid see maintenace work check cooling system for leaks Drive on briskly electric fan can be retrofitted Bleed cooling system Clean radiators with water jet Replace cooling liquid use antifreeze liquid with bran...

Page 52: ...HIS WILL SIGNIFICANTLY REDUCE THE BRAKING POWER AFTER RIDES ON SALTED ROADS CLEAN MOTORCYCLE THOROUGHLY WITH COLD WATER AND LET IT DRY WELL Should you wish to make a pause over a longer space of time please observe the following instructions Clean motorcycle thoroughly see chapter CLEANING Change engine oil short and long oil filters old engine oil contains aggressive contaminants Check antifreeze...

Page 53: ...aper ring Engine lubrication pressure circulation lubrication with two rotor pumps Engine oil full synthetic oil Motorex Power Synt 4T 10W 50 Quantity of engine oil 1 25 liters Primary ratio straight geared spur wheels 33 76 Z Clutch multi disc clutch in oil bath Transmission claw shifted 6 speed 6 speed 4 speed 6 speed 6 speed 4 speed 6 speed 6 speed Gear ratio 1st Gear 14 38 14 34 16 32 16 32 14...

Page 54: ... kW Type Keihin FCR MX 3900A Keihin FCR MX 3900A Keihin FCR MX 4122A Keihin FCR MX 3900B Main jet 178 178 185 178 Jet needle OBDVR OBDTR OBDTP OBDVT Idling jet 42 42 40 42 Main air jet 200 200 200 200 Idling air jet 100 100 100 100 Needle position 3rd from top 4th from top 4th from top 3rd from top Starting jet 85 85 85 85 Mixture control screw open 1 25 2 0 1 0 1 25 Slide 15 15 15 15 Performance ...

Page 55: ... Allan head screw primary gear free wheel M6 Loctite 648 16 Nm Hexagon nut primary gear M20x1 5 Loctite 243 150 Nm Allan head screw balancer shaft gear M6 Loctite 243 8 Nm Nut for inner clutch hub M18x1 5 Loctite 243 150 Nm Hexagon collar screw clutch spring M6 8 Nm Allan head screw shift roller locking piece M6 Loctite 243 10 Nm Hexagon collar screw locking lever M5 Loctite 243 6 Nm Hexagon colla...

Page 56: ...US gallons EXC 8 5 liters 2 1 US gallons MXC 13 Liter 3 5 gallons Final drive ratio 450 14 52Z 525 14 48Z 250 15 45Z 450 15 45Z 525 15 45Z 450 14 50Z 525 14 48Z Chain X Ring 5 8 x 1 4 Available final sprockets 38Z 40Z 42Z 45Z 48Z 50Z 52Z Bulbs headlight 12V 35 35W Sockel BA20D parking light 12V 5W Sockel W2 1x9 5d brake rear light 12V 21 5W Sockel BaY15d flasher light 12V 10W Sockel Ba15s license ...

Page 57: ...SX M8 10 Nm Clamping screws fork stubs M8 10 Nm Hexagon nut swing arm bolt M16x1 5 100 Nm Hexagon collar screw handlebar clamp M8 20 Nm Allan head srew handlebar support M10 Loctite 243 40 Nm Shock absorber top M12 80 Nm Shock absorber bottom M12 80 Nm Collar nut swing arm bolt M20x1 5 80 Nm Sprocket Screws M8 Loctite 243 35 Nm Ball joint for push rod M6 Loctite 243 10 Nm Engine mounting bolt M10 ...

Page 58: ... MXC EXC 16 Conservation for winter operation 51 Cooling system 41 Correct chain tension 31 Damping action during compression of shock absorber SX 15 Determining the riding sag of the shock absorber 26 Determining the static sag of the shock absorber 26 Digital speedometer indicator lamps 7 Dismounting and mounting the front wheel 36 Dismounting and mounting the rear wheel 37 Draining the float ch...

Page 59: ...ENGLISH 58 ...

Page 60: ...ANHANG APPENDICE APPENDIX APÉNDICE 1 SCHALTPLAN WIRING DIAGRAMM ...

Page 61: ...ANHANG APPENDICE APPENDIX APÉNDICE 2 SCHALTPLAN WIRING DIAGRAMM ...

Page 62: ...ANHANG APPENDICE APPENDIX APÉNDICE 3 SCHALTPLAN WIRING DIAGRAMM ...

Page 63: ...ultifunktionsdigitaltacho Tachimetro digitale multifunzione Pick up Impulsgeber Pick up Position light Standlicht Luce di posizione Rear brake switch hinterer Bremslichtschalter Interruttore luce post di stop Rear light brakelight hinteres Begrenzungslicht Bremslicht Luce post di posizione stop Regulator rectifier Regelgleichrichter Regolatore raddrizzatore Right front flasher rechter vorderer Bli...

Page 64: ...eedometer Ordinateur de bord Velocímetro digital multifuncional Pick up Capteur d allumage Generador de impulsos Position light feu de position luz de posicion Rear brake switch Contacteur de frein arrière Interruptor de luz del freno trasero Rear light brakelight Feu rouge stop Luces de parqueo traseras luces de freno Regulator rectifier Régulateur redresseur Regulador rectificador Right front fl...

Page 65: ...G 400 450 SX MXC EXC SMR SXS RACING 520 525 SX MXC EXC SMR RACING 540 SXS RACING 610 CRATE REPARATURANLEITUNG MANUALE DI RIPARAZIONE MANUEL DE RÉPARATION MANUAL DE REPARACIÓN Art NR 3 206 023 E REPAIRMANUAL2000 2005 ...

Page 66: ...3 REMOVING AND REFITTING ENGINE 4 DISASSEMBLING ENGINE 5 SERVICING INDIVIDUAL COMPONENTS 6 ASSEMBLING ENGINE 7 ELECTRICAL 8 FUEL SYSTEM 9 TROUBLE SHOOTING 10 TECHNICAL SPECIFICATIONS 11 PERIODIC MAINTENANCE SCHEDULE 12 WIRING DIAGRAMS 13 14 15 16 ...

Page 67: ...Updating of Rep Manual 3 205 85 E Model year 2002 Engine number with first digit 2 2 2002 3 206 007 E Updating of Rep Manual 3 205 85 E Model year 2003 Engine number with first digit 3 1 2003 3 206 013 E Updating of Rep Manual 3 205 85 E Model year 2004 Engine number with first digit 4 9 2003 3 206 023 E Updating of Rep Manual 3 205 85 E Model year 2005 Engine number with first digit 5 7 2004 Modi...

Page 68: ...e repair work WARNING STRICT COMPLIANCE WITH THESE INSTRUCTIONS IS ESSENTIAL TO AVOID DANGER TO LIFE AND LIMB CAUTION NON COMPLIANCE WITH THESE INSTRUCTIONS CAN LEAD TO DAMAGE OF MOTORCYCLE COMPONENTS OR RENDER MOTORCYCLES UNFIT FOR TRAFFIC NOTE POINTS OUT USEFUL TIPS Use only ORIGINAL KTM SPARE PARTS when replacing parts The KTM high performance engine is only able to meet user expectations if th...

Page 69: ...oles on the gasket for filler cap before conducting extensive failure detection As the possible affected motorcycles can not be limited we recommend to check and if necessary to correct the gaskets for filler cap on motorcycles during pre delivery inspection before handover to the customers When we became aware of the problem production and spareparts stock have been checked immediately and correc...

Page 70: ... are available in sufficient numbers as only a small number of bikes is affected To conduct the repair drive gear 590 30 055 000 and gasket set 590 30 099 000 are required Please make a warranty claim when repair is finished and use the code for crank replacement T3900230090 to claim for labour After repair please scrap the replaced gear T Stöcklmeier S Pierer W Pichlmair Vertrieb Vorstand Qualitä...

Page 71: ...rch Octane ROZ rating above 95 In course of engine repairs we are requesting you to use a new thicker cylinder base gasket with part no 594 30 035 000 0 8 mm This new gasket may be ordered individually and is available immediatley in the KTM Spare Parts Center It is also included in the gasket set in a separate package marked for models 450 EXC and 450 MXC T Stöcklmeier W Pichlmair Sales Quality M...

Page 72: ...s production since September 1st 2003 beginning with engine number 04 594 69364 that is VIN VBKRCA4024M371530 Vehicles that were manufactured before September 1st and delivered to you are listed in the attached Excel file Please order the required quantities from the KTM Spare Parts Center For this retrofit KTM will compensate the parts and through the use of Code T39002 36 970 10 minutes of labou...

Page 73: ...left radiator via a hose is used as a expansion reservior and should be filled half with coolant Take care to mount the hose without any kink Bild KTM Nummer Description 1 590 35 007 000 RADIATOR L S 45328 RAC 2000 2 580 35 016 000 RADIATOR CAP SMALL 1 4BAR 3 523 38 161 000 ADDITIONAL TANK L S 99 5 523 38 061 050 HOSE CONNECTION 6 583 07 016 001 FUEL HOSE VITON 6X1 5 PER M 7 0015 060203 HH COLLAR ...

Page 74: ...ason and can be extended for non professional and recreational usage The extension of the maintainance intervals depends on constant care and intensity of usage Maintainance Overview h 400 SX 400 EXC 520 SX 520 EXC 15 Small maintainance kit Small maintainance kit 30 Small maintainance kit Small maintainance kit Small maintainance kit Small maintainance kit 45 Small maintainance kit Small maintaina...

Page 75: ...36 003 000 Cylinder Roller bearing NJ206 ET2XCS46 crankshaft 2 503 30 082 000 Grooved ball bearing TM16004 balancer shaft 2 0625 160040 Gasket set cpl 1 590 30 099 000 TO BE CHECKED DURING MAINTAINANCE Primary gearing and gearbox need to be checked at each large maintainance for pitting Replacement necessary when impressions exceed the 2 3 of tooth width Further on transmission gears the shifting ...

Page 76: ...s when production has started c Mount jet needle OBEVR part no 590 31 134 0VR 3rd position from top This needle has been fitted in power restricted versions to meet homologation requirements d Main jet 160 art no 545 31 623 160 carburetor original equipped d Pilot jet 48 part no 590 31 607 48 included in de restriction kit e Mixture adjusting screw 11 4 turn open Please place your parts order at K...

Page 77: ...irbox 3 remove slide limit stop on right side under the plastic cover of carburetor 4 remove jet needle OBDVR and install OBDTM 400 pos IV 520 pos II from top 5 idle jet remains the same 48 6 adjust idle mixture 7 change gear ratio of chaindrive 400 EXC 42 15 520 EXC 40 15 competition 48 14 or 50 14 8 fit longer O ring chain The necessary deristriction kit for the rebuilding is delivered with the ...

Page 78: ...and damage the valve shaft seals To solve that problem both valve collets have to be shortened 1 0 mm by grinding them carefully at the lower edge see fig B fig A fig B In the case of such damage please issue a warranty claim T Stöcklmeier E Sellmaier Sales Quality Assurance F Haslinger W Felber Customer Service R D A 5 2 3 0 M a t t i g h o f e n S t a l l h o f n e r s t r 3 P o s t f a c h 9 1 ...

Page 79: ...crew 0912 050106 fig A by a new one and to replace self locking nut 0985 050003 by the new hh nut 0980 050003 fig B fig A fig B Both parts have to be assembled by the use of Loctite 243 and a tightening torque of 6 Nm Both parts and a labour rate of 30 minutes code T3900236200 you can claim via KTMservice net system T Stöcklmeier E Sellmaier Sales Quality Management F Haslinger W Felber Customer S...

Page 80: ...onents KTM offers following parts which can be ordered as a set but also as single parts at KTM Spareparts Center Spacer set Nr 590 35 002 044 Consisting of 2 pcs of each of below listed single items radiator spacer Nr 590 35 002 000 bushing Nr 546 35 036 000 HH collar screw M 6X25 WS 8 Nr 0014060253 Please mount the set as shown in photo below T Stöcklmeier E Sellmaier Sales Quality Management F ...

Page 81: ...ehaviour of a hotstart we suggest to use a 48 idlejet and a setting of the mixture screw of one rotation open The carburettor needle should be set to position IV from top on the 400 SX and to position III from top on the 520 SX To prevent the engine to quit in narrow turns the idle rpm should be risen from 1700 rpm to 1850 rpm With rising temperatures further adjustments to a leaner mixture can be...

Page 82: ...h diameter your brake system has KTM Numbers Brake system rear 26 mm 503 13 080 244 BRAKE CALIPER REAR CPL 26 MM 03 503 13 081 200 REPAIR KIT SEALING RINGS 26 MM 503 13 083 200 BRAKE PISTON 26 MM Brake system rear 28 mm 503 13 080 144 BRAKE CALIPER REAR CPL 28 MM 01 503 13 081 100 REPAIR KIT SEALING RINGS 28 MM 503 13 083 100 BRAKE PISTON 28 MM TD SPM FB 10 02 2003 ...

Page 83: ...mber of bikes delivered to your market have been prepared for you at KTM spareparts center The procedure is as follows a KTM spareparts center will ship to you and invoice above mentioned parts for all 525SX bikes you received b You arrange the retrofit on the bikes due to your priorities and c issue or advise to issue warranty claims in KTMservice net for every individual bike d KTM SMC will cred...

Page 84: ...ntermediate discs 1mm art nr 590 32 010 100 former 4 pcs plus 2 pcs intermediate discs 1 4mm art nr 590 32 010 200 former 4 pcs and position them as following 3 pcs intermediate discs 1 mm 2 pcs intermediate discs 1 4 mm 3 pcs intermediate discs 1 mm T Stöcklmeier E Sellmaier Sales Quality Assurance F Haslinger W Felber Customer Service R D A 5 2 3 0 M a t t i g h o f e n S t a l l h o f n e r s t...

Page 85: ...ore placing an order or to issuing a warranty claim it is necessary to update the price file in the Service net After receipt of the new cylinder head the damaged cylinder head has to be returned to KTM Austria including valves springs spring retainers rocker arms adjusting screws and camshaft For reimbursement of the arisen costs a warranty claim can be issued Following parts and labour costs wil...

Page 86: ...OIL CIRCUIT 2 2 ENGINE OIL 2 3 CHECKING THE ENGINE OIL LEVEL 2 3 CHANGING THE ENGINE OIL 2 4 CHANGING THE OIL FILTERS 2 5 CHECKING THE OIL LEVEL OF THE HYDRAULIC CLUTCH 2 6 BLEEDING OF THE HYDRAULIC CLUTCH 2 6 SPECIAL TOOLS 2 7 CLEANING STORAGE OF MOTORBIKE 2 9 2 1E 2 INDEX ...

Page 87: ...d by the jet bolt 5 An oil duct branches off to the long oil filter 6 where the coarser particles contained in the engine oil are filtered away Then the engine oil arrives at the short oil filter 7 which also filters the fine particles Now the purified engine oil is pumped past the bypass valve 8 to the conrod bearing 9 and sprayed from below onto the piston through a nozzle bk The second oil pump...

Page 88: ...2 F or 5W 40 for temperatures under 0 C 32 F Checking the engine oil level The engine oil level can be checked with the engine being either warm or cold Place the motorcycle in an upright position and on a horizontal surface not on the side stand If the engine is cold the engine oil must be visible at the lower edge of the inspection glass A If the engine is warm the engine oil must be visible up ...

Page 89: ...es with a hammer in order to relieve the stress acting on the plug Dismount the oil screen clean the components thoroughly and blow compressed air through them Check the O rings for damage and if necessary replace them Mount the oil screen together with the plug again and tighten the plug to 10 Nm CLEANING THE LONG OIL SCREEN NOTE The long oil screen is accommodated in the hexagon plug 4 adjacent ...

Page 90: ...eplace them Put the motorcycle on its side and fill the oil filter housings about halfway with engine oil Insert the long oil filter at the front and the short oil filter at the back of the housing Grease the O rings 4 of the oil filter covers and mount the cover Mount the bolts and tighten them to 6 Nm Position the brake fluid container and tighten the bolt to 8 Nm Return the motorcycle to an upr...

Page 91: ...raulic clutch For bleeding the cover of the master cylinder of the clutch needs to be removed For this purpose remove screws 1 and take off cover together with rubber bellows 2 At the slave cylinder of the clutch remove the bleeder nipple At its place mount the bleeder syringe 3 which is filled with biodegradable hydraulic oil Motorex Kupplungs Fluid 75 Refill oil until oil is discharged from the ...

Page 92: ...2 7E 1 2 3 4 21 23 6 7 8 9 10 11 12 13 14 15 16 17 18 19 20 5 22 24 ...

Page 93: ... Loctite 648 green 20 ml 9 151 12 017 000 Gear puller 10 151 12 018 000 Internal gear puller 12 16 mm 151 12 018 100 Internal gear puller 18 23 mm 11 590 29 026 006 Limit plug gauge 6 05 mm 12 590 29 035 000 Mounting sleeve for driving pin 13 590 29 036 000 Protection sleeve for primary gear 14 590 29 033 000 Puller for camshaft bearings 15 590 29 019 000 Valve spring mounter 16 584 29 037 037 Mou...

Page 94: ...ng detergent and a sponge The hard dirt can be removed before washing with the help of a soft water jet CAUTION NEVER CLEAN YOUR MOTORCYCLE WITH A HIGH PRESSURED CLEANER OR A HIGH PRESSURED WATER JET THE WATER COULD OTHERWISE RUN INTO THE ELECTRICAL COMPONENTS CONNECTORS SHEATHED CABLES BEARINGS CARBURETOR ETC AND CAUSE DISTURBANCES OR LEAD TO A PREMATURE DESTRUCTION OF THESE PARTS You should use ...

Page 95: ...206 023 E DISMOUNTING THE ENGINE 3 2 MOUNTING THE ENGINE 3 5 BLEEDING THE COOLING SYSTEM 3 7 CHECKING THE ADJUSTMENT OF THE HAND DECOMPRESSION RELEASE CABLE 3 7 ADJUSTING THE THROTTLE CABLES 3 7 INDEX DISMOUNTING AND MOUNTING THE ENGINE 3 1E 3 ...

Page 96: ...1 of the battery Remove the screw 2 and detach the 2 tension springs 3 Detach the 2 tension springs 4 pull exhaust pipes forward and take them off the vehicle Detach the 2 tension springs 6 and remove the screw 5 Pull the intermediate pipe forward and take it off the vehicle Disconnect all plug and socket connections of the ignition system Unhitch the cable of the hand decompressor at the engine P...

Page 97: ...to a receptacle Disconnect the water hoses 4 and 5 Disconnect the hose of the engine ventilation system 6 Disconnect the plug in connection from the throttle valve sensor Loosen the front and rear hose clamps of the carburetor pull the carburetor backward and pivot it out of the rubber sleeve at the front Take the carburetor off the vehicle Disconnect the cable 7 from the E starter motor Disconnec...

Page 98: ...late backwards Open the chain joint and remove the chain from the vehicle Remove the bolt 3 and take off the cable clip NOTE From Model 2001 onwards a cable tie is mounted instead of the the cable clip Disconnect the radiator hose 4 and dismount the tank roller 5 Dismount the front engine mounting bolt 6 Remove the engine mounting bolt 7 and the hex nut 8 Dismount the swing arm pivot and pull the ...

Page 99: ...r hose 3 and the tank roller 4 Fasten the cable clip 5 NOTE From Model 2001 onwards a cable tie is mounted instead of the the cable clip Mount the chain CAUTION WHEN MOUNTING THE CHAIN JOINT MAKE SURE THAT THE CLOSED SIDE OF THE RETAINER POINTS IN THE RUNNING DIRECTION Mount the clutch slave cylinder together with the chain damping sheet and the chainguard and tighten the three screws to 10 Nm Tig...

Page 100: ... throttle cables and mount the carburetor cover Connect the plug connector on the throttle sensor Connect the water hoses 1 and 2 Mount the engine bleeder hose 3 Attach the spring 4 on the foot brake lever to the clutch cover Mount the brake cylinder cover Connect all the plug connectors in the ignition system Attach the spark plug connector to the spark plug Attach the cable on the hand decompres...

Page 101: ...d If necessary correct this backlash To adjust move back the protective cover 3 loosen the counter nut 4 and correct the adjustment screw 5 accordingly Tighten counter nut and push back protective cover CAUTION IF THERE IS NO PLAY IN THE DECO LEVER THIS CAN RESULT IN ENGINE DAMAGE Adjusting the throttle cables The throttle grip should always provide for a backlash of 3 5 mm Besides with the engine...

Page 102: ...MODELS FROM 2002 450 525 MODELS FROM 2003 4 4 REMOVING THE FLYWHEEL 4 5 REMOVING THE CLUTCH DRIVE AND THE OUTER CLUCH HUB 4 5 DISMOUNTING THE OIL PUMP 4 6 DISMOUNTING THE UPPER CYLINDER HEAD PORTION 4 7 DISMOUNTING CYLINDER HEAD CYLINDER AND PISTON 4 7 DISMOUNTING THE TIMING CHAIN AND THE TIMING GEAR 4 9 DISMOUNTING THE E STARTER DRIVE GEAR AND KICKSTARTER 4 10 DISMOUNTING THE PRIMARY GEAR AND FRE...

Page 103: ...liers see photo Dismounting the chain wheel Remove collar bolt 5 and disc spring Take the chain wheel off the countershaft Pull the spacer bushing off the countershaft NOTE If the transmission and clutch of the engine are okay you can engage a gear in order to block the countershaft force transmission to the blocked crankshaft does exist If the countershaft cannot be blocked as described above you...

Page 104: ...he pressure piece 1 Take all lining and steel discs out of the outer clutch hub Remove all 12 driving pin sleeves 2 from model 2002 on Up to the 2002 model Remove the circlip 3 From 2003 model Bend up the lock washer 4 with a flat chisel position the clutch holder 590 29 003 100 5 with 6 driving sleeves as shown and loosen the nut 6 NOTE Do not remove the clutch holder to allow the flywheel nut to...

Page 105: ... collar nut 3 and remove the spring washer NOTE When ordering a new part a forged rotor will be supplied this part is produced without rivets and is interchangeable Dismounting the ignition system and loosening the primary gear model 250 EXC from 2002 models 450 525 from 2003 Unfasten the 4 bolts 4 and take the ignition cover together with the seal off the engine casing Holding the clutch holder m...

Page 106: ...ng bolt to 10 Nm Pulling off the flywheel Loosen the 2 bolts 3 and take the pulse generator out of the engine casing Mount the puller tool 580 12 009 000 and pull off the flywheel For the pull off step use the protection cover Remove the Woodruff key from the crankshaft CAUTION NEVER USE A HAMMER OR OTHER TOOLS TO HIT AGAINST THE FLYWHEEL THIS MIGHT CAUSE THE MAGNETS TO COME OFF THE FLYWHEEL AND T...

Page 107: ...d disk 2 and both half disks 3 from the main shaft Remove both needle bearings 4 and the supporting plate Dismounting the oil pump Loosen the 2 bolts 5 and remove the oil pump cover Pull needle roller 6 inner rotor 7 and outer rotor 8 out of the oil pump casing Remove banjo bolt 9 and jet bolt bk together with their sealing rings and dismount the oil line ...

Page 108: ...ten 4 bolts and dismount the water pump cover 2 together with its gasket Loosen all bolts 3 of the upper cylinder head part Use a plastic hammer to carefully tap upwards in area A and lift off the upper cylinder head part Dismounting cylinder head cylinder and piston Dismount the bolt 4 together with the sealing ring and the pressure spring Unfasten the 2 bolts and pull the timing chain tensioner ...

Page 109: ...to the chain tunnel you should insert a cable tie through the ends of the timing chain Extract the camshaft from the cylinder head Remove the 3 bolts 1 NOTE If no repairs to the cylinder and cylinder head are necessary these 3 bolts need not be removed You can dismount the cylinder and the cylinder head as one In this case the cylinder head gasket need not be replaced from Model 2001 onwards the b...

Page 110: ...g chain and timing gear Loosen the 2 bolts 1 and dismount the fall out protection element 2 Remove the timing chain Remove the bolts 3 and 4 Pull timing chain tensioner and timing chain guide upward out of the engine casing Remove circlip 5 Apply the puller tool 590 29 033 000 and pull the timing gear off the crankshaft ...

Page 111: ...arter spring and unhitch the spring shackle CAUTION BE CAREFUL WHEN RELEASING THE KICKSTARTER SPRING AS THE RECOILING KICKSTARTER SPRING MAY CAUSE INJURY Pull the kickstarter shaft together with ratchet gear spring and disc out of the engine casing Slide back the sliding plate and pull the shift shaft together with the stop disc 5 out of the engine casing Remove the bolt 6 and dismount the shift a...

Page 112: ...NOTE The collar nut 1 was already removed from the 250 EXC models from 2002 and the 450 525 models from 2003 as described on page 4 5 Loosen the 2 bolts 2 and dismount the oil pump cover Take the oil pump shaft together with needle roller inner rotor 3 and outer rotor 4 out of the engine casing Remove 2 bolts 5 opposite located Mount the puller tool 590 29 021 044 and pull the primary gear off the...

Page 113: ...E ON THE SEALING SURFACES Dismount the left casing half and the gasket Pull the 2 dowels out of the engine casing and secure the right half of the casing in the work stand Remove the stop disc 1 O ring 2 and inner ring 3 Pull both shift rails 4 together with the 4 springs out of the engine casing and swing the shift forks sideward Pull the shift roller 5 out of the bearing seat Remove the shift fo...

Page 114: ...In this position the balancer shaft can be pulled out of the bearing seat Pull the crankshaft out of the bearing seat Clean all components check them for wear and if necessary replace them with new ones NOTE For a complete engine overhaul procedure we recommend that you replace all gaskets shaft seal rings O rings and bearings ...

Page 115: ...N RING END GAP 5 9 CHECKING THE OIL PUMPS FOR WEAR 5 9 LUBRICATION SYSTEM 5 10 UPPER PORTION OF CYLINDER HEAD 5 11 CYLINDER HEAD 5 12 CAMSHAFT 5 14 PREASSEMBLING THE CAMSHAFT 5 15 TIMING CHAIN TENSIONER 5 16 TIMING TRAIN 5 16 CHECKING THE CLUTCH FOR WEAR 5 17 CHECKING THE KICKSTARTER FOR WEAR 5 19 PREASSEMBLING THE KICKSTARTER SHAFT 5 19 SHIFT MECHANISM 5 21 PREASSEMBLING THE SHIFT SHAFT 5 21 ASSE...

Page 116: ...ves must be placed on a suitably large plane surface supporting the whole of the sealing surface without damaging it A wooden panel is best used as a base Bearings or shaft seal rings should not be hammered into their seats If no suitable press is available use a suitable mandrel and hammer them in with great care Cold bearings will practically drop into their seats at an engine housing temperatur...

Page 117: ... bearing up to the stop Shaft seal ring of shift shaft 4 From the outside press in new shaft seal ring up to a flush position its open side facing inward Shaft seal ring of countershaft 5 From the outside press in new shaft seal ring up to a flush position its open side facing inward Grooved ball bearing of balancer shaft 6 Use a bearing extractor to pull the grooved ball bearing out of the casing...

Page 118: ...rooved ball bearing from the outside to the inside From the inside press in a new grooved ball bearing up to the stop NOTE The grooved ball bearing on the main shaft 3 is secured with a screw from the 2003 models Apply Loctite 243 to the thread of the screw and tighten to 5 Nm Grooved ball bearing of countershaft 4 Use a suitable punch to press the grooved ball bearing from the outside to the insi...

Page 119: ...A with Loctite 243 and tighten the screw to 6 Nm Needle bearing of shift shaft 4 Press needle bearing from the outside to the inside Press new needle bearing in from the outside and up to a flush position Once the casing half has cooled down check if the fit of the bearings is tight Kickstarter release plate 5 When exchanging the release plate secure both bolts with Loctite 243 and tighten to 10 N...

Page 120: ...pening pressure of the bypass valve will decrease This causes a decrease in oil pressure and subsequently increased wear Clean all oil ducts with compressed air and check them for unobstructed passage Clutch cover Shaft seal ring of kickstarter shaft 3 Remove the old shaft seal ring by levering it out with a screwdriver Press a new shaft seal ring in up to the stop Shaft seal ring of crankshaft 4 ...

Page 121: ...ft will continue to be used check crankshaft journals for run out Place crankshaft on a roller block or a similar device and check the outer end of the journals for run out with a dial gauge Run out of crankshaft journals max 0 12 mm The radial play and axial play on the conrod bearing must be checked radial clearance max 0 05 mm axial clearance max 1 10 mm NOTE From Model 2001 onwards the conrod ...

Page 122: ...l again to approx 150 C engage the inner ring and slip it on the crankshaft journal immediately Allow the inner ring to cool for about 30 seconds and hammer the inner ring in once more by means of a suitable tube so as to ensure its proper fit Having exchanged the inner rings measure the axial clearance of the crankshaft CAUTION NEVER CLAMP THE CRANKSHAFT IN A VISE WITH A CRANKSHAFT JOURNAL AND TR...

Page 123: ...ze of the piston is marked at the top of the piston 2 The piston is measured on the piston skirt across to the piston pin as shown in the illustration Diameter of piston 250 size I 74 950 74 980 mm size II 74 961 74 990 mm Diameter of piston 400 size I 88 920 88 950 mm size II 88 931 88 960 mm Diameter of piston 450 EXC MXC size I 88 916 88 946 mm size II 88 926 88 956 mm Diameter of piston 520 si...

Page 124: ...andpaper 400 grit may be used to clean the piston ring grooves 3 Piston rings check for damage and end gap see below Mount the oil scraper ring with the labeling TOP facing upwards Mount the rectangular ring with the labeling O facing upwards 4 Piston pin If the piston pin is heavily discolored or has score marks it must be replaced Also insert the piston pin into conrod and check its bearing for ...

Page 125: ...ng every oil filter change Oil pump cover 3 Check for score marks caused by the oil pump rotors on its inner side and if necessary replace it Oil pump shaft 4 Place it on a planar surface and check it for eccentricity Oil pump wheel 5 Check toothing for wear The recess for the needle roller must not be worn out Oil screen 6 Clean the two oil screens with compressed air and petroleum O rings 7 Chec...

Page 126: ...ollers 8 Check if they move smoothly if you detect any radial play you have to replace the rocker arm Adjusting bolts 9 The seating surfaces of the adjusting bolts must be planar Decompressor shaft 2 Check for smooth movability and play in the bearing bore Replace the O ring bl Replace the O rings bk Prior to assembly oil all components thoroughly Position rocker arms in the cylinder head s upper ...

Page 127: ...ust flange 2 together with its gasket Dismount the 4 valves with the aid of a special tool 590 29 019 000 NOTE When being mounted again used valves must be mounted in the same valve guide as before For this purpose place the valves in a cardboard box in the same position they were mounted in the cylinder head see photo ...

Page 128: ...at The valve stem is chrome hardened by experience wear occurs at the valve guide Valve springs Check the valve springs for fractures or wear visual check use a sliding caliper to measure the length Replace the spring if it is shorter see Technical Data also see Technical Information 0003 30 02 Valve stem gaskets Every time the valves are dismounted you should replace the valve stem gaskets Place ...

Page 129: ...he 2 bolts 8 and take off the camshaft wheel 9 Use the puller tool to pull the grooved ball bearing bk off the camshaft Clean all components check them and if necessary replace them with new components Camshaft Check bearing seats and cams for wear Renew grooved ball bearings 5 and bk Autodecompressor shaft 7 Check bearing for play and contact surface to the rocker arm for wear Camshaft wheel 9 Ch...

Page 130: ...t the threads of the 2 bolts 6 with Loctite 243 and mount the camshaft wheel 7 Tighten bolts to 28 Nm For preassembly press on the grooved ball bearing 5 by means of a hollow punch Mount the autodecompressor shaft 8 and the spring 9 Preload the spring by approx 1 2 turn and insert the end of the spring into the groove B Now check whether the autodecompressor shaft turns back into its initial posit...

Page 131: ...ing push the ratchet in the direction of the arrow so that the pressure pin will no longer be locked and push the pressure pin all the way into the tensioner housing Timing train Clean all components thoroughly and check them for wear Timing gear 1 Check the toothing for broken off parts and wear Timing chain tensioner rail 2 Check for seizing marks at the contact surface Timing chain guide 3 Chec...

Page 132: ...A on the inner clutch hub If the depressions are greater than 0 5mm the inner clutch hub must be replaced A modified driver with sleeves 9 is installed starting with the 2002 model Pressure cap bk Check the seating surface B of the steel disc for damage Outer clutch hub bl Check the stop surfaces C of the lining disk and the clutch cage for wear If the depressions are greater than 0 5 mm the linin...

Page 133: ... 2003 Four 1 4 mm 6 clutch disks Must be planar Check for mechanical damage Replace clutch disks if localized points are broken off Model 2003 Four 1 0 mm 7 clutch disks Must be planar Check for mechanical damage Replace clutch disks if localized points are broken off NOTE The clutch disks all have the same thickness 1 mm from the 2004 model Inner clutch hub 8 Check for seizing marks and damage Pr...

Page 134: ...ear for unobstructed passage Preassembling the kickstarter shaft Clamp the kickstarter shaft 4 with the toothed end facing upward into a vise use protection jaws Mount stop disc 5 needle bearing 6 and kickstarter gear 1 with the locking teeth facing downward Slip on the stop disc 7 and mount the circlip 8 with the sharp edge facing upward Mount the driving hub 9 such that the recess is located abo...

Page 135: ...5 20E Repair manual KTM 250 610 Racing Art Nr 3 206 023 E 1 1 2 B 3 4 4 6 7 C D E 8 9 10 4 A 5 5 1 ...

Page 136: ...ing plate 6 Check it for wear at the points of engagement C Check the return surface D on the sliding plate for wear replace it in case of severe notching Check the guide bolts E for tight fit and wear Shift mechanism Preassemble the shift shaft and check the clearance F between the sliding plate 6 and the shift element The clearance must be 0 40 0 80 mm Preassembling the shift shaft Secure the sh...

Page 137: ...y clean all parts exchange damaged components New axial securing elements should be mounted whenever repair work is performed Assembling the main shaft 4 speed Secure the main shaft with the toothed end facing downward in a vise use protection jaws Prior to assembly oil all components thoroughly Mount the spacer bushing 1 and the 3rd 4th speed sliding gear 2 with the small gear facing downward Mou...

Page 138: ...whenever repair work is performed Assembling the main shaft 6 speed Secure the main shaft with the toothed end facing downward in a vise use protection jaws Prior to assembly oil all components thoroughly Mount the split needle bearing 2 slip on the 5th speed idler gear 1 with the shift dogs facing upward Mount the stop disc 3 25 2x32x1 5 mm and the circlip 4 with the sharp edge pointing upward Sl...

Page 139: ... countershaft with the toothed end facing downward in a vise use protection jaws Prior to assembly oil all components thoroughly Mount the split needle bearing 2 and the 2nd speed idler gear 1 with the recess for shift dogs facing upward on the countershaft Mount the stop disc 3 25 2x32x1 5mm and circlip 4 with the sharp edge facing upward Mount the 6th speed sliding gear 5 with the shift groove f...

Page 140: ...free wheel out of the free wheel hub and check the contact surface A for pressure marks Clean the free wheel hub thoroughly Free wheel 4 Thoroughly clean the free wheel with petroleum and compressed air Check the segments of the free wheel for wear Then oil the free wheel thoroughly Free wheel gear 5 Slip the free wheel gear onto the crankshaft and check for clearance If necessary replace the need...

Page 141: ...ee wheel 2 Remove the 6 bolts 4 Use a plastic hammer to tap on the free wheel hub 5 from the side and dismount the free wheel hub Mount the new free wheel hub on the primary wheel Degrease the threads of the bolts apply Loctite 648 and tighten the bolts in a crosswise order to 16 Nm Oil the free wheel 2 thoroughly and insert it into the free wheel hub 5 Use circlip pliers to insert the spreader ri...

Page 142: ...UNTING THE OUTER CLUTCH HUB AND THE DRIVER 6 7 MOUNTING THE PRIMARY GEAR NUT 250 EXC AND ALL MOD FROM 2003 6 8 MOUNTING THE TIMING GEAR 6 9 MOUNTING THE PISTON AND CYLINDER 6 10 MOUNTING THE CYLINDER HEAD 6 10 MOUNTING THE CYLINDER HEAD TOP PORTION 6 12 MOUNTING THE TIMING CHAIN TENSIONER 6 13 ADJUSTING THE VALVE CLEARANCE 6 13 MOUNTING THE FLYWHEEL 6 14 MOUNTING THE PULSE GENERATOR AND THE IGNITI...

Page 143: ...rt the crankshaft into the bearing seat Turn the crankshaft such that the mark A is in front and insert the balancer shaft into the bearing seat Make sure that the mark A on the crankshaft is between the 2 marks B on the balancer shaft Mounting the shift mechanism and transmission Turn the engine sideward Insert main shaft 1 and countershaft 2 into the bearing seats simultaneously Apply grease to ...

Page 144: ...es Insert shift roller into bearing seat ONLY ENGINES WITH 4 SPEED SHIFTING NOTE The shift roller must be turned with the shift roller mounted such that the pin A faces vertically downward Engage the shift forks in the shift roller and mount the two shift rails 2 together with the springs Make sure that the following parts were mounted inner bearing ring 3 O ring 4 stop disc 5 2 dowels in the engi...

Page 145: ... the projecting casing gasket at the cylinder base away neatly at the sealing surfaces Mounting the primary gear and the freewheel 400 520 models until 2002 Turn the crankshaft to TDC and mount the crankshaft fixing bolt without a sealing ring Check if the Woodruff key has been mounted in the crankshaft Thoroughly oil the free wheel and the needle cage in the free wheel gear Insert the free wheel ...

Page 146: ...the oil pump shaft NOTE If the shift lock has been removed it can easily be mounted at this point see page 6 6 Slide on the oil pump wheel 3 mount the stop disc 4 and the tab washer 5 By turning the oil pump wheel check whether the oil pump shaft moves smoothly Wipe the seating surface of the oil pump cover clean Insert the outer and inner rotors into the engine casing such that the two marks A an...

Page 147: ...olt to 10 Nm Grease the preassembled shift shaft and together with the stop disc slide it into the bearings until the sliding plate abuts the roller driving pin Push back the sliding plate and push the shift shaft in up to the stop Check whether the legs A of the return spring abut the casing nose B on both the left and right sides Slip on the shift lever and shift through all gears Turn the main ...

Page 148: ...r spring such that the distance to the kickstarter shaft is the same all around Mounting the outer clutch hub and driver up to the 2002 model Mount the stop disc and the bearing bush Oil the bearing bush slip the outer clutch hub and the stop disc 4 onto the main shaft NOTE From Model 2001 onwards the support washer 4 is replaced by a step washer and two needle bearings 5 are mounted instead of th...

Page 149: ...er gear will remain in the engine case Block the outer clutch hub with the special tool 590 29 003 100 7 see photo and tighten the collar nut to 120 Nm Secure the collar nut with a lock washer as illustrated NOTE A used driver can usually be mounted without heating Mounting the primary gear nut 250 EXC models after 2002 and all models after 2003 Apply the special tool 590 29 003 100 7 as illustrat...

Page 150: ...forget the 2 bushings NOTE 2 mounting points for the tensioning rail are provided for models from 2003 The tensioning rail is attached to point A on the 450 SX model The tensioning rail is attached to point B on all other models CAUTION AFTER TIGHTENING CHECK THE TENSIONING RAIL FOR SMOOTH OPERATION Place the timing chain such that both ends are of equal length NOTE The timing chain can also be pu...

Page 151: ...RCISE EXTREME CAUTION WHEN MOUNTING THE CYLINDER THE OIL SCRAPER RING CAN BREAK EASILY Mounting the cylinder head Check the two dowels in the cylinder for perfect fit Apply a new cylinder head gasket the labeling ALTO facing upward and mount the cylinder head At the same time insert the timing chain NOTE see Technical Information Oil the 4 collar bolts at their threads and their seating surfaces a...

Page 152: ...e on top NOTE When mounting the camshaft you have to use the crankshaft fixing bolt to block the crankshaft in the TDC position Place the timing chain onto the camshaft gear and mount a new rivet link 1 At first mount the socket of the special tool 590 29 020 000 as shown and then compress the rivet link Mount the socket of the special tool as shown and rivet on the rivet link NOTE The rivet membe...

Page 153: ...end piece inwards and tighten the bolt in the area of the end piece Tighten the remaining bolts in a crosswise order to 10 Nm Axial clearance rocker arms 0 02 0 10 mm The following steps only apply to models from 2002 onwards Slip on the assembling sleeve 590 29 005 010 A Grease the O rings and mount the gasket carrier 2 without canting the collar facing the camshaft gear CAUTION ALWAYS USE THE AS...

Page 154: ...e adjusting screw Valve clearance 0 12 mm CAUTION IF THE PISTON IS NOT IN THE IGNITION TDC POSITION THE VALVES WILL BE ACTUATED BY THE ROCKER ARMS AND IT WILL NOT BE POSSIBLE TO ADJUST THE VALVE CLEARANCE CORRECTLY IN THIS CASE THE ENGINE MUST BE TURNED ONE REVOLUTION FURTHER AND BLOCKED AGAIN NOTE The feeler gauge must be pointed and bent slightly to adjust the valve clearance for the 450 525 SX ...

Page 155: ... 25 Nm see above Check the Woodruff key in the crankshaft for proper fit and slip the flywheel onto the crankshaft Mount the shaft disk and collar nut Counteracting with the clutch holder tighten the and collar nut to 60 Nm Mounting the pulse generator and the ignition cover Position the pulse generator in the engine casing and insert the cable grommet 2 into the aperture of the casing Degrease th...

Page 156: ...ch disks 6 1 4 mm are positioned on the inside see drawing Mounting the pressure piece Apply the pressure cap and mount the clutch springs the spring retainers and the collar bolts Apply Loctite 243 to the collar bolts 7 and tighten crosswise to 8 Nm Verify that the two dowels have been mounted in the engine casing Grease all shaft seal rings in the clutch cover and fix the clutch cover gasket wit...

Page 157: ...Mounting the electric starter Oil the O ring of the E starter motor and insert the E starter motor into the engine casing Mount the 2 screws 4 M6x20 and tighten to 8 Nm Oil the spacer bushing 5 and slip it onto the countershaft with the recess for the O ring facing inward Slide the sprocket on with the high collar facing inward Degrease the thread of the collar screw coat it with Loctite 243 and m...

Page 158: ... kickstart and shift lever How to fill in engine oil Mount the plugs 3 and 4 and the oil drain plug 5 and tighten them NOTE Tightening torque 3 10 Nm 4 15 Nm and 5 20 Nm Remove the oil dipstick at the clutch cover and fill in 1 20 liter of synthetic 10W 50 engine oil e g Motorex Power Synt 4T Reattach the plug and check the engine for leaks NOTE The engine oil level must be checked once more after...

Page 159: ...CDI UNIT 7 5 CHECKING THE IGNITION COIL 7 5 TROUBLESHOOTING IN THE IGNITION SYSTEM 7 5 IGNITION 7 6 REPLACING THE STATOR 7 6 MAIN FUSE 7 7 CHECKING THE ELECTRIC STARTER MOTOR 7 7 CHECKING THE STARTER RELAY 7 7 MEASUREMENTS WITH PEAK VOLTAGE ADAPTER STATIC IGNITION VALUES 250 525 SX MXC EXC RACING 7 8 STATIC GENERATOR VALUES 250 525 SX MXC EXC RACING 7 10 DYNAMIC GENERATOR VALUES 250 525 SX MXC EXC...

Page 160: ...ger item no 584 29 074 000 is available from KTM You can also use the battery charger to test the battery s off load voltage startability and the generator capacity Remove the battery and check the charging level Use a voltmeter to measure the voltage between the battery poles off load voltage Accurate results can only be obtained if the battery has neither been charged nor discharged during a per...

Page 161: ...FOLLOW THE INSTRUCTIONS OF THE MANUFACTURER WHEN FILLING A NEW BATTERY THE RELEVANT SAFETY INSTRUCTIONS ARE ALSO CONTAINED IN THE USER MANUAL SUPPLIED WITH THE BATTERY FAILURE TO OBSERVE THESE INSTRUCTIONS CAN RESULT IN SEVERE INJURIES Checking the capacitor Discharge the capacitor by bridging the two connections with a cable bridge and dismount it Connect the negative pole of a 12V battery with t...

Page 162: ...sive voltage in the circuit The bulbs burn out In this case the voltage regulator must be replaced Checking the charging voltage NOTE The values stated below only apply to fully charged batteries minimum charging level 90 Start the engine and switch on the low beam Connect a voltmeter to both battery connections Accelerate the engine to a speed of 5000 rpm and read the voltage Nominal value 14 0 1...

Page 163: ...l off the spark plug connector Disconnect the spark plug connector from the ignition cable Hold the free end of the ignition cable approximately 5 mm 0 1968 in from the ground A strong spark should be visible when the electric starter is operated If the battery level is low turn off the light and use the kick starter If a spark is visible replace the spark plug connector Twist out the spark plug a...

Page 164: ...del Replacing the stator 4K 3A Remove the bolt 1 and dismount the retaining plate Remove the 2 bolts 2 and take the stator out from the ignition cover Place a new stator in the ignition cover Degrease the threads of all 3 bolts and apply Loctite 243 Mount the bolts and tighten them to 6 Nm Place the wire harness in a non energized condition and secure it with the retaining plate Do not forget the ...

Page 165: ...r motor Disconnect the negative pole of the battery and remove the electric starter motor Connect the negative pole of a 12 V battery to the housing of the E starter motor and briefly connect the positive pole of the battery to connection 3 of the electric starter motor use thick cables The starter must turn as soon as the circuit is closed If this is not the case replace the starter motor Checkin...

Page 166: ...te cable disconnect connector 3 to disconnect the CDI unit 2 Multimeter display 30 volts 35 volts for 400 SX 5 volts Same measurement with connectors CDI unit connected Multimeter display 200 volts 10 volts Check the primary voltage output 4 for ignition coil control also see circuit diagram on opposite page for output voltage blue white cable color Apply the red measuring lead R of the peak volta...

Page 167: ...asher right front flasher handle bar switch left front flasher rear brake switch regulator rectifier U rear light brakelight start button generator G 3 ye bl ye bl cooling fan black 10 br ye re br ye re ye re re gn bu pu br wh br br ye re bl br br bl ye re br wh bu gn ye re br ye re or bl pu or br wh gn ye ye bl br bl wh ye bl br bu wh re wh re bl ye re bl gn TPS re re br gn pu bl re bl re wh ye y...

Page 168: ...peak voltage adapter must be applied to the ground Check regulator rectifier output voltage 9 also see circuit diagram on opposite page cable colors yellow red regulator rectifier bk connected capacitor disconnected if installed and fuse bm removed between yellow red and brown ground Multimeter display 14 volts 1 volt NOTE The black measuring lead S of the peak voltage adapter must be applied to t...

Page 169: ...tuated engine running at idle speed Multimeter display 12 volts 1 volt Stressed light switched on horn and brake actuated engine running at increasing speed up to 8000 rpm Multimeter display 13 volts 1 volt NOTE The black measuring lead on the peak voltage adapter should be applied to the ground negative terminal Check the charge current remove main fuse apply the multimeter measuring leads withou...

Page 170: ...T NEEDLE VALVE 8 11 CHECKING THE THROTTLE VALVE 8 11 ASSEMBLING THE CARBURETOR KEIHIN FCR 35 39 8 12 ASSEMBLING THE CARBURETOR KEIHIN FCR MX 37 39 41 8 15 ADJUSTING THE POSITION OF THE THROTTLE VALVE SENSOR 8 18 CHECKING THE THROTTLE VALVE SENSOR 8 19 DISMOUNTING AND INSTALLING THE THROTTLE VALVE SENSOR 8 19 CARBURETOR ADJUSTING IDLING KEIHIN FCR 35 39 8 20 CHECKING ADJUSTING THE FLOAT HEIGHT 8 20...

Page 171: ...023 E 8 2E CARBURETOR KEIHIN FCR 35 39 NOTE The Keihin FCR 39 carburetor 400 520 Racing has a larger air trumpet and a different carburetor jets than the Keihin 35 carburetor 250 Racing The FCR 39 carburetor is also equipped with a throttle sensor ...

Page 172: ...8 3E CARBURETOR KEIHIN FCR MX 37 39 41 ...

Page 173: ... throttle valve sensor Loosen the 2 hose clamps 3 4 and pull the carburetor out of the connection boot To install the carburetor insert it into the connection boot and secure it with the 2 hose clamps Make sure that the carburetor is installed vertically in relation to the vehicle Mount and adjust both throttle cables and check whether the throttle grip moves smoothly Connect the plug 5 of the thr...

Page 174: ...f the carburetor in perfect order Dismount the carburetor and remove any coarse dirt Remove the wire clip 1 and pull the ventilation hoses out of the carburetor Disconnect the hose 2 Loosen the 2 bolts 3 and dismount all ventilation hoses from the carburetor Remove the 2 bolts 4 and dismount the slide cover together with its gasket Remove the bolt 5 and take the jet needle out of the throttle valv...

Page 175: ...e the 2 sealing rings the spring and the diaphragm from the pump housing Remove the screw and dismount the float chamber Unhitch the push rod 3 of the accelerator pump and dismount it Take the plastic part 4 off the needle jet Loosen the screw 5 pull out the float hinge pin 6 and dismount the float together with the float needle valve Remove the screw 7 and use pliers to carefully extract the seat...

Page 176: ...ed again Remove the screw and the clip together with the bushing and pull the connection piece 5 out of the carburetor Remove the 2 screws and take the intake trumpet together with the O ring 6 off the carburetor Unscrew the idle air jet 7 and the main air jet 8 Thoroughly clean all jets and other parts and blow compressed air through them Clean the carburetor housing and blow compressed air throu...

Page 177: ...t all individual components of the carburetor in perfect order Dismount the carburetor and remove any coarse dirt Loosen both screws 1 and remove all of the vent hoses from the carburetor Remove both screws 2 and remove the slide cover and gasket from the carburetor Remove screw 3 and pull the jet needle out of the throttle slide Remove screw 4 Pull the throttle slide arm up and take the throttle ...

Page 178: ... and remove the float together with the float needle valve Remove the main jet 2 Remove the screw 3 and use pliers to carefully extract the seat of the float needle valve from the carburetor Screw out the idling jet 4 the starting jet 5 and the needle jet 6 Turn in the mixture control screw 7 down to the stop count the number of turns and write it down Turn out the mixture control screw and dismou...

Page 179: ...gain Remove screw 3 and pull the connecting piece out of the carburetor Remove the 2 screws and take the intake trumpet together with the O ring 4 off the carburetor Unscrew the idle air jet 5 and the main air jet 6 Thoroughly clean all jets and other parts and blow compressed air through them Clean the carburetor housing and blow compressed air through all the ducts in the carburetor Check all ga...

Page 180: ...cking the accelerator pump Check the membranes for cracking or brittleness Check gaskets for damage Check if the bores 2 are unobstructed Checking the jet needle Check the jet needle for bending and wear Checking the float needle valve Check the sealing surface of the needle valve for notches There must not be any dirt between the valve seat and the float needle Checking the throttle valve The rol...

Page 181: ... piece must be easy to turn Mount the choke slide 5 and actuate it several times checking whether it can be moved smoothly In addition check whether the choke locks properly Thread the spring the washer and the O ring onto the mixture control screw 6 and screw the mixture control screw in as far as it will go Now unscrew the mixture control screw the number of turns written down during disassembly...

Page 182: ...push rod 2 of the accelerator pump slides into the bore Place the membrane 3 with the labeling facing upwards and the spring into the pump housing Place the O ring 4 into the groove Secure the sealing ring 5 with some grease in the cover and fasten the cover by means of 3 screws Turn the cable disc and push the throttle valve into the carburetor such that the rollers 6 engage the throttle valve se...

Page 183: ...hould be identical Then turn the cable disc and check if the throttle valve moves smoothly Mount the jet needle and secure it with the screw 4 Position the slide cover and gasket and fasten with 2 screws Secure the ventilation hoses with the 2 screws 5 of the float chamber and connect the hose 6 Insert the 2 hose connections into the bores and fasten them with the retaining clip 7 Mount the thrott...

Page 184: ...de 5 the hot start knob 6 and actuate several times checking for smooth operation Also make sure the choke and the hot start knob lock into place Thread the spring the washer and the O ring onto the mixture control screw 7 and screw the mixture control screw in as far as it will go Now unscrew the mixture control screw the number of turns written down during disassembly NOTE See the Technical Spec...

Page 185: ... into the bore Place the membrane 5 with the labeling facing upwards and the spring into the pump housing Place the O ring 6 into the groove Secure the sealing ring 7 with some grease in the cover and fasten the cover by means of 3 screws Mount the throttle valve sensor such that the flat spot at the carburetor engages the groove of the throttle valve sensor and secure it by means of the screw Pul...

Page 186: ...pply Loctite 243 to the screw 1 and tighten Mount the jet needle and fix with the screw 2 Position the slide cover with the gasket and fasten with the 2 screws 3 Fix the vent hoses on the float chamber with the 2 screws 4 ...

Page 187: ...justment value for the throttle valve sensor EXAMPLE Throttle valve sensor resistance bl s 5kΩ Throttle valve sensor resistance ge s 5 kΩ x 0 15 750 Ω 50 Ω Connect the multimeter measuring range Ω x100 to the yellow and the black cable of the throttle valve sensor and measure the throttle valve sensor resistance with the throttle grip closed According to the above example this value should be 750Ω...

Page 188: ...hrottle valve sensor As you open the throttle grip slowly the resistance must change evenly Resistance of throttle valve sensor 0 5 kΩ 1 kΩ while opening the throttle grip Dismounting and installing the throttle valve sensor Disconnect the plug and socket connection of the throttle valve sensor and remove the screws 1 Take the throttle valve sensor off the carburetor When mounting the throttle val...

Page 189: ...n a satisfying result by following the procedure described above an incorrectly dimensioned idling nozzle may be the cause In this case a the mixture control screw has been screwed in up to the stop without causing any change in rotational speed a smaller idling jet has to be installed b the engine dies when the mixture control screw is still open by 2 turns a larger idling jet needs to be selecte...

Page 190: ...rew has been screwed in up to the stop without causing any change in rotational speed a smaller idling jet has to be installed b the engine dies when the mixture control screw is still open by 2 turns a larger idling jet needs to be selected Naturally in cases of jet changes you have to start your adjusting work from the beginning 5 Then use the adjusting wheel to set the desired idle speed 6 In c...

Page 191: ...TROUBLE SHOOTING Repair manual KTM 250 610 Racing Art Nr 3 206 023 E 9 1E 9 250 610 RACING 9 2 INDEX ...

Page 192: ...flammable components of the new fuels evaporate during longer periods of standing still When the motorcycle has been out of operation for more than a week it is therefore recommended to drain the old fuel from the float chamber The engine will immediately start when the float chamber is filled with new fuel Close fuel tap loosen fuel hose at carburetor lead into a basin and open fuel tap if fuel l...

Page 193: ...y The battery isn t charged by the generator because REMEDY Dismount carburetor and check if worn out Tighten jets Have ignition system checked Clean and check fuel system as well as carburetor Replace the float Clean or replace air filter Check if exhaust is damaged replace glasfiber yarn in exhaust silencer Adjust valve gap Check setting of the hand decompression cable Have ignition system check...

Page 194: ...K SHOCK ABSORBER 10 9 MODEL 2003 TECHNICAL SPECIFICATIONS ENGINE 10 10 BASIC CARBURETOR SETTING 10 11 TECHNICAL SPECIFICATIONS CHASSIS 10 12 STANDARD ADJUSTMENT FORK SHOCK ABSORBER 10 12 MODEL 2004 TECHNICAL SPECIFICATIONS ENGINE 250 450 525 SX MXC EXC 10 13 BASIC CARBURETOR SETTING 250 450 525 SX MXC EXC 10 14 TECHNICAL SPECIFICATIONS ENGINE 400 EXC 450 525 SMR 450 540 SXS 10 15 BASIC CARBURETOR ...

Page 195: ...SMR 450 540 SXS 610 CRATE 10 22 BASIC CARBURETOR SETTING 450 525 SMR 540 SXS 610 CRATE 10 23 TECHNICAL SPECIFICATIONS CHASSIS 250 400 450 525 SX MXC EXC 10 24 STANDARD ADJUSTMENT FORK SHOCK ABSORBER 250 400 450 525 SX MXC EXC 10 24 TECHNICAL SPECIFICATIONS CHASSIS 450 525 SMR 540 SXS 10 25 STANDARD ADJUSTMENT FORK SHOCK ABSORBER 450 525 SMR 540 SXS 10 25 MOUNTING CLEARANCES WEAR LIMITS 10 26 TIGHT...

Page 196: ... 4 speed claw shafted 6 speed claw shafted Gear ratio 1st Gear 14 34 14 34 14 34 14 34 2nd Gear 18 30 17 31 18 30 17 31 3rd Gear 20 28 19 28 20 28 19 28 4th Gear 22 26 22 26 22 26 22 26 5th Gear 24 23 24 23 6th Gear 26 21 26 21 Iginition system contactless DC CDI ignition with digital advanced system by KOKUSAN Generator 12V 40W 12V 110W Spark plug NGK CR8 EK Spark plug gap 0 60 mm Cooling system ...

Page 197: ...1 0 bar 14 psi 1 0 bar 14 psi 1 0 bar 14 psi Air pressure road driver only 2 0 bar 28 psi 2 0 bar 28 psi Fuel tank capacity 7 5 Liter 2 US Gallons 9 Liter 2 3 US gallons Final drive ratio 14 50 14 48 400 15 45 520 15 40 400 14 50 520 14 48 Chain O ring 5 8 x 1 4 Available final sprockets 38 40 42 45t 48 50 52 Steering head angle 63 5 Wheel base 1481 10 mm 58 3 0 4 in Seat height unloaded 925 mm 36...

Page 198: ...2 14 34 2nd Gear 18 30 18 30 17 31 18 30 18 30 17 31 3rd Gear 20 28 20 28 19 28 20 28 20 28 19 28 4th Gear 22 26 22 26 22 26 22 26 22 26 22 26 5th Gear 24 24 24 24 24 23 24 24 24 23 6th Gear 21 18 21 18 26 21 21 18 26 21 Ignition system contactless DC CDI ignition with digital advanced system by KOKUSAN Generator 12V 40W 12V 150W Spark plug NGK CR8 EK Spark plug gap 0 6 mm 0 0236 in Cooling system...

Page 199: ... in brake caliper floated Rear brake Disk brake with carbon steel brake disc Ø 220 mm 8 7 in brake caliper floated Brake disc Wear limit max 0 4 mm 0 016 in Front tires 80 100 21 90 90 21 80 100 21 Air pressure offroad 1 0 bar 14 psi 1 0 bar 14 psi 1 0 bar 14 psi Air pressure road driver only 1 5 bar 21 psi 1 5 bar 21 psi Rear tires 110 90 19 140 80 18 110 100 18 Air pressure offroad 1 0 bar 14 ps...

Page 200: ... two rotor pumps Engine oil full synthetic oil Shell Advance Ultra 4 SAE 10W40 Quantity of engine oil 1 25 liters Primary ratio straight geared spur wheels 33 76 Z Clutch multi disc clutch in oil bath Transmission claw shifted 6 speed 6 speed 6 speed 6 speed 4 speed 6 speed 6 speed Gear ratio 1st Gear 14 38 16 32 16 32 14 34 16 32 16 32 14 34 2nd Gear 16 36 18 30 18 30 17 31 18 30 18 30 17 31 3rd ...

Page 201: ...pump membrane 0 0 3 2 mm 3 2 mm 400 SX RACING 400 MXC EXC RACING 250 EXC RACING 250 EXC RACING 8 3 kW 400 EXC RACING 12 kW 520 EXC RACING 12 5 kW BASIC CARBURATOR SETTING Type Keihin CR39 Keihin CR39 Keihin CR39 Keihin CR39 Carburator setting number 250899 100699 250401 240401 Main jet 175 175 175 175 Jet needle OBDTM OBDTM OBDVR OBDVR Idling jet 48 48 48 45 Main air jet 200 200 200 200 Idling air...

Page 202: ...ure road driver only 1 5 bar 1 5 bar 21 psi Rear tires 110 90 19 140 80 18 110 100 18 Air pressure offroad 1 0 bar 14 psi 1 0 bar 14 psi 1 0 bar 14 psi Air pressure road driver only 2 0 bar 28 psi 2 0 bar 28 psi Fuel tank capacity 7 5 liters 2 US gallons EXC 8 5 liters 2 1 US gallons MXC 13 Liter 3 5 gallons Final drive ratio 400 14 50t 520 14 48t 250 12 52t 400 15 45t 520 15 40t 400 14 50t 520 14...

Page 203: ...h two rotor pumps Engine oil full synthetic oil Shell Advance Ultra 4 SAE 10W40 Quantity of engine oil 1 25 liters Primary ratio straight geared spur wheels 33 76 Z Clutch multi disc clutch in oil bath Transmission claw shifted 6 speed 4 speed 6 speed 6 speed 4 speed 6 speed 6 speed Gear ratio 1st Gear 14 38 16 32 16 32 14 34 16 32 16 32 14 34 2nd Gear 16 36 18 30 18 30 17 31 18 30 18 30 17 31 3rd...

Page 204: ...de stop Stop pump membrane 858 2 15 mm 858 2 15 mm 858 2 15 mm 858 2 15 mm Hot start device 2 2 mm 250 EXC RACING Six Days 250 EXC RACING 11 kW 450 EXC RACING 12 kW BASIC CARBURATOR SETTING Type Keihin FCR MX 39 Keihin FCR MX 39 Keihin FCR MX 41 Carburator setting number 3900A 3900B 4125A Main jet 178 178 185 Jet needle OBDTN OBDVT OBDTP Idling jet 42 42 42 Main air jet 200 200 200 Idling air jet ...

Page 205: ...ers 2 US gallons EXC 8 liters 2 1 US gallons MXC 13 Liter 3 5 gallons Final drive ratio 450 14 50t 525 14 48t 250 12 52t 450 15 45t 525 15 40t 450 14 50t 525 14 48t Chain X Ring 5 8 x 1 4 Available final sprockets 38t 40t 42t 45t 48t 50t 52t Bulbs headlight HS1 12V 35 35W parking light 12V 5W Sockel W2 1x9 5d brake rear light 12V 21 5W Sockel BaY15d flasher light 12V 10W Sockel Ba15s license plate...

Page 206: ...rculation lubrication with two rotor pumps Engine oil full synthetic oil Motorex Power Synt 4T 10W 50 Quantity of engine oil 1 25 liters Primary ratio straight geared spur wheels 33 76 Z Clutch multi disc clutch in oil bath Transmission claw shifted 6 speed 4 speed 6 speed 6 speed 4 speed 6 speed 6 speed Gear ratio 1st Gear 14 38 16 32 16 32 14 34 16 32 16 32 14 34 2nd Gear 16 36 18 30 18 30 17 31...

Page 207: ... OBDVR OBDVR OBDTP OBDTN Idling jet 42 42 40 42 Main air jet 200 200 200 200 Idling air jet 100 100 100 100 Needle position 3 rd from top 3 rd from top 4 rd from top 2 rd from top Starting jet 85 85 85 85 Mixture control screw open 1 25 1 25 1 0 1 5 Slide 15 15 15 15 Performance restrictor Slide stop Stop pump membrane 858 2 15 mm 858 2 15 mm 858 2 15 mm 858 2 15 mm Hot start device 2 2 mm 450 EXC...

Page 208: ...nze bushing forged Piston rings 1 compression ring 1 oil scraper ring Engine lubrication pressure circulation lubrication with two rotor pumps Engine oil full synthetic oil Motorex Power Synt 4T 10W 50 Quantity of engine oil 1 25 Liter Primary ratio straight geared spur wheels 33 76 Clutch Mehrscheibenkupplung im Ölbad Transmission claw shifted 6 speed 6 speed 6 speed 4 speed Gear ratio 1st Gear 1...

Page 209: ...OBDTP OBDTP Idling jet 42 40 42 40 42 Main air jet 200 200 200 200 200 Idling air jet 100 100 100 100 100 Needle position 1st from top 4th from top 4th from top 4th from top 4 von oben Starting jet 85 85 85 85 85 Mixture control screw open 1 25 1 1 5 1 1 5 Slide 15 15 15 15 15 Performance restrictor slide stop Stop pump membrane 858 2 15 mm 858 2 15 mm 858 2 15 mm 858 2 15 mm 858 2 15 mm Hot start...

Page 210: ...8 psi Fuel tank capacity 7 liters 2 US gallons EXC 8 5 liters 2 1 US gallons MXC 13 Liter 3 5 gallons Final drive ratio 450 14 52t 525 14 48t 250 15 45t 450 15 45t 525 15 45t 450 14 50t 525 14 48t Chain X Ring 5 8 x 1 4 Available final sprockets 38t 40t 42t 45t 48t 50t 52t Bulbs headlight HS1 12V 35 35W parking light 12V 5W Sockel W2 1x9 5d brake rear light 12V 21 5W Sockel BaY15d flasher light 12...

Page 211: ... only 90 90 21 1 0 bar 1 5 bar 120 75 R 17 KR 106 1 5 bar 80 100 21 1 0 bar Rear tires Air pressure offroad Air pressure road driver only 140 80 18 1 0 bar 2 0 bar 165 55 R 17 KR 108 1 6 bar 110 90 19 1 0 bar Fuel tank capacity 8 5 Liter 7 0 Liter Final drive ratio 15 45 14 45 450 14 52 525 14 48 Chain X Ring 5 8 x 1 4 Available final sprockets 38Z 40Z 42Z 45Z 48Z 50Z 52Z Bulbs headlight HS1 12V 3...

Page 212: ... mm Spring preload 5 mm 5 mm 513 mm Air chamber length 120 mm 100 mm 110 mm Fork oil SAE 5 SAE 5 SAE 5 STANADARD ADJUSTMENT SHOCK ABSORBER 400 EXC 450 525 SMR 450 540 SXS WP 5018 PDS MCC 1218Y772 WP 5018 PDS DCC 1218Y787 WP 5018 PDS BAVP 12187A06 Compression adjuster 19 13 LS low speed 2 HS high speed 15 LS low speed 2 HS high speed Rebound adjuster 24 19 22 Spring 88 250 92 250 87 5 240 Spring pr...

Page 213: ...ation lubrication with two rotor pumps Engine oil full synthetic oil Motorex Power Synt 4T 10W 50 Quantity of engine oil 1 25 liters Primary ratio straight geared spur wheels 33 76 Z Clutch multi disc clutch in oil bath Transmission claw shifted 6 speed 6 speed 4 speed 6 speed 6 speed 4 speed 6 speed 6 speed Gear ratio 1st Gear 14 38 14 34 16 32 16 32 14 34 16 32 16 32 14 34 2nd Gear 16 36 17 31 1...

Page 214: ...ACING EU AUS 12 kW Type Keihin FCR MX 3900A Keihin FCR MX 3900A Keihin FCR MX 4122A Keihin FCR MX 3900B Main jet 178 178 185 178 Jet needle OBDVR OBDTR OBDTP OBDVT Idling jet 42 42 40 42 Main air jet 200 200 200 200 Idling air jet 100 100 100 100 Needle position 3rd from top 4th from top 4th from top 3rd from top Starting jet 85 85 85 85 Mixture control screw open 1 25 2 0 1 0 1 25 Slide 15 15 15 ...

Page 215: ...g Piston alluminium alloy forged Piston rings 1 compression ring 1 oil scraper ring Engine lubrication pressure circulation lubrication with two rotor pumps Engine oil full synthetic oil Motorex Power Synt 4T 10W 50 Quantity of engine oil 1 25 liters Primary ratio straight geared spur wheels 33 76 Clutch multi disc clutch in oil bath Transmission claw shifted 6 speed 6 speed 4 speed 6 speed Gear r...

Page 216: ...185 185 190 Jet needle OBDTP OBDTP OBDTP OBDTP Idling jet 40 42 42 45 Main air jet 200 200 200 200 Idling air jet 100 100 100 100 Needle position 4th from top 4th from top 4th from top 4th from top Starting jet 85 85 85 85 Mixture control screw open 1 0 1 5 1 0 1 5 Slide 15 15 15 15 Performance restrictor Stop pump membrane 858 2 15 mm 858 2 15 mm 858 2 15 mm 858 2 15 mm Hot start device 2 2 mm 2 ...

Page 217: ... 13 Liter 3 5 gallons Final drive ratio 450 14 52Z 525 14 48Z 250 15 45Z 450 15 45Z 525 15 45Z 450 14 50Z 525 14 48Z Chain X Ring 5 8 x 1 4 Available final sprockets 38Z 40Z 42Z 45Z 48Z 50Z 52Z Bulbs headlight 12V 35 35W Sockel BA20D parking light 12V 5W Sockel W2 1x9 5d brake rear light 12V 21 5W Sockel BaY15d flasher light 12V 10W Sockel Ba15s license plate illmination 12V 1 2W Sockel 1x4 6d Bat...

Page 218: ...5 55 R 17 KR 108 1 6 bar 110 90 19 1 0 bar Fuel tank capacity 7 0 liters Final drive ratio 14 45 450 14 52 525 14 48 Chain X Ring 5 8 x 1 4 Available final sprockets 38Z 40Z 42Z 45Z 48Z 50Z 52Z Steering head angle 63 5 Wheel base 1481 10 mm Seat height unloaded 855 mm 925 mm TECHNICAL DATA CHASIS 450 525 SMR 450 540 SXS RACING 2005 STANDARD ADJUSTMENT FORK 450 525 SMR 450 540 SXS WP4860PAMA 14 18 ...

Page 219: ... I 0 050 0 092 mm assembly clearance size II 0 052 0 095 mm wear limit 0 12 mm Piston 450 EXC MXC diameter size I 88 916 88 946 mm diameter size II 88 926 88 958 mm assembly clearance size I 0 054 0 096 mm assembly clearance size II 0 056 0 099 mm wear limit 0 12 mm Piston 520 MXC EXC diameter size I 94 942 94 950 mm diameter size II 94 951 94 956 mm assembly clearance size I 0 060 0 070 mm assemb...

Page 220: ... spring 32 40 mm minimum length of the inner spring 30 20 mm Valve springs 540 SXS 610 CRATE minimum length of the outer spring 32 90 mm minimum length of the inner spring 30 70 mm Oil pumps clearance outer rotor housing max 0 20 mm clearance outer rotor inner rotor max 0 20 mm axial clearance 0 15 mm Bypass valve minimum spring length 23 5 mm Clutch length of springs min 41 5 mm new 43 mm wear li...

Page 221: ...ite 243 120 Nm Hexagon collar screw clutch spring M6 Loctite 243 8 Nm Allan head screw shift roller locking piece M6 Loctite 243 10 Nm Hexagon collar screw locking lever M5 Loctite 243 6 Nm Hexagon collar screw shift roller M5 Loctite 243 6 Nm Hexagon collar screw securing guide chain guide chain tensioner M6 Loctite 243 6 Nm Hexagon collar screw clip M5 Loctite 243 6 Nm Hexagon collar screw chain...

Page 222: ... M20x1 5 80 Nm Hexagon nut swing arm bolt M14x1 5 M16x1 5 100 Nm Hexagon collar screw handlebar clamp M8 Loctite 243 20 Nm Allan head screw handlebar support M10 Loctite 243 40 Nm Shock absorber top bottom M12 80 Nm Sprocket nuts M8 Loctite 243 35 Nm Ball joint for push rod M6 Loctite 243 10 Nm Engine mounting bolt M10 60 Nm Engine brace M8 33 Nm Screw adjusting ring spring preload shock abs M6 8N...

Page 223: ...Repair manual KTM 250 610 Racing Art Nr 3 206 023 E PERIODIC MAINTENANCE SCHEDULE MODEL 2000 11 2 MODEL 2001 11 4 MODEL 2002 11 6 MODEL 2003 11 8 MODEL 2004 11 12 MODEL 2005 11 16 INDEX 11 1E 11 ...

Page 224: ...aulic clutch 䢇 Check adjustment and function of telescopic fork 䢇 䢇 Check telescopic fork for leaks 䢇 Loosen breather bolts at fork legs overpressure 䢇 䢇 Change fork oil 䢇 Perform a full maintenance job for the telescopic fork 䢇 Clean dust bellows on telescopic fork 䢇 䢇 䢇 Check steering head bearing clearance and adjust if necessary 䢇 䢇 Clean and grease steering head bearings and its seals 䢇 Check...

Page 225: ... SX 400 SX 400 MXC EXC 400 MXC EXC 520 SX 520 SX 520 MXC EXC 520 MXC EXC 15 Small Maintenance Kit Small Maintenance Kit 30 Small Maintenance Kit Small Maintenance Kit Small Maintenance Kit Small Maintenance Kit 45 Large Maintenance Kit Large Maintenance Kit 60 Small Maintenance Kit Large Maintenance Kit Small Maintenance Kit Large Maintenance Kit 75 Small Maintenance Kit Small Maintenance Kit 90 L...

Page 226: ...amp setting Check function of electric systems low high beams brake light indicator indicator lamps speedometer illumination horn emergency OFF switch or button Check brake fluid level lining thickness brake discs Check brake lines for damage and leaks Check smooth operation and adjust free travel of handbrake foot brake lever Check tightness of brake system bolts Check shock absorber and fork for...

Page 227: ...ghtness of bolts nuts and hose clamps regularly For cross country use After every cleaning Before each start SUPPLEMENTARY MAINTENANCE INSTRUCTIONS FOR THE 400 520 RACING ENGINE MODEL 2001 ADDITIONAL ORDER FOR KTM WORKSHOP Hours 400 SX 400 MXC EXC 520 SX 520 MXC EXC 15 Small Maintenance Kit Small Maintenance Kit 30 Small Maintenance Kit Small Maintenance Kit Small Maintenance Kit Small Maintenance...

Page 228: ...p setting Check function of electric systems low high beams brake light indicator indicator lamps speedometer illumination horn emergency OFF switch or button Check brake fluid level lining thickness brake discs Check brake lines for damage and leaks Check smooth operation and adjust free travel of handbrake foot brake lever Check tightness of brake system screws Check shock absorber and fork for ...

Page 229: ... contact spray Check tightness of screws nuts and hose clamps regularly For cross country use After every cleaning Before each start CONTINUED TESTS OF THE 250 400 520 RACING MOTOR FOR KTM S SPECIALIZED WORKSHOP ADDITIONAL ORDER FOR KTM S SPECIALIZED WORKSHOP a 100 l fuel consumption is equivalent to approx 15 operating hours Force fit of clutch drive shaft Clutch disk wear Cylinder and piston wea...

Page 230: ...ting Check function of electric systems low high beam brake light indicator lamps speedometer illumination horn emergency OFF switch or button Check brake fluid level lining thickness brake discs Check brake lines for damage and leaks Check function smooth operation and adjust free travel of handbrake foot brake lever Check tightness of brake system screws Check shock absorber and fork for leaks a...

Page 231: ...cate chain check tension and adjust if necessary Clean air filter and filter box Check tires for pressure and wear Check cooling fluid level Check fuel lines for leaks Drain and clean float chamber Check all control elements for smooth operation Check brake performance Treat blank metal parts with the exception of brake and exhaust system with wax based anti corrosion agent Treat ignition and stee...

Page 232: ...k the eccentricity of the valve disk Check the valve guides for wear Check the radial clearance of the rocker arm rollers Check the elongation of the timing chain Check the chain tensioner tooting for damage visual check Check the eccentricity of the crankshaft journal Replace the conrod bearings Check piston pin bearing Replace the balancer shaft bearings Replace the crankshaft main bearings Chec...

Page 233: ...pring cap for wear Check the eccentricity of the valve disk Check the valve guides for wear Check the radial clearance of the rocker arm rollers Check the elongation of the timing chain Check the chain tensioner tooting for damage visual check Check the eccentricity of the crankshaft journal Replace the conrod bearings Check piston pin bearing Replace the balancer shaft bearings Replace the cranks...

Page 234: ...tting Check function of electric systems low high beam brake light indicator lamps speedometer illumination horn emergency OFF switch or button Check brake fluid level lining thickness brake discs Check brake lines for damage and leaks Check function smooth operation and adjust free travel of handbrake foot brake lever Check tightness of brake system screws Check shock absorber and fork for leaks ...

Page 235: ...cate chain check tension and adjust if necessary Clean air filter and filter box Check tires for pressure and wear Check cooling fluid level Check fuel lines for leaks Drain and clean float chamber Check all control elements for smooth operation Check brake performance Treat blank metal parts with the exception of brake and exhaust system with wax based anti corrosion agent Treat ignition and stee...

Page 236: ...entricity of the valve disk Check the valve guides for wear Check the radial clearance of the rocker arm rollers Check the elongation of the timing chain Check the chain tensioner tooting for damage visual check Check the eccentricity of the crankshaft journal Replace the conrod bearings Check piston pin bearing Replace the balancer shaft bearings Replace the crankshaft main bearings Check the ent...

Page 237: ... for wear Check the eccentricity of the valve disk Check the valve guides for wear Check the radial clearance of the rocker arm rollers Check the elongation of the timing chain Check the chain tensioner tooting for damage visual check Check the eccentricity of the crankshaft journal Replace the conrod bearings Check piston pin bearing Replace the balancer shaft bearings Replace the crankshaft main...

Page 238: ...ee travel of handbrake foot brake lever z z Check tightness of brake system screws z z CHASSIS Check shock absorber and fork for leaks and function z z Clean fork dust bellows z Bleed fork legs z Check swing arm bearings z Check adjust steering head bearings z z Check tightness of chassis screws triple clamps fork leg axle passage z z WHEELS Check spoke tension and rim joint z z Check tires and ai...

Page 239: ... and clean fork dust bellows regularly z Clean and lubricate chain check tension and adjust if necessary z z Clean air filter and filter box z Check tires for pressure and wear z Check cooling fluid level z Check fuel lines for leaks z Drain and clean float chamber z Check all control elements for smooth operation z Check brake performance z z Treat blank metal parts with the exception of brake an...

Page 240: ...ength of the bypass valve spring z z z RECOMMENDED INSPECTION OF THE 250 610 RACING ENGINE USED FOR HOBBY ENDURO COMPETITIONS BY THE KTM WORKSHOP ADDITIONAL ORDER FOR THE KTM WORKSHOP a 100 liter fuel consumption is equivalent to approx 15 operating hours 30 hours 200 liter 60 hours 400 liter 90 hours 600 liter 120 hours 800 liter 180 hours 1200 liter 240 hours 1600 liter 270 hours 1800 liter Chec...

Page 241: ...IAGRAMS MODEL 2000 USA 12 2 EU 12 3 MODEL 2001 EU 12 5 USA 12 7 MODEL 2002 USA 12 8 EU 12 9 MODEL 2003 USA 12 11 EU 12 13 MODEL 2004 USA 12 14 EU 12 15 450 525 SX 12 16 MODEL 2005 EXC EUROPA 12 17 EXC USA 12 18 SX SXS SMR 12 19 CABLE COLOURS 12 20 INDEX 12 1E 12 ...

Page 242: ...Repair manual KTM 250 610 Racing Art Nr 3 206 023 E 12 2E ...

Page 243: ...12 3E ...

Page 244: ...12 4E Repair manual KTM 250 610 Racing Art Nr 3 206 023 E ...

Page 245: ...12 5E ...

Page 246: ...Repair manual KTM 250 610 Racing Art Nr 3 206 023 E 12 6E ...

Page 247: ...12 7E ...

Page 248: ...Repair manual KTM 250 610 Racing Art Nr 3 206 023 E 12 8E 250 400 520 MXC EXC RACING 2002 ...

Page 249: ...12 9E Modell 250 400 520 EXC RACING ...

Page 250: ...Repair manual KTM 250 610 Racing Art Nr 3 206 023 E 12 10E 250 400 520 EXC RACING 2002 ...

Page 251: ...250 450 525 MXC EXC 01 02 03 12 11E ...

Page 252: ...12 12E Repair manual KTM 250 610 Racing Art Nr 3 206 023 E ...

Page 253: ...12 13E 250 450 525 EXC Racing 2003 ...

Page 254: ... headlight handle bar switch regulator rectifier U rear light brakelight start bottom generator G 3 ye bl light switch cooling fan black 10 wh br ye re ye re br C_AB 9 ye br br bl wh ye bl br bu wh re wh re bl ye re bl gn TPS re re br gn re bl re wh ye ye re bu wh wh re br wh ye wh re br wh ye bl wh ye ye re bu speed sensor multi func digital speedometer Repair manual KTM 250 610 Racing Art Nr 3 2...

Page 255: ...ght rear flasher right front flasher handle bar switch left front flasher rear brake switch regulator rectifier U rear light brakelight start button generator G 3 ye bl ye bl cooling fan black 10 br ye re br ye re ye re re gn bu pu br wh br br ye re bl br br bl ye re br wh bu gn ye re br ye re or bl pu or br wh gn ye ye bl br bl wh ye bl br bu wh re wh re bl ye re bl gn TPS re re br gn pu bl re bl...

Page 256: ...e green black generator ignition coil throttle position sensor pick up stop button yellow black black brown red blue white I D C red white wiring diagramm SX 450 525 2004 19 05 2003 Repair manual KTM 250 610 Racing Art Nr 3 206 023 E ...

Page 257: ...12 17E ...

Page 258: ...12 18E Repair manual KTM 250 610 Racing Art Nr 3 206 023 E ...

Page 259: ...12 19E SX SXS SMS RACING 2005 450 540 ...

Page 260: ...12 20E Repair manual KTM 250 610 Racing Art Nr 3 206 023 E Cable colours bl black ye yellow bu blue gn green re red wh white br brown or orange pi pink gr grey pu purple ...

Page 261: ...3 05 2002 Frontfork 4860 MX Multi Adjuster 2003 12_234 Introduction 2 Exploded view 3 Disassembly forkleg 4 Disassembly cartridge 17 Disassembly compression holder 21 Assembling compression holder 24 Disassembly tap rebound 27 Assembling tap rebound 31 Assembling cartridge 34 Assembling forkleg 37 ...

Page 262: ... professional tools Regular you need next to the general equipment the special tools of WP Suspension These tools with a unique T number available at WP Suspension protect you from damaging the parts Always use aluminium protector plates when clamping our products or parts in the vice Always replace damaged or worn parts Clean all parts before assembling Caution Many times it is necesarry to assem...

Page 263: ...Workshop manual Product Exploded View Disassembly assembling 3 4860 MXMA Frontfork 4860 MXMA 2003 05 2002 Exploded view ...

Page 264: ...rk 4860 MXMA 2003 05 2002 Note the rebound position by turning the knob to the right After removing the rubber cap Note the compression position by turning the screw to the right Clamp the outer tube in T1403S and unscrew the screw cap PA with T103 12_063 Disassembly forkleg 12_062 ...

Page 265: ...orkshop manual 4860 MXMA 5 Frontfork 4860 MXMA 2003 05 2002 Clamp the forkleg axle clamp in the vice and let the outer tube down Pull the spring downwards and place open end spanner size 22 on the hydraulic stop Unscrew the screw cap 12_067 12_068 ...

Page 266: ... Disassembly Assembling Workshop manual 4860 MXMA 6 Frontfork 4860 MXMA 2003 05 2002 Remove the screw cap from the piston rod 12_070 Remove the preload spacers 12_074 Pull the spring downwards and remove the spanner 12_075 ...

Page 267: ...Product Exploded View Disassembly Assembling Workshop manual 4860 MXMA 7 Frontfork 4860 MXMA 2003 05 2002 Remove the spring 12_076 Remove the adjustment tube with the O ring 12_089 ...

Page 268: ...03 05 2002 Clamp the axle clamp in the vice so that the forkleg is at an angle of 45 degrees 12_095 Unscrew the compression holder out of the axle clamp size 19 when the cartridge is rotating with the holder bend the piston rod a little bit to the side 12_096 Drain the oil out the forkleg 12_094 ...

Page 269: ...mbly Assembling Workshop manual 4860 MXMA 9 Frontfork 4860 MXMA 2003 05 2002 Remove holder compression Caution oil iscoming out the cartridge Disassemble the cartridge out the forkleg 12_097 12_098 12_099 Disassemble the dust wiper ...

Page 270: ...xploded View Disassembly Assembling Workshop manual 4860 MXMA 10 Frontfork 4860 MXMA 2003 05 2002 Disassemble the circlip Heat the outer tube near the oilseal not too hot Heat the outer tube at this level 12_100 ...

Page 271: ...oduct Exploded View Disassembly Assembling Workshop manual 4860 MXMA 11 Frontfork 4860 MXMA 2003 05 2002 Pull with both hands the outer tube from the inner tube Remove DU bush inner tube 1 Remove DU bush ...

Page 272: ...Product Exploded View Disassembly Assembling Workshop manual 4860 MXMA 12 Frontfork 4860 MXMA 2003 05 2002 Remove DU bush inner tube Remove DU bush outer tube ...

Page 273: ...oduct Exploded View Disassembly Assembling Workshop manual 4860 MXMA 13 Frontfork 4860 MXMA 2003 05 2002 Remove support ring 12_105 Disassemble the oilseal Pay attention to the assembling direction 12_106 ...

Page 274: ...Product Exploded View Disassembly Assembling Workshop manual 4860 MXMA 14 Frontfork 4860 MXMA 2003 05 2002 Remove the circlip Remove the dust wiper 12_107 12_108 ...

Page 275: ...Product Exploded View Disassembly Assembling Workshop manual 4860 MXMA 15 Frontfork 4860 MXMA 2003 05 2002 Heat the axle clamp Use T1404S 12_111 12_112 ...

Page 276: ...sassembly Assembling Workshop manual 4860 MXMA 16 Frontfork 4860 MXMA 2003 05 2002 12_113 and unscrew the inner tube from the axle clamp Remove the O ring out the groove of the axle clamp 12_115 1 2 1 1 4 Remove the inner tube ...

Page 277: ...Exploded View Disassembly Assembling Workshop manual 4860 MXMA 17 Frontfork 4860 MXMA 2003 05 2002 1 Clamp the tube with plug in the clamping block Tool T508S T509 2 12_116 12_117 Disassembly cartridge 3 12_118 ...

Page 278: ... Assembling Workshop manual 4860 MXMA 18 Frontfork 4860 MXMA 2003 05 2002 Unscrew the screw sleeve size 22 Turn the screw sleeve out of the tube 12_119 12_120 Disassemble the piston rod complete Pay attention to the piston ring 12_121 ...

Page 279: ...w Disassembly Assembling Workshop manual 4860 MXMA 19 Frontfork 4860 MXMA 2003 05 2002 Clamp the piston rod in T508S not too tight and unscrew the hydraulic stop from the piston rod 12_164 Remove the hydraulic stop 12_165 ...

Page 280: ...hop manual 4860 MXMA 20 Frontfork 4860 MXMA 2003 05 2002 Remove the screw sleeve with spring retainer 12_167 Disassemble the DU bush with T507 and press it out the screw sleeve with support of the vice 12_168 Spring retainer screw sleeve DU bush 12_169 ...

Page 281: ...003 05 2002 Clamp the compression holder in the vice and unscrew the check valve nut size 17 Version with a locking remove the locking with a file 12_124 Remove the check valve nut 12_125 Remove the check valve spring Pay attention to the assembling direction 12_126 Disassembly holder compression ...

Page 282: ...l 4860 MXMA 22 Frontfork 4860 MXMA 2003 05 2002 Remove the check valve shim 12_127 Disassemble the compression piston with O ring Pay attention to the assembling direction 12_128 Place a screwdriver on top of the holder and remove the entire shim packet 12_129 ...

Page 283: ...ual 4860 MXMA 23 Frontfork 4860 MXMA 2003 05 2002 Disassemble the O ring 12_130 Remove the copper washer 12_131 Holder compression copper washer O ring shims compression piston compression with O ring shim check valve spring check valve nut check valve 12_132 ...

Page 284: ...ed View Disassembly Assembling Workshop manual 4860 MXMA 24 Frontfork 4860 MXMA 2003 05 2002 Replace copper washer 12_133 Assemble the O ring 12_134 Replace the entire shim packet 12_135 Assembling holder compression ...

Page 285: ...mbling Workshop manual 4860 MXMA 25 Frontfork 4860 MXMA 2003 05 2002 Replace piston Pay attention to the assembling direction 12_136 Replace shim check valve 12_137 Replace spring check valve Pay attention to the assembling direction 12_138 ...

Page 286: ... Assembling Workshop manual 4860 MXMA 26 Frontfork 4860 MXMA 2003 05 2002 Wetting the thread of the nut with T132 and tighten it 12_140 to a torque of 5Nm 12_141 Check if the spring is correctly placed in the chamber of the nut 12_142 ...

Page 287: ... 27 Frontfork 4860 MXMA 2003 05 2002 Clamp the piston rod at the level where the hydraulic stop is mounted in T508S and unscrew the rebound tap Size 17 12_143 Remove the rebound tap complete 12_144 145 146 posterize Remove the rebound spring 12_147 Disassembly tap rebound ...

Page 288: ... MXMA 2003 05 2002 Pull the rebound needle with spring out of the tap rebound 12_148 Check the O ring 12_149 Pay attention to the position of the triangular shims on the piston Clamp the tap in the vice and unscrew the nut Size 10 Version with locking Remove the locking with a file 12_150 ...

Page 289: ...l 4860 MXMA 29 Frontfork 4860 MXMA 2003 05 2002 Remove the nut Pay attention to the assembling direction 12_151 Place a screwdriver on top of the tap and remove the entire shim packet 12_152 Remove piston rebound Pay attention to the assembling direction 12_153 ...

Page 290: ...op manual 4860 MXMA 30 Frontfork 4860 MXMA 2003 05 2002 Remove check valve shims 12_154 Remove spring check valve 12_155 Rebound adjustment needle with O ring spring tap rebound spring check valve shims check valve piston rebound shims nut M6x0 5 12_156 ...

Page 291: ... Frontfork 4860 MXMA 2003 05 2002 Assemble the spring and shims check valve 12_157 Assemble the piston rebound Pay attention to the assembling direction 12_158 Replace the shims Pay attention to the position of the triangular shims on the piston 12_159 Assembling tap rebound ...

Page 292: ...ling Workshop manual 4860 MXMA 32 Frontfork 4860 MXMA 2003 05 2002 Wetting the thread of the nut with T132 Screw the nut on the tap 12_160 tighten the nut to a torque of 5 Nm 12_161 Grease the O ring of the adjustment needle with T158 12_162 ...

Page 293: ...Product Exploded View Disassembly Assembling Workshop manual 4860 MXMA 33 Frontfork 4860 MXMA 2003 05 2002 Mount the needle with spring into the tap rebound 12_163 ...

Page 294: ... 34 Frontfork 4860 MXMA 2003 05 2002 Press with T507 the DU bush into the screw sleeve 12_171 Clamp the piston rod in T508S At the level where the hydraulic stop is mounted 12_172 Wetting the thread with T131 And screw the tap in the piston rod 12_173 Assembling cartridge ...

Page 295: ...XMA 35 Frontfork 4860 MXMA 2003 05 2002 Tighten the tap rebound 12_174 Clamp the piston rod not too tight in at the other side and replace the screw sleeve with spring retainer 12_175 Screw the hydraulic stop hand tight to the end of the thread of the piston rod 12_176 ...

Page 296: ...XMA 2003 05 2002 Clamp the tube with plug in the clamping block T508S and T509 and assemble the piston rod cpl into the tube Guide the piston ring 12_177 Before assembling wet the thread of the screw sleeve with T131 Screw the screw sleeve into the tube 12_178 Tighten the screw sleeve 12_179 ...

Page 297: ...orkshop manual 4860 MXMA 37 Frontfork 4860 MXMA 2003 05 2002 Replace a new O ring in the groove of the axle clamp 12_180 Wetting the thread of the axle clamp with T132 12_181 Wetting the thread of the inner tube with T132 12_182 Assembling forkleg ...

Page 298: ...assembly Assembling Workshop manual 4860 MXMA 38 Frontfork 4860 MXMA 2003 05 2002 Assemble the inner tube in the axle clamp 12_183 Screw very tight the inner tube with T503S T1404S 12_184 Apply the dust wiper with T51 1 14_0007 ...

Page 299: ...Workshop manual 4860 MXMA 39 Frontfork 4860 MXMA 2003 05 2002 Place T1401 over the inner tube and assemble the dust wiper 14_0008 Replace the circlip 14_0011 Apply the innerside of the oilseal with T511 and the outerside with frontfork oil 14_0010 ...

Page 300: ...ed View Disassembly Assembling Workshop manual 4860 MXMA 40 Frontfork 4860 MXMA 2003 05 2002 Assemble the oilseal Pay attention to the assembling direction 14_0012 Remove the tool and replace the support ring 12_190 ...

Page 301: ...Product Exploded View Disassembly Assembling Workshop manual 4860 MXMA 41 Frontfork 4860 MXMA 2003 05 2002 Replace the DU bush Replace the tube Replace the DU bush ...

Page 302: ...Product Exploded View Disassembly Assembling Workshop manual 4860 MXMA 42 Frontfork 4860 MXMA 2003 05 2002 Slide carefully the outer tube over the inner tube Replace the DU bush on the inner tube ...

Page 303: ...ct Exploded View Disassembly Assembling Workshop manual 4860 MXMA 43 Frontfork 4860 MXMA 2003 05 2002 Assemble with T1402S the DU bush with the flat side and 12_194 tap or push it into the outer tube 12_195 ...

Page 304: ...g Workshop manual 4860 MXMA 44 Frontfork 4860 MXMA 2003 05 2002 Use the other side of T1402S 12_196 and tap the oilseal into the outer tube 12_197 Assemble the circlip into the groove of the outer tube Important Check this very carefully 12_198 ...

Page 305: ...sembly Assembling Workshop manual 4860 MXMA 45 Frontfork 4860 MXMA 2003 05 2002 Assemble the dust wiper with T1402S 12_199 Apply the O ring of the compression piston with frontfork oil 12_202 Place the cartridge into the forkleg ...

Page 306: ...rkshop manual 4860 MXMA 46 Frontfork 4860 MXMA 2003 05 2002 Assemble the cartridge in the center of the axle clamp and tighten the holder compression to a torque of 25Nm 12_203 Assemble the adjustment tube with the O ring into the piston rod 12_204 ...

Page 307: ...206 Move the piston rod keep the adjustment tube on his place several times up and down till you feel that the cartridge is full with oil the damping is smooth over the entire stroke mostly it is necesarry to fill some not too much extra oil in the forkleg Now compress the piston rod and outer tube fully down and fill the forkleg with oil till about 25mm under the 4 holes of the inner tube Move th...

Page 308: ...4860 MXMA 48 Frontfork 4860 MXMA 2003 05 2002 Pull the piston rod out and assemble the spring 12_211 Pull the spring downwards and place open end spanner 22 on the hydraulic stop 12_212 Replace first the steel washer on the spring then the preload spacer s 12_213 ...

Page 309: ...embly Assembling Workshop manual 4860 MXMA 49 Frontfork 4860 MXMA 2003 05 2002 Screw handtight the screw cap on the piston rod Screw down the screw cap till the hydr stop is against the screw cap and tighten it to a torque of 25Nm ...

Page 310: ...roduct Exploded View Disassembly Assembling Workshop manual 4860 MXMA 50 Frontfork 4860 MXMA 2003 05 2002 Pull the spring downwards and remove the spanner Tighten the screw cap with T103 Position rebound ...

Page 311: ...Product Exploded View Disassembly Assembling Workshop manual 4860 MXMA 51 Frontfork 4860 MXMA 2003 05 2002 Position compression And replace the rubber cap 12_226 ...

Page 312: ... 2 Exploded view 3 Disassembly shock absorber 4 Disassembly tube side 13 Disassembly MCC 33 Assembling MCC 39 Assembling Tube side 44 Disassembly piston rod side 53 Diassembly adaptor DU bush 63 Assembling adaptor DU bush 67 Assembling piston rod side 70 Assembling shock absorber 81 Bleeding 87 On pressure with nitrogen 92 Mounting spring 95 Adjustment 98 ...

Page 313: ... use clean and professional tools Regular you need next to the general equipment the special tools of WP Suspension These tools with a unique T number available at WP Suspension protect you from damaging the parts Always use aluminium protector plates when clamping our products or parts in the vice Always replace damaged or worn parts Clean all parts before assembling Caution Many times it is nece...

Page 314: ...Workshop manual Product Exploded View Disassembly Assembling 3 5018 PDS 2003 Shock absorber 5018 PDS 2003 05 2002 Exploded view ...

Page 315: ...REB position Fully closed is turning the adjustment screw clockwise MCC MCC Mono Compression Control Take note of the compression COM position Fully closed is turning the adjustment screw clockwise DCC DCC Dual Compression Control Take note of the compression Low Speed position Fully closed is turning the adjustment screw clockwise Disassembly Shock absorber ...

Page 316: ...018 PDS 2003 Werkplaatshandboek 5 Shock absorber 5018 PDS 2003 05 2002 DCC Take note of the compression High Speed position Fully closed is turning the hexagonal size 17 screw clockwise Measure the length of the spring Spring preload Unscrew the Allen bolt size 4 ...

Page 317: ...bling Workshop manual 5018 PDS 2003 Werkplaatshandboek 6 Shock absorber 5018 PDS 2003 05 2002 Release the spring preload with open spanner T106 Disassemble the spring retainer and springring Screw the screw retainer against the lock retainer ...

Page 318: ...View Disassembly Assembling Workshop manual 5018 PDS 2003 Werkplaatshandboek 7 Shock absorber 5018 PDS 2003 05 2002 Remove the washer Remove the second washer Remove the spring Pay attention to the assembling direction ...

Page 319: ...Product Exploded View Disassembly Assembling Workshop manual 5018 PDS 2003 Werkplaatshandboek 8 Shock absorber 5018 PDS 2003 05 2002 Spring with washers spring retainer and springring ...

Page 320: ...sassembly Assembling Workshop manual 5018 PDS 2003 Werkplaatshandboek 9 Shock absorber 5018 PDS 2003 05 2002 Disassemble the rubber cap Nitrogen plug with O ring Unscrew slowly the nitrogen plug size 4 to release the pressure ...

Page 321: ...Exploded View Disassembly Assembling Workshop manual 5018 PDS 2003 Werkplaatshandboek 10 Shock absorber 5018 PDS 2003 05 2002 Tap the cap from the tube 2 1 Place disassembling bush T1216 on the adaptor DU bush ...

Page 322: ...ploded View Disassembly Assembling Workshop manual 5018 PDS 2003 Werkplaatshandboek 11 Shock absorber 5018 PDS 2003 05 2002 Push the adaptor DU bush downwards Disassemble the springring out of the tube Springring ...

Page 323: ...embly Assembling Workshop manual 5018 PDS 2003 Werkplaatshandboek 12 Shock absorber 5018 PDS 2003 05 2002 Pull carefully but firmly the piston rod complete out of the tube Push with depth stop T107S the separation piston downwards ...

Page 324: ... Workshop manual 5018 PDS 2003 Werkplaatshandboek 13 Shock absorber 5018 PDS 2003 05 2002 Drain the oil out the tube Clamp the tube side in the vice Remove the springring out of the groove and slide it a little bit downwards Disassembly tube side ...

Page 325: ...mbly Assembling Workshop manual 5018 PDS 2003 Werkplaatshandboek 14 Shock absorber 5018 PDS 2003 05 2002 Slide the guiding bush downwards Remove the upper springring Remove the guiding bush Pay attention to the assembling direction ...

Page 326: ...Product Exploded View Disassembly Assembling Workshop manual 5018 PDS 2003 Werkplaatshandboek 15 Shock absorber 5018 PDS 2003 05 2002 Remove the springring Spring guiding bush with the two springrings ...

Page 327: ...roduct Exploded View Disassembly Assembling Workshop manual 5018 PDS 2003 Werkplaatshandboek 16 Shock absorber 5018 PDS 2003 05 2002 Turn the screw retainer of the tube Screw retainer with the Allen bolt ...

Page 328: ...orkshop manual 5018 PDS 2003 Werkplaatshandboek 17 Shock absorber 5018 PDS 2003 05 2002 Unscrew the screw cap of the MCC size 24 DCC also size 24 Remove the screw cap Remove the washer inside the screw cap or on top of the spring inside the bottom ...

Page 329: ... Assembling Workshop manual 5018 PDS 2003 Werkplaatshandboek 18 Shock absorber 5018 PDS 2003 05 2002 Remove the spring Pull the damping holder cpl out of the bottom Srew cap with adjustment needle spring and the MCC damping holder cpl ...

Page 330: ... Disassembly Assembling Workshop manual 5018 PDS 2003 Werkplaatshandboek 19 Shock absorber 5018 PDS 2003 05 2002 Unscrew the lock retainer with open spanner T1233 Heat the lock retainer Screw the lock retainer of the bottom ...

Page 331: ...xploded View Disassembly Assembling Workshop manual 5018 PDS 2003 Werkplaatshandboek 20 Shock absorber 5018 PDS 2003 05 2002 Use slide spanner T146 with bush T1201 Unscrew the tube Heat the bottom near the tube ...

Page 332: ...oded View Disassembly Assembling Workshop manual 5018 PDS 2003 Werkplaatshandboek 21 Shock absorber 5018 PDS 2003 05 2002 Screw the tube out of the bottom Screw the lock retainer of the tube Tube with lock retainer ...

Page 333: ...ing Workshop manual 5018 PDS 2003 Werkplaatshandboek 22 Shock absorber 5018 PDS 2003 05 2002 Disassemble the O ring out of the groove inside the bottom Place dis assembling tool T145S on top of the screw cap Place pin spanner T125S onto T145S ...

Page 334: ...oded View Disassembly Assembling Workshop manual 5018 PDS 2003 Werkplaatshandboek 23 Shock absorber 5018 PDS 2003 05 2002 Unscrew the screw cap Heat the reservoir near the bottom Turn the reservoir from the bottom ...

Page 335: ...Product Exploded View Disassembly Assembling Workshop manual 5018 PDS 2003 Werkplaatshandboek 24 Shock absorber 5018 PDS 2003 05 2002 Remove the O ring Bottom cpl with both O rings ...

Page 336: ...ly Assembling Workshop manual 5018 PDS 2003 Werkplaatshandboek 25 Shock absorber 5018 PDS 2003 05 2002 Pay attention to the assembling direction Push the separation piston out of the reservoir Separation piston Disassemble the O ring ...

Page 337: ...Product Exploded View Disassembly Assembling Workshop manual 5018 PDS 2003 Werkplaatshandboek 26 Shock absorber 5018 PDS 2003 05 2002 Separation piston piston ring and O ring ...

Page 338: ...Assembling Workshop manual 5018 PDS 2003 Werkplaatshandboek 27 Shock absorber 5018 PDS 2003 05 2002 Clamp the bottom in the vice Use disassembling tool T120 for disassembling the adaptor bushes Tap the adaptor bush out of the heim joint ...

Page 339: ...oded View Disassembly Assembling Workshop manual 5018 PDS 2003 Werkplaatshandboek 28 Shock absorber 5018 PDS 2003 05 2002 Remove the seal Disassemble the springring Tap the other adaptor bush out of the heim joint ...

Page 340: ...18 PDS 2003 Werkplaatshandboek 29 Shock absorber 5018 PDS 2003 05 2002 Use Dis assembling tool T1207S for disassembling the heim joint Press the heim joint out of the bottom at the side were the springring is removed Adaptor bushes seals springrings and heim joint ...

Page 341: ...018 PDS 2003 Werkplaatshandboek 30 Shock absorber 5018 PDS 2003 05 2002 Replace one springring Assemble the heim joint with the bevelled edge into the direction of the bottom with assembling tool T1206 Press the heim joint into the bottom with support of the vice ...

Page 342: ...isassembly Assembling Workshop manual 5018 PDS 2003 Werkplaatshandboek 31 Shock absorber 5018 PDS 2003 05 2002 Press with T1207 A the heim joint against the springring Assemble the springring into the groove Replace the seals ...

Page 343: ...Product Exploded View Disassembly Assembling Workshop manual 5018 PDS 2003 Werkplaatshandboek 32 Shock absorber 5018 PDS 2003 05 2002 1 Assemble the adaptor bushes with support of T1206 2 ...

Page 344: ...2003 Werkplaatshandboek 33 Shock absorber 5018 PDS 2003 05 2002 There is a separated workshop manual for the DCC Damping holder MCC Remove the disk Pay attention to the assembling direction Clamp the damping holder with clamping block T1202S Not too tight Disassembly MCC ...

Page 345: ...duct Exploded View Disassembly Assembling Workshop manual 5018 PDS 2003 Werkplaatshandboek 34 Shock absorber 5018 PDS 2003 05 2002 Unscrew the nut size 10 Turn the nut of Remove the piston with check valve ...

Page 346: ...Exploded View Disassembly Assembling Workshop manual 5018 PDS 2003 Werkplaatshandboek 35 Shock absorber 5018 PDS 2003 05 2002 Piston with the check valve side Compression side Damping holder with shims setting ...

Page 347: ... Workshop manual 5018 PDS 2003 Werkplaatshandboek 36 Shock absorber 5018 PDS 2003 05 2002 Remove the shims of the damping holder Pay attention to the assembling order and direction Nut M6 piston with check valve setting shims damping holder disk ...

Page 348: ...ssembly Assembling Workshop manual 5018 PDS 2003 Werkplaatshandboek 37 Shock absorber 5018 PDS 2003 05 2002 Remove the O ring of the screw cap Turn clockwise the adjustment needle out of the screw cap Adjustment needle complete ...

Page 349: ...Product Exploded View Disassembly Assembling Workshop manual 5018 PDS 2003 Werkplaatshandboek 38 Shock absorber 5018 PDS 2003 05 2002 Steel ball spring adjustment needle with O ring screw cap O ring ...

Page 350: ...ng Workshop manual 5018 PDS 2003 Werkplaatshandboek 39 Shock absorber 5018 PDS 2003 05 2002 Assemble the spring and steel ball and grease also the O ring these with water proof grease T159 Assemble the O ring Assemble the needle Assembling MCC ...

Page 351: ...Workshop manual 5018 PDS 2003 Werkplaatshandboek 40 Shock absorber 5018 PDS 2003 05 2002 Turn the needle fully open Replace the setting and piston with the check valve Wet the thread of the nut with Loctite 2701 T132 and turn the nut on the holder ...

Page 352: ...Product Exploded View Disassembly Assembling Workshop manual 5018 PDS 2003 Werkplaatshandboek 41 Shock absorber 5018 PDS 2003 05 2002 Tighten the nut to a torque of 6Nm Replace the disk ...

Page 353: ...shop manual 5018 PDS 2003 Werkplaatshandboek 42 Shock absorber 5018 PDS 2003 05 2002 Assemble the O ring on the bottom Assemble the O ring inside the bottom Grease the O ring groove of the separation piston with O ring grease T158 Assembling tube side ...

Page 354: ...w Disassembly Assembling Workshop manual 5018 PDS 2003 Werkplaatshandboek 43 Shock absorber 5018 PDS 2003 05 2002 Assemble the O ring Grease the O ring with T158 Pay attention to the groove of the nitrogen reservoir groove ...

Page 355: ...Workshop manual 5018 PDS 2003 Werkplaatshandboek 44 Shock absorber 5018 PDS 2003 05 2002 1 Assemble the separation piston and piston ring with the hollow surface into the reservoir at the groove side Push the separation piston into the reservoir 2 ...

Page 356: ...mbly Assembling Workshop manual 5018 PDS 2003 Werkplaatshandboek 45 Shock absorber 5018 PDS 2003 05 2002 Wet the thread of the bottom with T132 Wet the thread of the reservoir with T132 on both sides Wet the thread of the screw cap ...

Page 357: ...y Assembling Workshop manual 5018 PDS 2003 Werkplaatshandboek 46 Shock absorber 5018 PDS 2003 05 2002 Turn the reservoir with screw cap on the bottom Tighten the reservoir wit T125S and T145S Wet the thread inside the bottom with T132 ...

Page 358: ...sembly Assembling Workshop manual 5018 PDS 2003 Werkplaatshandboek 47 Shock absorber 5018 PDS 2003 05 2002 Turn the lock retainer as far as possible onto the tube Wet the thread of the tube with T132 Turn the tube into the bottom ...

Page 359: ...g Workshop manual 5018 PDS 2003 Werkplaatshandboek 48 Shock absorber 5018 PDS 2003 05 2002 Tighten the tube with T146 and T1201 Screw the lock retainer against the bottom and tighten it with T1233 Turn the screw spring retainer onto the tube and ...

Page 360: ...Disassembly Assembling Workshop manual 5018 PDS 2003 Werkplaatshandboek 49 Shock absorber 5018 PDS 2003 05 2002 completely downwards Assemble the springring passed the groove of the tube Slide the spring guide onto the tube ...

Page 361: ...ssembly Assembling Workshop manual 5018 PDS 2003 Werkplaatshandboek 50 Shock absorber 5018 PDS 2003 05 2002 Assemble the first springring into the groove Slide the guiding bush over the springring Assemble the second springring ...

Page 362: ...ly Assembling Workshop manual 5018 PDS 2003 Werkplaatshandboek 51 Shock absorber 5018 PDS 2003 05 2002 Wet the O ring of the piston MCC with T158 Assemble the damping holder MCC cpl into the housing of the bottom Assemble the spring ...

Page 363: ...loded View Disassembly Assembling Workshop manual 5018 PDS 2003 Werkplaatshandboek 52 Shock absorber 5018 PDS 2003 05 2002 Turn the screw cap into the bottom Tighten the screw cap Place the ring into the screw cap ...

Page 364: ...ploded View Disassembly Assembling Workshop manual 5018 PDS 2003 Werkplaatshandboek 53 Shock absorber 5018 PDS 2003 05 2002 Clamp the piston rod cpl in the vice Unscrew the nut size 22 Disassembly piston rod side ...

Page 365: ...er 5018 PDS 2003 05 2002 Place a screwdriver on top of the piston rod and lift the entire assembly onto the screwdriver Turn off the nut Rebound bush plane compression setting 1 shims piston 1 rebound setting 1 shims intermediate bush compression setting 2 shims piston 2 rebound setting 2 shims piston rod nut ...

Page 366: ...Product Exploded View Disassembly Assembling Workshop manual 5018 PDS 2003 Werkplaatshandboek 55 Shock absorber 5018 PDS 2003 05 2002 Remove the adaptor DU bush Remove the cap Remove the bump rubber ...

Page 367: ...Assembling Workshop manual 5018 PDS 2003 Werkplaatshandboek 56 Shock absorber 5018 PDS 2003 05 2002 Clamp the mounting fork in the vice Unscrew the screw cap of the rebound adjustment size 15 Turn the screw cap out of the mounting fork ...

Page 368: ...embly Assembling Workshop manual 5018 PDS 2003 Werkplaatshandboek 57 Shock absorber 5018 PDS 2003 05 2002 1 Turn the rebound adjustment needle anti clockwise out of the mounting fork 2 Rebound adjustment needle with the screw cap ...

Page 369: ...Assembling Workshop manual 5018 PDS 2003 Werkplaatshandboek 58 Shock absorber 5018 PDS 2003 05 2002 1 Push the rubber plug out of the mounting fork 2 Push with an pin d2 on top of the piston rod the rebound needle out of the piston rod ...

Page 370: ...isassembly Assembling Workshop manual 5018 PDS 2003 Werkplaatshandboek 59 Shock absorber 5018 PDS 2003 05 2002 Take the rebound needle out Rebound needle Clamp the mounting fork in the vice and unscrew the locking nut size 24 ...

Page 371: ...ded View Disassembly Assembling Workshop manual 5018 PDS 2003 Werkplaatshandboek 60 Shock absorber 5018 PDS 2003 05 2002 Clamp the piston rod in clamping block T1202S Heat de mounting fork Unscrew the mounting fork ...

Page 372: ...sembling Workshop manual 5018 PDS 2003 Werkplaatshandboek 61 Shock absorber 5018 PDS 2003 05 2002 Turn the mounting fork of the piston rod Turn the nut of the piston rod Push with een Allenkey size 5 the rebound tube out of the piston rod ...

Page 373: ...Product Exploded View Disassembly Assembling Workshop manual 5018 PDS 2003 Werkplaatshandboek 62 Shock absorber 5018 PDS 2003 05 2002 Piston rod and rebound tube cpl ...

Page 374: ...loded View Disassembly Assembling Workshop manual 5018 PDS 2003 Werkplaatshandboek 63 Shock absorber 5018 PDS 2003 05 2002 Adaptor DU bush 1 Lift the rebound spring out of the adaptor 2 Disassembly adaptor DU bush ...

Page 375: ...embly Assembling Workshop manual 5018 PDS 2003 Werkplaatshandboek 64 Shock absorber 5018 PDS 2003 05 2002 Remove the steel washer Pay attention to the back up ring in the washer Remove the quad ring Remove the second back up ring ...

Page 376: ...ssembly Assembling Workshop manual 5018 PDS 2003 Werkplaatshandboek 65 Shock absorber 5018 PDS 2003 05 2002 Lift the dirt scraper out of the adaptor Disassemble the O ring Dis assembling tool T1504 adaptor and support bush T1209 ...

Page 377: ...Product Exploded View Disassembly Assembling Workshop manual 5018 PDS 2003 Werkplaatshandboek 66 Shock absorber 5018 PDS 2003 05 2002 Press the DU bush out of the adaptor ...

Page 378: ... Shock absorber 5018 PDS 2003 05 2002 Press the DU bush into the adaptor with T1504 and T1209 Calibrate the DU bush with the calibration thorn T1205 Important wet the thorn with oil before the calibration Press the dirt scraper into the adaptor with assembling bush T1204 Assembling adaptor DU bush ...

Page 379: ...op manual 5018 PDS 2003 Werkplaatshandboek 68 Shock absorber 5018 PDS 2003 05 2002 Assemble the first the back up ring and then the quad ring into the adaptor Replace the steel disk with the back up ring Assemble the rebound spring with support of T1209 ...

Page 380: ...Product Exploded View Disassembly Assembling Workshop manual 5018 PDS 2003 Werkplaatshandboek 69 Shock absorber 5018 PDS 2003 05 2002 Assemble the O ring Grease the O ring with T158 ...

Page 381: ...ling Workshop manual 5018 PDS 2003 Werkplaatshandboek 70 Shock absorber 5018 PDS 2003 05 2002 Turn the lock nut on the piston rod Grease the O ring of the rebound tube with T158 Assemble the tube into the piston rod Assembling piston rod side ...

Page 382: ... Disassembly Assembling Workshop manual 5018 PDS 2003 Werkplaatshandboek 71 Shock absorber 5018 PDS 2003 05 2002 Wet the thread of the piston rod with T132 Turn the mounting fork on the piston rod Tighten the mounting fork ...

Page 383: ...isassembly Assembling Workshop manual 5018 PDS 2003 Werkplaatshandboek 72 Shock absorber 5018 PDS 2003 05 2002 Turn the lock nut against the mounting fork Tighten the nut 1 Place assembling tool T1215 on top of the piston rod ...

Page 384: ...Product Exploded View Disassembly Assembling Workshop manual 5018 PDS 2003 Werkplaatshandboek 73 Shock absorber 5018 PDS 2003 05 2002 2 Assemble the bump rubber Replace the cap ...

Page 385: ...embling Workshop manual 5018 PDS 2003 Werkplaatshandboek 74 Shock absorber 5018 PDS 2003 05 2002 Replace carefully the adaptor DU bush Replace the entire damping package Pay attention to the first shim this one must be centered on the ring ...

Page 386: ...Workshop manual 5018 PDS 2003 Werkplaatshandboek 75 Shock absorber 5018 PDS 2003 05 2002 Grease the thread of the piston rod with a little bit of T158 Turn the nut on the piston rod Turn the nut just so far so that the pistons can still be turned ...

Page 387: ...mbly Assembling Workshop manual 5018 PDS 2003 Werkplaatshandboek 76 Shock absorber 5018 PDS 2003 05 2002 Place the center sleeve T1214 over both pistons and adaptor DU bush Place T107S through T1214 intermediate bush and piston rod ...

Page 388: ...bly Assembling Workshop manual 5018 PDS 2003 Werkplaatshandboek 77 Shock absorber 5018 PDS 2003 05 2002 Tighten the piston rod nut to a torque of 40Nm Check if you can lift the shim Grease the O ring of the rebound needle with T158 ...

Page 389: ...sembling Workshop manual 5018 PDS 2003 Werkplaatshandboek 78 Shock absorber 5018 PDS 2003 05 2002 Assemble the needle into the piston rod Push the needle further Grease the O ring and steel ball of the rebound adjustment needle with T159 ...

Page 390: ...sembly Assembling Workshop manual 5018 PDS 2003 Werkplaatshandboek 79 Shock absorber 5018 PDS 2003 05 2002 Screw the adjustment needle into the mounting fork Turn de rebound screw cap into the mounting fork Tighten the screw cap ...

Page 391: ...xploded View Disassembly Assembling Workshop manual 5018 PDS 2003 Werkplaatshandboek 80 Shock absorber 5018 PDS 2003 05 2002 Turn the adjustment completely open Push the needle downwards Assemble the rubber plug ...

Page 392: ... PDS 2003 Werkplaatshandboek 81 Shock absorber 5018 PDS 2003 05 2002 Turn the compression adjustment fully open DCC High and Low speed Fill the tube with oil just under the springring groove inside the tube Place plunger T1210S into the tube Assembling shock absorber ...

Page 393: ...ling Workshop manual 5018 PDS 2003 Werkplaatshandboek 82 Shock absorber 5018 PDS 2003 05 2002 Push the plunger downwards Push with T107S the separation piston in the reservoir as far as possible Slide the O ring of T107S against the screw cap ...

Page 394: ...Workshop manual 5018 PDS 2003 Werkplaatshandboek 83 Shock absorber 5018 PDS 2003 05 2002 Push again with T1210S Push with T107S the separation piston to the correct position the O ring of T107S must have a distance of about 10mm from the screw cap ...

Page 395: ...isassembly Assembling Workshop manual 5018 PDS 2003 Werkplaatshandboek 84 Shock absorber 5018 PDS 2003 05 2002 Fill oil till 10mm under the groove Close the compression adjustment DCC Low speed Push both pistons under the oil ...

Page 396: ...xploded View Disassembly Assembling Workshop manual 5018 PDS 2003 Werkplaatshandboek 85 Shock absorber 5018 PDS 2003 05 2002 Open the compression adjustment Push the adaptor DU bush just under the O ring groove ...

Page 397: ...t Exploded View Disassembly Assembling Workshop manual 5018 PDS 2003 Werkplaatshandboek 86 Shock absorber 5018 PDS 2003 05 2002 Assemble the springring Pull the piston rod fully out Tap the cap into the tube ...

Page 398: ...embly Assembling Workshop manual 5018 PDS 2003 Werkplaatshandboek 87 Shock absorber 5018 PDS 2003 05 2002 Clamp not too tight the shock absorber in the vice like picture 1 Unscrew the screw cap and remove the entire MCC 2 Bleeding ...

Page 399: ...2003 Werkplaatshandboek 88 Shock absorber 5018 PDS 2003 05 2002 Turn adaptor T1502S of the air release bottle T144S into the MCC DCC housing of the bottom Ensure that there is sufficient oil in the bottle Hold the bottle up so that the oil wil flow into the shock absorber ...

Page 400: ...bly Assembling Workshop manual 5018 PDS 2003 Werkplaatshandboek 89 Shock absorber 5018 PDS 2003 05 2002 Push the piston rod slowly completely inwards And out Repeat those handlings several times Cant the shock absorber several times ...

Page 401: ...Assembling Workshop manual 5018 PDS 2003 Werkplaatshandboek 90 Shock absorber 5018 PDS 2003 05 2002 Repeat all the handling till all air is out of the shock absorber Push the separation piston to the correct position Remove the adaptor ...

Page 402: ...Product Exploded View Disassembly Assembling Workshop manual 5018 PDS 2003 Werkplaatshandboek 91 Shock absorber 5018 PDS 2003 05 2002 Assemble the MCC DCC ...

Page 403: ...embling Workshop manual 5018 PDS 2003 Werkplaatshandboek 92 Shock absorber 5018 PDS 2003 05 2002 Turn the nitrogen plug with O ring several turns into the screw cap of the reservoir Nitrogen charging device T170S On pressure with nitrogen ...

Page 404: ...w Disassembly Assembling Workshop manual 5018 PDS 2003 Werkplaatshandboek 93 Shock absorber 5018 PDS 2003 05 2002 Place the shock absorber in T170S and open de tap for about 20 seconds Close the nitrogen plug Close the tap ...

Page 405: ...Product Exploded View Disassembly Assembling Workshop manual 5018 PDS 2003 Werkplaatshandboek 94 Shock absorber 5018 PDS 2003 05 2002 Assemble the rubber cap ...

Page 406: ...Product Exploded View Disassembly Assembling Workshop manual 5018 PDS 2003 Werkplaatshandboek 95 Shock absorber 5018 PDS 2003 05 2002 Assemble the washer Assemble the spring Assembling spring ...

Page 407: ...t Exploded View Disassembly Assembling Workshop manual 5018 PDS 2003 Werkplaatshandboek 96 Shock absorber 5018 PDS 2003 05 2002 Assemble the second washer Assemble the spring retainer Assemble the springring ...

Page 408: ...uct Exploded View Disassembly Assembling Workshop manual 5018 PDS 2003 Werkplaatshandboek 97 Shock absorber 5018 PDS 2003 05 2002 Adjust the spring to the correct preload Tighten the bolt to a torque of 5Nm ...

Page 409: ...assembly Assembling Workshop manual 5018 PDS 2003 Werkplaatshandboek 98 Shock absorber 5018 PDS 2003 05 2002 Turn the mounting fork to the correct position Compression position MCC Compression Low speed position DCC Adjustment ...

Page 410: ...Product Exploded View Disassembly Assembling Workshop manual 5018 PDS 2003 Werkplaatshandboek 99 Shock absorber 5018 PDS 2003 05 2002 Compression High Speed position DCC Rebound position ...

Reviews: