background image

 INSTALLATION 

3

13

SMARTPAT COND 1200

www.krohne.com

09/2015 - 4003041501 - MA SMARTPAT COND1200 R01 en

3.3  Pre-installation requirements

The required steps are explained in the following sections.

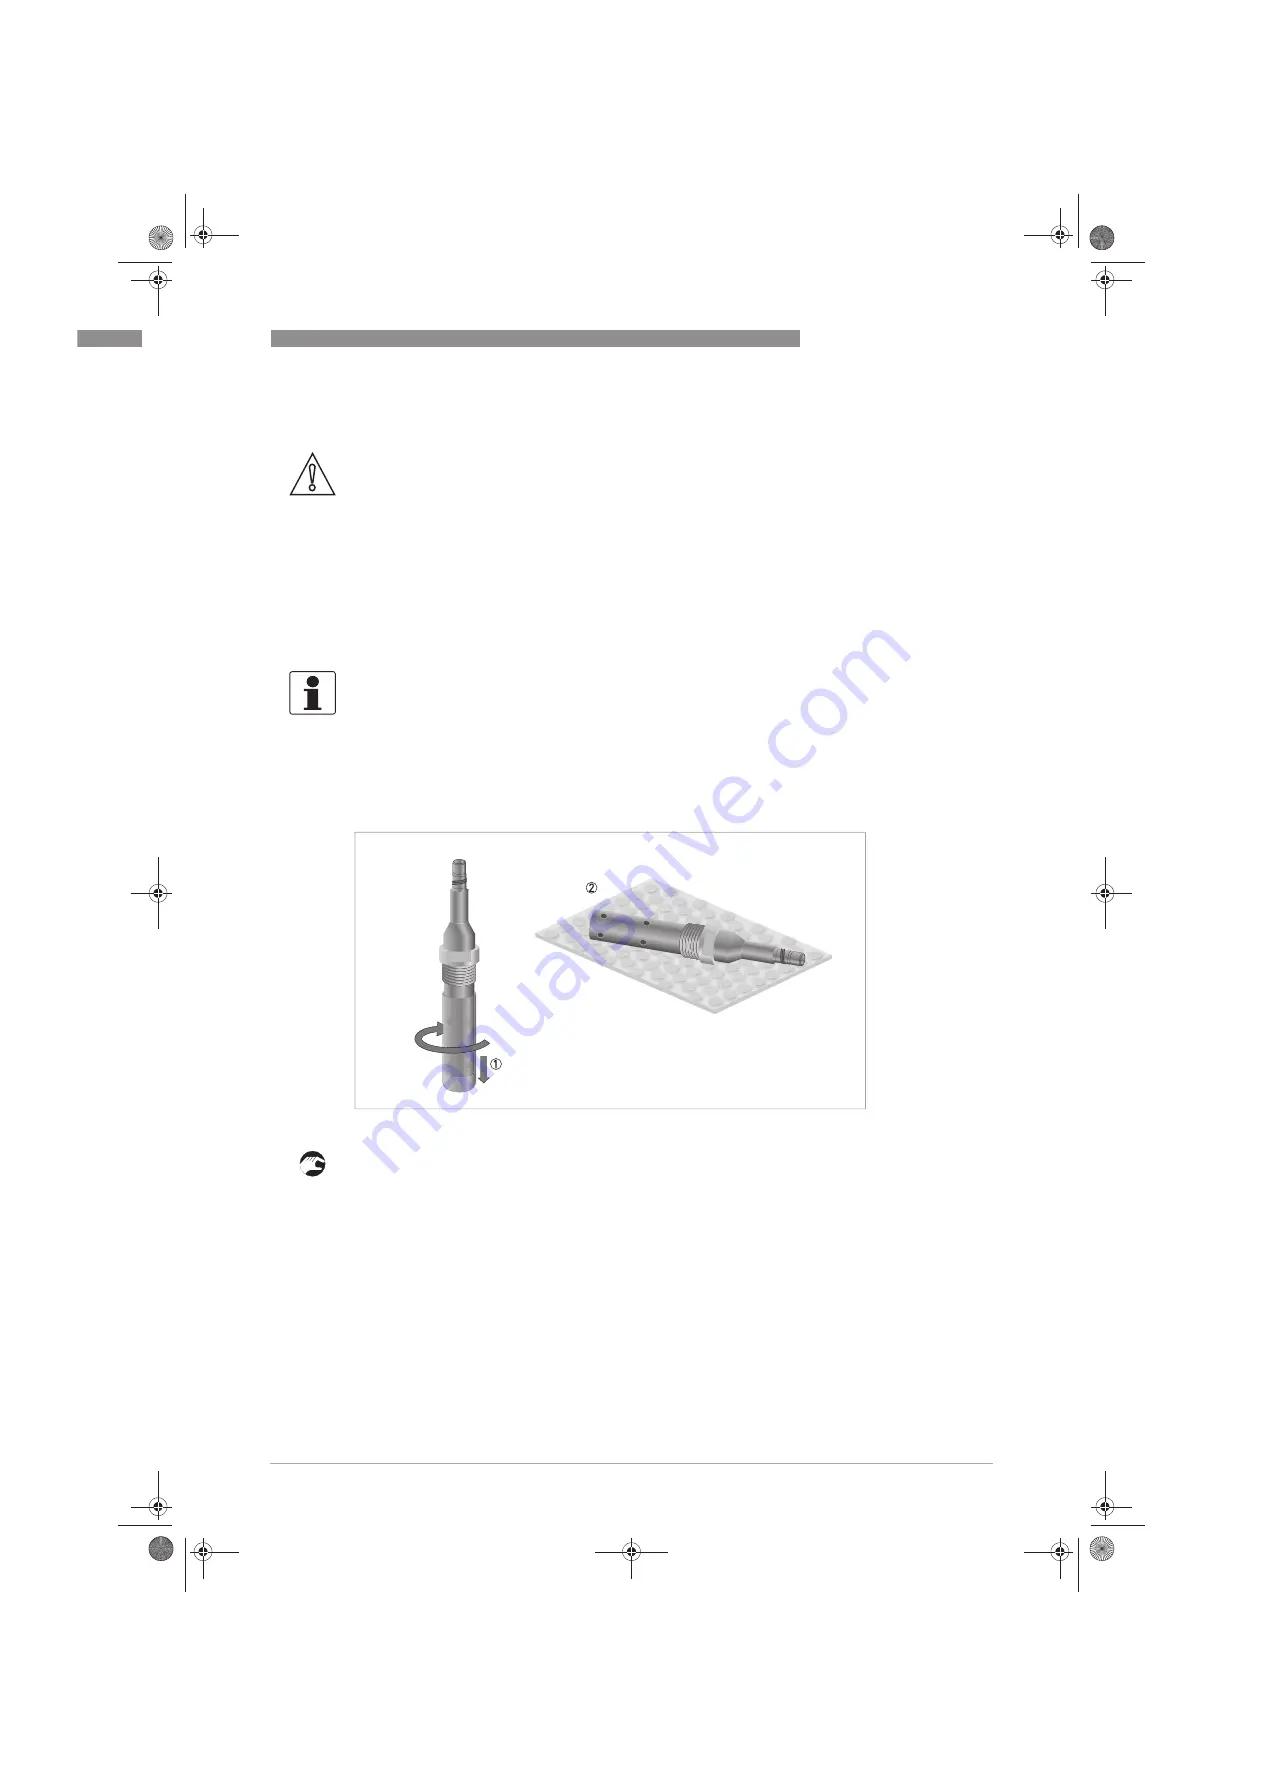
Unpacking the sensor

•  

Remove by gently twisting and pulling the protective cap from the sensor 

1

.

•  

Lay the sensor on a soft ESD mat or soft paper tissue 

2

.

•  

Leave the protection cap of the VP connector, as long as the sensor is not connected to the 

cable.

CAUTION!

Do not drop the device! Handle the device with care!

Never touch or scratch the electrodes of the sensor.

Store the sensor in its original packaging in a dry, dust-free location. Keep it away from dirt. If 
necessary, clean it. See cleaning procedure on page 29

.

Do not make any mechanical modifications to the sensor (electrodes shortened, drilled, bent 
or scratched). This can result in the loss of proper functionality, as well as the rights under 
the device warranty.

The sensor must be suitable for the temperature, pressure and medium conditions which are 
specified (including chemical resistance).

INFORMATION!

A sensor specific DTM software for usage with PACTware

TM

 FDT is available. The DTM software 

is free of charge and available from CD (scope of delivery) or can be downloaded from the 
KROHNE website (Downloadcenter).

Figure 3-1: Unpacking the sensor

MA_SMARTPAT_COND_1200_en_150902_4003041501_R01.book  Page 13  Monday, September 21, 2015  4:33 PM

Summary of Contents for SMARTPAT COND 1200

Page 1: ...evision ER 1 0 0_ SW REV 1 0 x SMARTPAT COND 1200 SMARTPAT COND 1200 SMARTPAT COND 1200 SMARTPAT COND 1200 Handbook Handbook Handbook Handbook KROHNE 09 2015 4003041501 MA SMARTPAT COND1200 R01 en MA_...

Page 2: ...of KROHNE Messtechnik GmbH Subject to change without notice 2 SMARTPAT COND 1200 www krohne com 09 2015 4003041501 MA SMARTPAT COND1200 R01 en Copyright 2015 by KROHNE Messtechnik GmbH Ludwig Krohne...

Page 3: ...tallation 12 3 2 Storage and transport 12 3 3 Pre installation requirements 13 3 4 Installation procedure 14 4 Electrical connections 15 4 1 Safety instructions 15 4 2 Power supply 15 4 3 Grounding an...

Page 4: ...cal data 32 7 3 Dimensions 34 8 Description of HART interface 35 8 1 General description 35 8 2 Software history 35 8 3 Connection variants 36 8 3 1 Point to Point connection analogue digital mode 37...

Page 5: ...ing CAUTION Responsibility for the use of the measuring devices with regard to suitability intended use and corrosion resistance of the used materials against the measured fluid lies solely with the o...

Page 6: ...y e mail may involve gaps in security It is not possible to protect such data completely against access by third parties We hereby expressly prohibit the use of the contact data published as part of o...

Page 7: ...age to the device it is essential that you read the information in this document and observe applicable national standards safety requirements and accident prevention regulations If this document is n...

Page 8: ...partial disregard of this warning can lead to serious health problems and even death There is also the risk of seriously damaging the device or parts of the operator s plant WARNING Disregarding this...

Page 9: ...libration INFORMATION Inspect the packaging carefully for damages or signs of rough handling Report damage to the carrier and to the local office of the manufacturer INFORMATION Do a check of the pack...

Page 10: ...1 en 2 2 Device description Figure 2 2 Construction of the sensor 1 VP2 connector 2 Nickel plated brass body 3 Process connection G3 4 A thread male PVDF 4 Electrodes stainless steel 1 4571 and PVDF i...

Page 11: ...facturer 2 Device name 3 Cell constant Electronic Revision version 4 TAG number optional 5 Order code 6 Serial number 7 Manufacturing date Ingress protection 8 Electronic electric device waste marking...

Page 12: ...arefully for damages or signs of rough handling Report damage to the carrier and to the local office of the manufacturer INFORMATION Do a check of the packing list to make sure that you have all the e...

Page 13: ...aging in a dry dust free location Keep it away from dirt If necessary clean it See cleaning procedure on page 29 Do not make any mechanical modifications to the sensor electrodes shortened drilled ben...

Page 14: ...rectly to the process control system 2 Install the sensor into its final measuring location 3 If necessary re calibrate the cell constant for your process conditions WARNING During installation of the...

Page 15: ...o the Ex documentation DANGER All work on the electrical connections may only be carried out with the power disconnected DANGER Observe the national regulations for electrical installations WARNING Ob...

Page 16: ...4 Connecting the cable to the sensor Connecting the cable to the sensor Ensure that both cable and sensor connector are absolutely dry 1 Screw the cable connector 2 on the sensor connector and tighte...

Page 17: ...cable glands with suitable ones Cable VP2 S Transparent Black inner coax shield Ub White Ub Shield S Figure 4 2 SJB 200 W Ex with SMARTPAT sensor integrated HART resistor and without display left side...

Page 18: ...T sensor without display and integrated HART resistor right side SJB 200 W Ex with SMARTPAT sensor display and without integrated HART resistor SJB 200 W Ex with SMARTPAT sensor without display and in...

Page 19: ...and behind the instrument so that the sensor can be taken out in case of check INFORMATION To achieve reliable measuring results the electrodes must always have full contact with the measuring medium...

Page 20: ...ion is only recommended if the pipeline is completely filled and if there are no particles or air bubbles in the pipeline Consider the diameter of the pipeline i e compare pipeline DN with insertion l...

Page 21: ...pipeline is completely filled and if there are no particles or air bubbles in the pipeline Consider the diameter of the pipeline i e compare pipeline DN with insertion length of the sensor shaft Figur...

Page 22: ...can be connected to the OPTIBRIDGE SMARTBRIDGE or another suitable USB interface cable OPTIBRIDGE SMARTBRIDGE will be connected to the PC via USB port Add the devices regarding the instructions of PAC...

Page 23: ...erence value Press Next Next Next Next to proceed i The old cell constant and the calculated new cell constant appear If you want to save the new cell constant press Next Next Next Next to proceed Set...

Page 24: ...Next Next Next to proceed Input the new cell constant i To save the new cell constant press Next Next Next Next to proceed Set the calibration date with DD MM YYYY Press Next Next Next Next to procee...

Page 25: ...oceed Choose the correct unit and press Enter Enter Enter Enter to proceed Set the reference value After setting the value press Enter Enter Enter Enter to proceed i The old cell constant and the calc...

Page 26: ...r Enter Enter Enter to proceed i The message Save new cell constant Save new cell constant Save new cell constant Save new cell constant appears and the values for the old and new cell constant are sh...

Page 27: ...maged mechanically Dilute hydrochloric acid or cleaning in ultrasonic baths can be helpful to prevent various accumulations for more information refer to Cleaning on page 29 The measuring electrodes a...

Page 28: ...value out of range S04 Res Min res Resistivity Min resistivity Resistivity value out of range S05 T Temp Max Temperature Max temperature Temperature value out of range S06 T Temp Min Temperature Min...

Page 29: ...with these operating instructions it will rarely present any problems INFORMATION For more precise information please contact your local sales office CAUTION Should you nevertheless need to return a...

Page 30: ...CAUTION Disposal must be carried out in accordance with legislation applicable in your country Separate collection of WEEE Waste Electrical and Electronic Equipment in the European Union Separate coll...

Page 31: ...f measurement is Siemens and is normally expressed in S cm An important criterion for the measuring range of conductivity cells is the geometry of the electrodes There are two rules which are characte...

Page 32: ...uctive Measuring range 100 S cm 20 mS cm c 1 at 25 C 77 F Design Temperature sensor Pt1000 Connector VarioPin 2 0 VP2 Operating conditions Process temperature 0 135 C 32 275 F Ambient temperature 10 8...

Page 33: ...Physical layer FSK Device category Sensor galvanically isolated System requirements 250 loop resistance for HART communication Multidrop operation 4 mA In a multidrop communication system up to 32 dev...

Page 34: ...Process connection G3 4 A thread male Figure 7 2 SMARTPAT COND 1200 Dimensions mm Dimensions inch a 228 2 8 98 b 198 7 79 c 7 0 28 d 116 4 57 e 100 3 94 f 20 5 0 81 g VarioPin h 24 0 94 i WS 36 k G3 4...

Page 35: ...of the connected devices can communicate digitally with one another via the HART protocol while simultaneously transmitting the analogue signals When it comes to the field devices and secondary master...

Page 36: ...Burst mode is not supported Burst mode is not supported Burst mode is not supported Burst mode is not supported In the burst mode a slave device transfers cyclic pre defined response telegrams to get...

Page 37: ...the HART Master The current output of the device is passive Figure 8 1 Point to Point connection 1 Primary master with e g PACTwareTM FDT DTM 2 FSK modem 3 HART signal 4 SD 200 W R or SMARTMAC 200 W o...

Page 38: ...ferent devices into the Field Communicator 8 5 1 Installation The HART Device Description for the sensor must be installed on the Field Communicator Otherwise only the functions of a generic DD are av...

Page 39: ...d documentation for information on how to install and set up the DTM 8 7 Overview Basic DD menu tree for Field Communicator 475 Main menu Submenu 1 Measuring value 1 Measuring value 1 Measuring value...

Page 40: ...d diagnostic information on page 28 7 Condensed state Display of status information icon for sensor according to NAMUR NE 107 2 Quick setup 1 TAG 1 TAG set and display TAG 2 Long Tag set and display L...

Page 41: ...nterval in days 0 999 days Default setting 0 5 Time remaining Display of the remaining maintenance time read only 6 Reset interval 1 No 2 Yes Reset maintenance interval Default setting No 2 I O 1 Meas...

Page 42: ...2 Commissioning Set date of commissioning 1 Maximum reached temperature 2 Displayed only if linear temperature compensation is selected 5 Service 1 Service calibration 1 Trimming at 4 mA 2 Trimming at...

Page 43: ...NOTES 9 43 SMARTPAT COND 1200 www krohne com 09 2015 4003041501 MA SMARTPAT COND1200 R01 en Notes MA_SMARTPAT_COND_1200_en_150902_4003041501_R01 book Page 43 Monday September 21 2015 4 33 PM...

Page 44: ...g Krohne Str 5 47058 Duisburg Germany Tel 49 203 301 0 Fax 49 203 301 10389 info krohne com KROHNE 09 2015 4003041501 MA SMARTPAT COND1200 R01 en Subject to change without notice The current list of a...

Reviews: