12
Overview
Front Panel
If you keep the SHIFT button pressed and press one of
the buttons of this section, the “Write Performance” window
appears in the display, and you can save the current track set-
tings into a Performance.
STYLE CHANGE
This button turns the Style Change function on or off.
On
When you select a Performance, the Style might
change according to which Style is memorized
onto the Performance.
Off
When you select a Performance, the Style will
remain the same. Only Keyboard tracks (Sounds,
Effects…) will be changed.
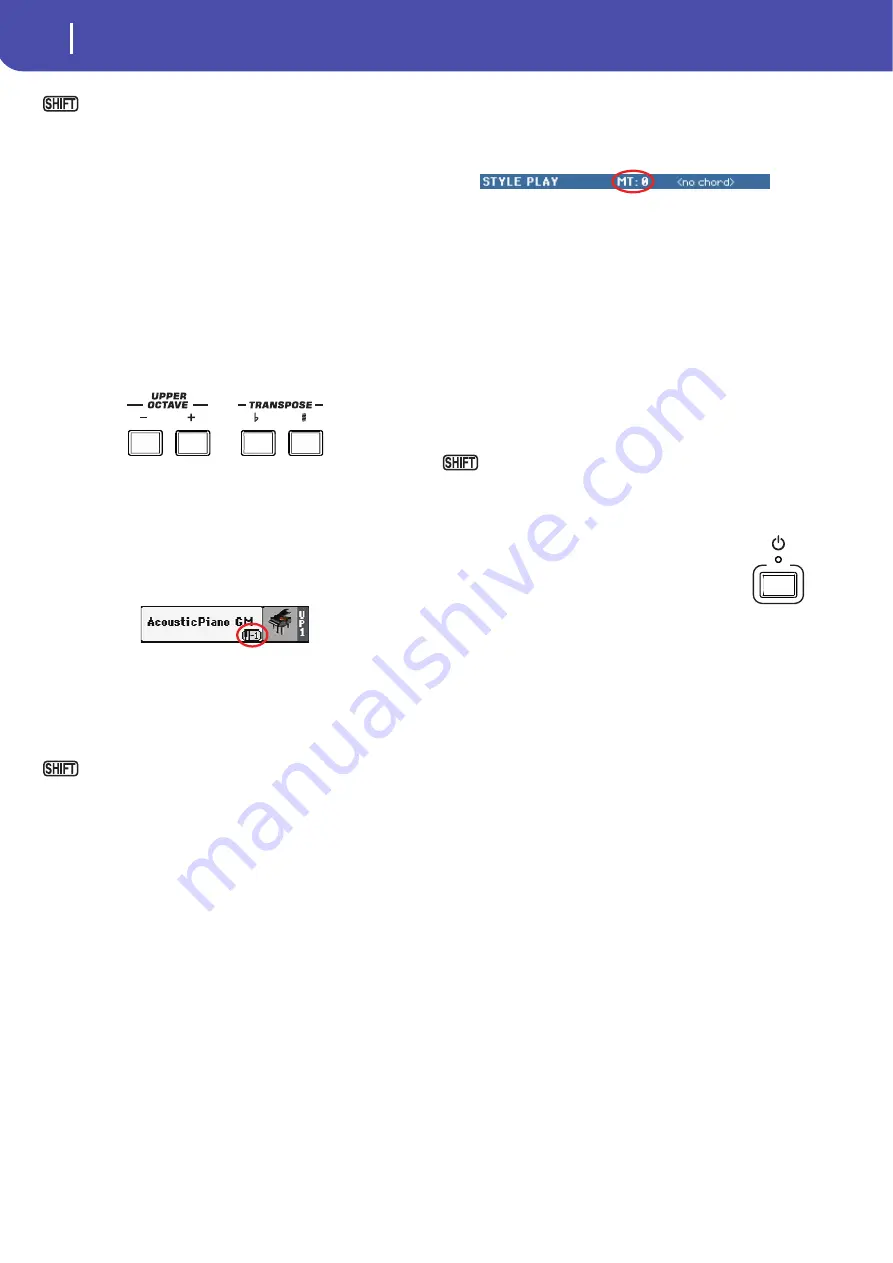
Transpose Section
Use these buttons to transpose the Sounds.
UPPER OCTAVE
Use these buttons to transpose the Upper tracks in steps of one
whole octave (12 semitones; max ±3 octaves). The octave trans-
position value is always shown (in octaves) next to the Sound’s
name.
Press both buttons together, to reset the Octave Transpose to the
saved value.
–
Lowers the selected track by one octave.
+
Raises the selected track by one octave.
You can jump to the Style Play > Tuning page by keeping
SHIFT pressed and pressing one of the UPPER OCTAVE but-
tons.
Hint:
Go to the Tuning page to separately transpose each
track.
TRANSPOSE
These buttons transpose the whole instrument in steps of one
semitone (Master Transpose). The transpose value is usually
shown in the page header.
Press both buttons together, to reset the Master Transpose to zero.
Note:
You can also transpose MP3 files. Keep in mind, however,
that transposition always remains inside the range -5…+6 semi-
tones. This range is enough to cover all keys, but allows to avoid
excessive audio degradation. Any further transposing will be
reversed to fit the range. So, you might see a +7 transpose value
(Just Fifth Up) shown in the display, but the MP3 will actually play
5 semitones lower (Just Fourth Down).
♭
Lowers the Master Transpose in steps of one
semitone.
♯
Raises the Master Transpose in steps of one semi-
tone.
You can jump to the Global > Transpose Control page by
keeping SHIFT pressed, and pressing one of the TRANSPOSE
buttons.
Power On/Off
STANDBY
Use this button to turn the instrument on (LED on)
or off (LED off). When turned off, the instrument
is in “standby” mode.
Press it briefly to turn the instrument on. In case there are User
Sounds based on User PCM Samples, loading may take some
time.
Keep it pressed for about one second to turn the instrument off.
Warning:
When the instrument is in standby mode, it is still con-
nected to the power line. Accessing the inside of the instrument can
be dangerous. To completely disconnect the instrument from the
power, unplug the power plug from the power socket on the wall.
Note:
To avoid wasting power, Pa600 will by default automatically
turn off after two hours of non-active use (playing, pressing but-
tons or using the touch-screen). Please save your data (Perfor-
mances, Styles, Songs, and so on) before taking a prolonged pause.
You can change the auto power-off timer in Global > General Con-
trols > Clock & Power.
Summary of Contents for PA 600
Page 1: ...Quick Guide ENGLISH OS Ver 1 0 MAN0010047 1 E ...
Page 2: ......
Page 6: ...2 Contents ...
Page 7: ......
Page 32: ...28 Easy Mode The Song Play page in detail ...
Page 33: ......
Page 89: ......
Page 95: ......


