Print Media
32
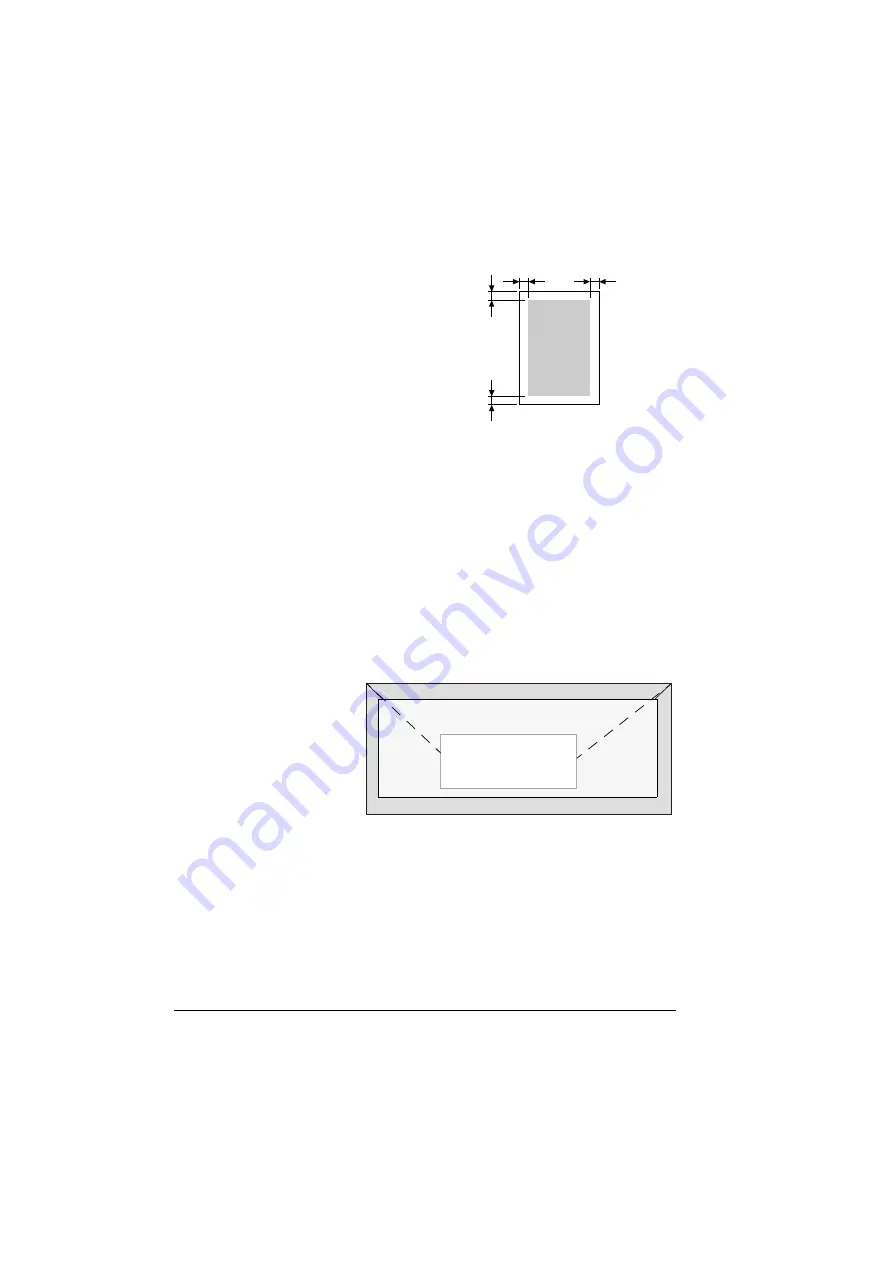
Guaranteed Imageable (Printable) Area
The printable area on all media sizes is
up to 4 mm (0.157") from the edges of
the media.
Each media size has a specific image-
able area, the maximum area on which
the machine can print clearly and with-
out distortion.
This area is subject to both hardware
limits (the physical media size and the
margins required by the machine) and
software constraints (the amount of
memory available for the full-page frame buffer). The guaranteed imageable
(printable) area for all media sizes is the page size minus 4 mm (0.157") from
all edges of the media.
"
When printing in color on legal-size media, the bottom margin is
10 mm (0.394").
"
When printing on coated paper, the top margin is 10 mm (0.394
"
).
Imageable Area—Envelopes
Envelopes have a nonguaranteed imageable area that varies with envelope
type.
"
The envelope
print orienta-
tion is deter-
mined
by your appli-
cation.
Page Margins
Margins are set through your application. Some applications allow you to set
custom page sizes and margins while others have only standard page sizes
and margins from which to choose. If you choose a standard format, you may
lose part of your image (due to imageable area constraints). If you can cus-
tom-size your page in your application, use those sizes given for the imagea-
ble area for optimum results.
a
a
a
a
Printable
Area
a = 4 mm (0.157")
Guaranteed
area
Nonguaranteed area
Nonimageable area 4 mm (0.157")
Summary of Contents for Magicolor 2480 MF
Page 1: ...magicolor 2480 MF User s Guide 4556 9593 01A 1800794 001B ...
Page 6: ......
Page 12: ......
Page 13: ...1 Introduction ...
Page 20: ......
Page 21: ...2 Control Panel and Configuration Menu ...
Page 34: ......
Page 35: ...3 Media Handling ...
Page 57: ...Loading Media 45 4 5 ...
Page 58: ...Loading Media 46 Tray 2 Loading Plain Paper 1 2 ...
Page 60: ...Loading Media 48 6 7 ...
Page 65: ...4 Using the Printer Driver ...
Page 72: ......
Page 73: ...5 Using Direct Print ...
Page 76: ......
Page 77: ...6 Using the Copier ...
Page 84: ......
Page 85: ...7 Using the Scanner ...
Page 89: ...Making Basic Scans 77 Cancel Click to close the WIA driver window ...
Page 90: ......
Page 91: ...8 Replacing Consumables ...
Page 107: ...9 Maintenance ...
Page 115: ...Cleaning the Machine 103 6 7 BOTTOM VIEW Laser lens ...
Page 116: ...Cleaning the Machine 104 8 9 ...
Page 117: ...Cleaning the Machine 105 Cleaning the Duplex Option Feed Rollers 1 2 3 ...
Page 118: ...Cleaning the Machine 106 Cleaning the Media Feed Rollers for Tray 2 1 2 ...
Page 119: ...Cleaning the Machine 107 3 4 ...
Page 120: ...Cleaning the Machine 108 Cleaning the Media Feed Rollers for the ADF 1 2 3 ...
Page 122: ......
Page 123: ...10 10 Troubleshooting ...
Page 133: ...Clearing Media Misfeeds 121 8 9 ...
Page 134: ...Clearing Media Misfeeds 122 10 11 12 ...
Page 136: ...Clearing Media Misfeeds 124 16 17 18 19 ...
Page 137: ...Clearing Media Misfeeds 125 20 ...
Page 139: ...Clearing Media Misfeeds 127 Clearing a Media Misfeed from the ADF 1 2 3 ...
Page 140: ...Clearing Media Misfeeds 128 4 5 6 ...
Page 162: ......
Page 163: ...11 11 Installing Accessories ...
Page 168: ...Duplex Option 156 6 Make sure that both knobs are securely locked 7 ...
Page 170: ...Tray 2 158 2 Be sure to place Tray 2 on a level surface ...
Page 171: ...A Appendix ...
Page 178: ......
Page 182: ......


