31
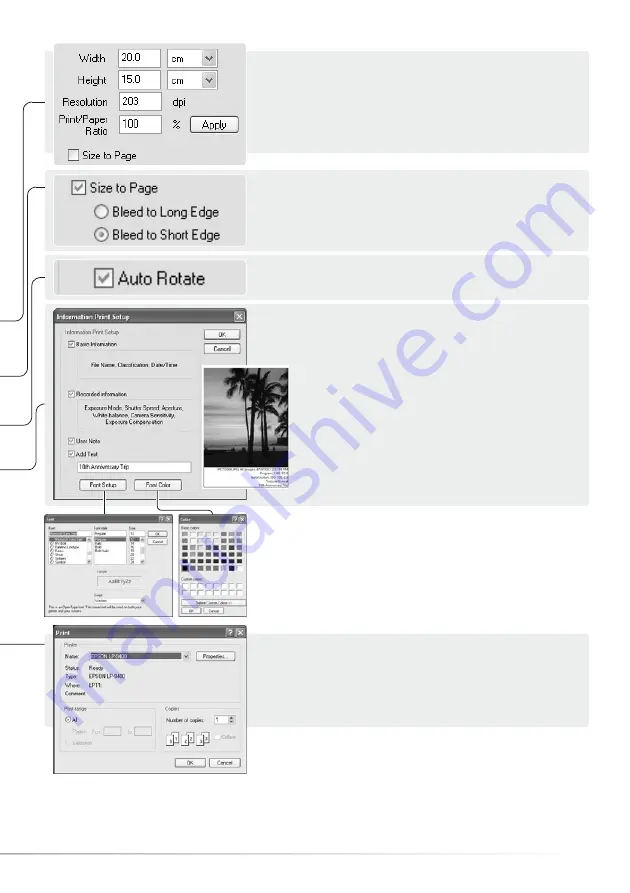
Click the print button to begin printing. The operating
system’s print dialog box opens before the document is
sent to the printer; this screen varies with the operating
system and printer. Refer to the operating system’s help
and the printer instruction manual.
Select the appropriate options from the print dialog box. Click the print button to start printing or the
cancel button to close the window.
Click the check box to add information to the
printout. Click the Info. setup button to select the
information printed.
On the information-print-setup screen, click the
appropriate check boxes. To make a user note, see
section 6.4. Click the add-text check box and enter
a comment in the text field below it. Click “OK” to
complete the setup. Fonts can be selected and
changed; click the font-setup or font-color buttons
to open the appropriate dialog box.
The size-to-page option sets print parameters
automatically. The image can be bled to the long or the
short side of the page; the print preview reflects the setting.
Uncheck the size-to-page option to set print size manually.
The fields are linked so a change in one value is reflected in
the others. The units for width and height can be changed.
To see the affect on the preview image, click the apply
button. Auto rotate can be turned on and off, see below.
Auto rotate orients the image to the page dimensions
automatically; the print preview reflects the setting.
For information on the font-setup and font-color dialog
boxes, see Master notes on page 33.
Summary of Contents for DiMAGE Master Lite
Page 1: ...INSTRUCTION MANUAL ...


