


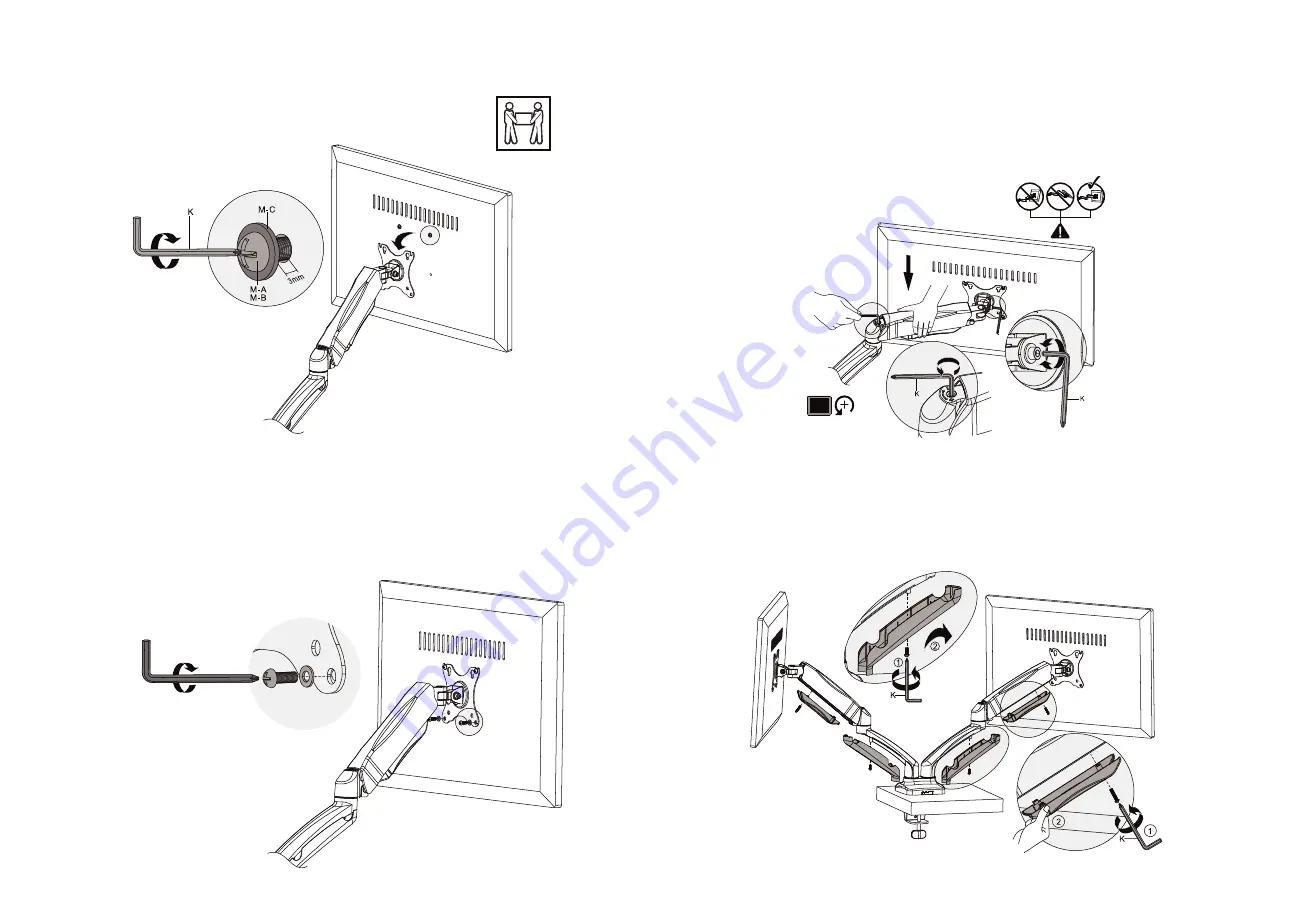
4. Then simply slide the monitor onto the VESA plate by aligning the pear-shaped slots with
the screws attached to the monitor, until it is properly positioned in place.
5. Proceed to insert the other two screws and washers through the lower mounting holes of
the VESA plate. Tighten with the screwdriver to securely mount the monitor to the arm.
When doing so, be careful not to over-tighten the screws.
6. Repeat the same procedure to attach the second monitor to the other arm.
7. When both monitors are mounted, adjust the tension of each spring using the supplied allen
key. Lower the monitor down to access the screw. If the monitor is rising up, loosen the
screw by turning it to the left. If the monitor is falling down, tighten the screw by turning it
to the right. The monitor is properly counterbalanced when it can be moved vertically to
any position smoothly with just a touch.
8. Now unscrew the cable covers located under the arms. Route the monitor cables along the
channels, leaving enough slack to allow for proper movement, as shown below.
Monitor with flushed or recessed mounting holes
Summary of Contents for KPM-312
Page 7: ......


