158
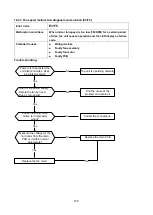
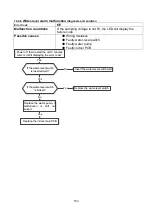
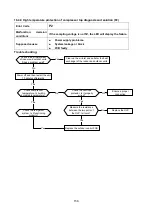
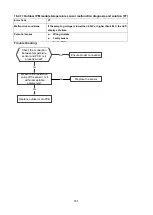
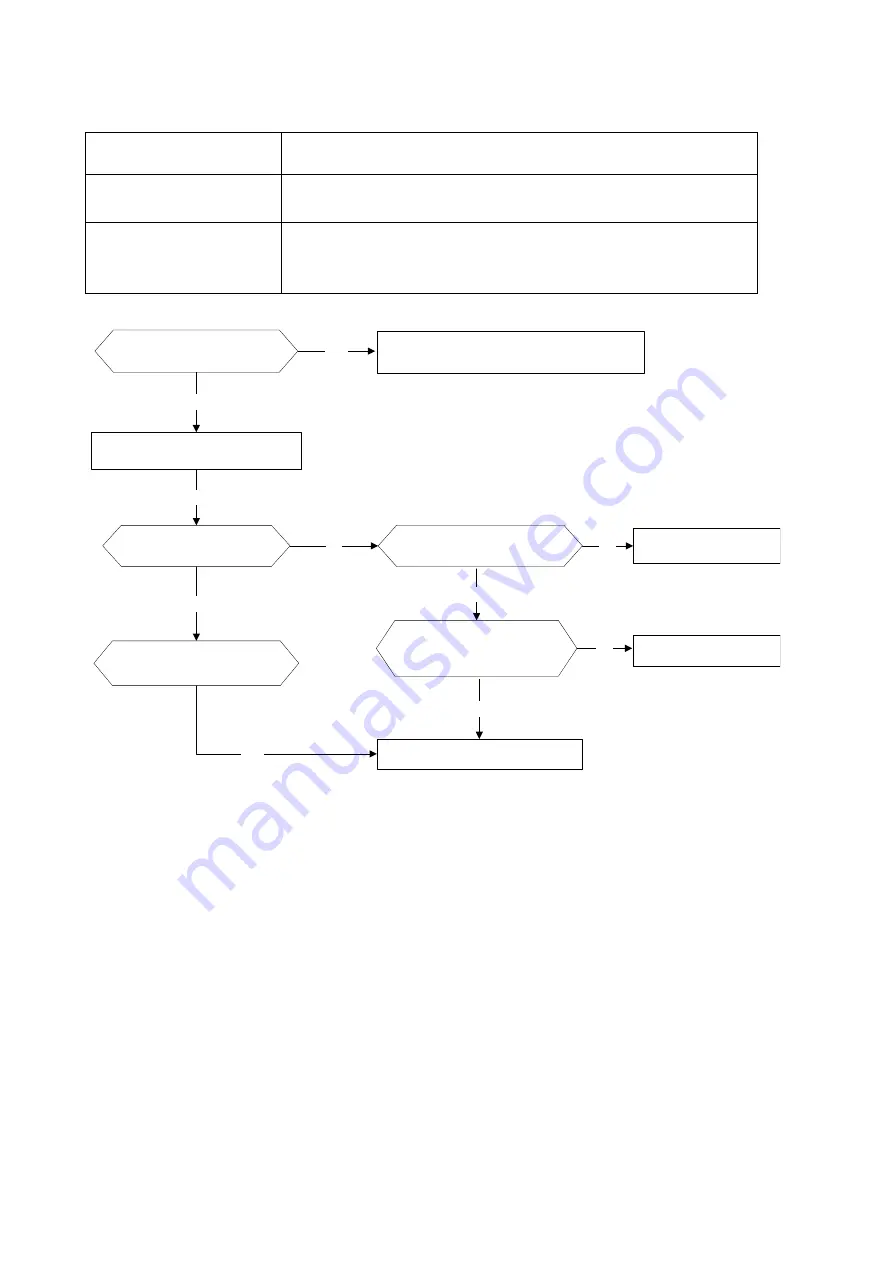
16.4.9 High temperature protection of compressor top diagnosis and solution (P2)
Error Code
P2
Malfunction
decision
conditions
If the sampling voltage is not 5V, the LED will display the failure.
Supposed causes
●
Power supply problems.
●
System leakage or block
●
PCB faulty
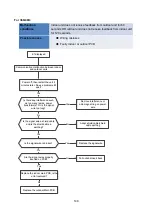
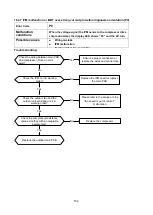
Trouble shooting:
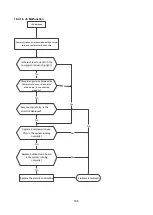
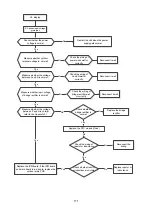
Check the air flow system
of indoor and outdoor units.
Does a problem exist?
Clear up the air inlet and outlet or the heat
exchanger of the indoor and outdoor units.
Yes
No
Yes
Yes
Power off and then restart the unit
10 minutes afterwards
Check compressor
temperature. Is it within
acceptable parameters?
No
Check the refrigerant
system. Is it functioning
properly?
Yes
Check the overload
protector. Is it properly
wired?
Ensure a proper
connection
No
Measure the resistance
between the two ports of
the OLP. Is it zero?
Yes
Replace the OLP
No
Replace the outdoor control PCB
Yes
Summary of Contents for KDIP012-H2
Page 8: ...5 2 2 Part names of Indoor Outdoor units Cassette Units ...
Page 9: ...6 KDIR Duct Units ...
Page 10: ...7 KDIP Duct Units ...
Page 11: ...9 Ceiling floor Units ...
Page 12: ...10 HESP DUCT Units ...
Page 19: ...19 2 3 4 7 Outside Water Pump for Optional When Ceiling Installation ...
Page 31: ...33 KSIE024 H220 O KSIR036 H218 inch 37 2 16 1 31 9 40 6 26 5 15 9 ...
Page 34: ...36 Ceiling floor Units ...
Page 39: ...41 KTIR036 H2G1 KTIR048 H2G1 ...
Page 40: ...43 KUIR18 H2 KUIR24 H2 ...
Page 41: ...44 KFUF036 H2G1 KFUF048 H2G1 ...
Page 42: ...45 KFUF060 H2G1 ...
Page 43: ...46 KFUF036 H2G1 KFUF048 H2G1 ...
Page 44: ...47 KDIP090 H2 KDIP012 H2 KDIP018 H2 KDIP24 H2 ...
Page 69: ...74 6 2 Outdoor Unit KSIE018 H220 O KSIE024 H220 O ...
Page 70: ...75 KSIE009 H221 O KSIE012 H220 O ...
Page 71: ...77 KSIR036 H218 ...
Page 77: ...83 KDIR09 H2 Code 0 Code 1 Code 2 Code 3 Code 4 ...
Page 78: ...84 KDIR12 H2 Code 0 Code 1 Code 2 Code 3 Code 4 ...
Page 79: ...85 KDIR18 H2 Code 0 Code 1 Code 2 Code 3 Code 4 ...
Page 80: ...86 KDIR24 H2 Code 0 Code 1 Code 2 Code 3 Code 4 ...
Page 96: ...104 12 Field Wiring 9K 24K 36K 48K 60K ...
Page 97: ...105 ...
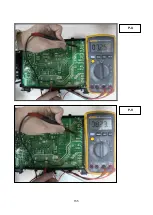
Page 147: ...155 P U P V ...
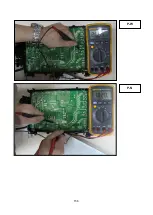
Page 148: ...156 P W P N ...
Page 181: ...191 4 Remove the evaporator fixing clamps to disassemble the evaporator Fixing clamps 1 screw ...
Page 188: ...221 5 Remove the four fixing screws of the fan motor then remove the motor 5 ...

