


80
If you’ve created lettering with any particular font, the users of your file will also need that same font
installed, unless you first convert the text to a graphic. If they do not have the font available, they will
receive a message to replace the font with one already installed before the file will open. To prevent this
from happening, select your text and go to
Arrange>Text to Graphics
.
If you’ve already welded your text,
then this step is not necessary.
If you’ve creating lettering, consider sharing the name of the font you used, in case the user wants to
journal in the same font or create additional text from the same font to cut. To do this, use the
Notes
feature mentioned below.
All files should be test cut to make sure the final product is exactly as you had planned in your design and
the cutting is smooth and relatively fast. Photos or scans of the final product are also a worthy inclusion
with your file.
Instructions may also be necessary if your file involves folding or it’s a detailed paper piecing. Again, the
Notes
feature allows you to easily add text to your file… text that won’t be cut.
If you want your instructions
in a separate file, be sure to create them in a format that most users can open, such as .txt, .doc, or .pdf.
If you wish to place images on separate layers or even on different pages within the same file, refer to the
information on
Sheet Layer Palette
under Arranging (in
Section 3.4 Manipulating Images in KNK Studio
)
and the information on
Page Control
(in
Section 9.10 Features for Professionals
).
There are five tools under the
Measure Tools
icon on the
Tools
toolbar. Some are useful during the
design phase, while others can be used to make your file look more finished and professional.
o
Measurement: Similar to using a tape measure, obtain the length for any two points on the screen.
Click once and then drag the mouse to any location. The distance is shown in the Smart Bar.
o
Dimension: Use this tool to label the distance between any two points on the screen. Select line type
from the Smart Bar and click start and end points. The dimension, in chosen units, will be added to the
screen.
o
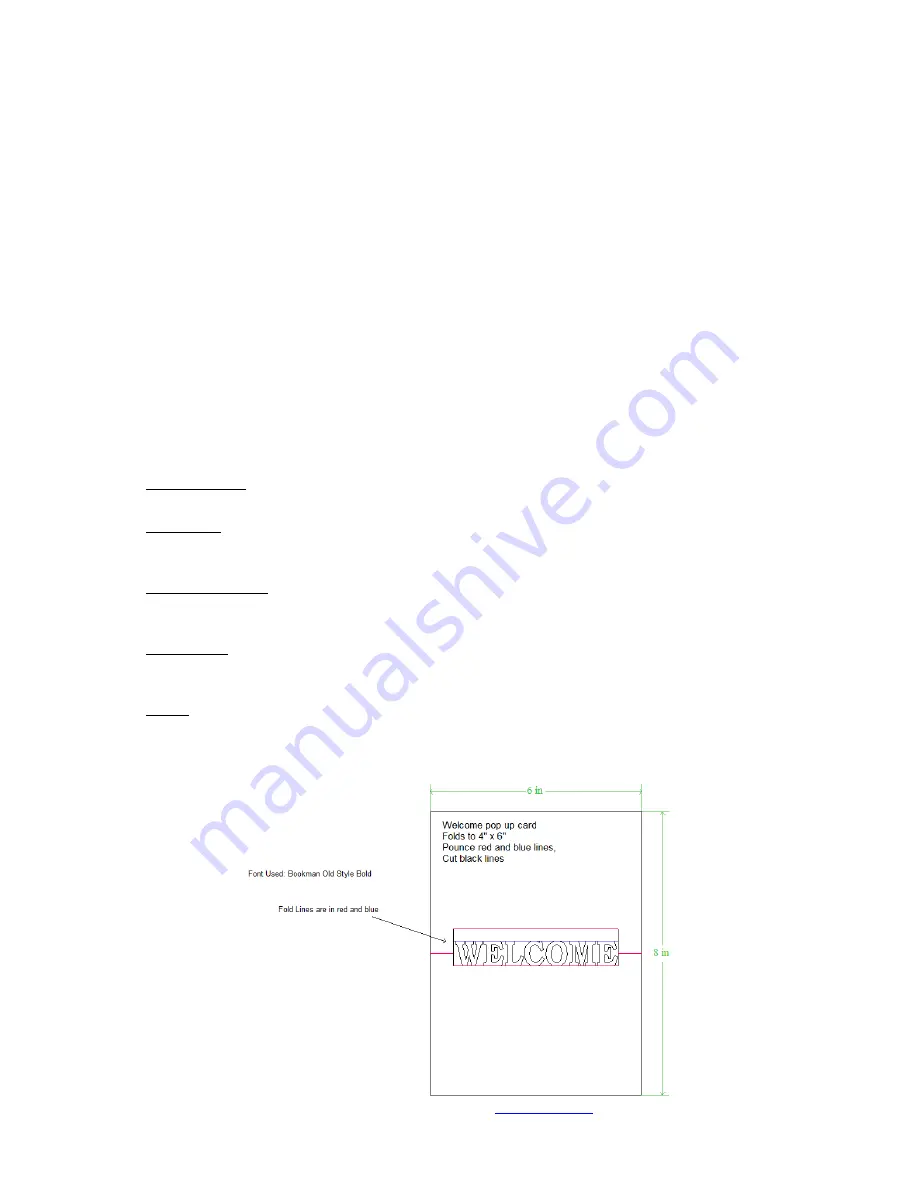
Object Dimension: Similar to Dimension, but specific to the selected object. Drag from any of the red
targets on the object and upon releasing, the dimensions will be marked, along with arrows (see
diagram below).
o
Arrow Draw: Drag from any point to create an arrow. Double click and a text box will open where a
custom label can be created. This is useful for indicating fold lines in a project or labeling images in a
paper piecing (see diagram below).
o
Notes: Text in any size and font can be added to the screen. This is useful for adding a title and
instructions to a project. The text created by
Notes will not be cut. It’s advisable to use a common,
simple font, such as Arial or Times New Roman, since the user will need to have the same font
installed on their computer and you will want the text to be easy-to-read.
*** If you enjoyed the designing tutorials in this chapter, be sure to check out
for more free tips and free video tutorials.


