


69
7.8 Making Paths or Grouping
When you have completed the editing of an image, select the entire image by using
Ctrl-A
or dragging a
large box around the image to select all parts. Select
Arrange>Make Path
or
Ctrl-H
. This will now recolor
the entire image to one color and the image will be treated as a single object. If you have used individual
colors within the image and wish to retain those colors, then instead of using Make Path, just group the
image using
Layout>Group
or
Ctrl-G
.
This isn’t a necessary step, but it does prevent individual paths from being separated from others. Also the
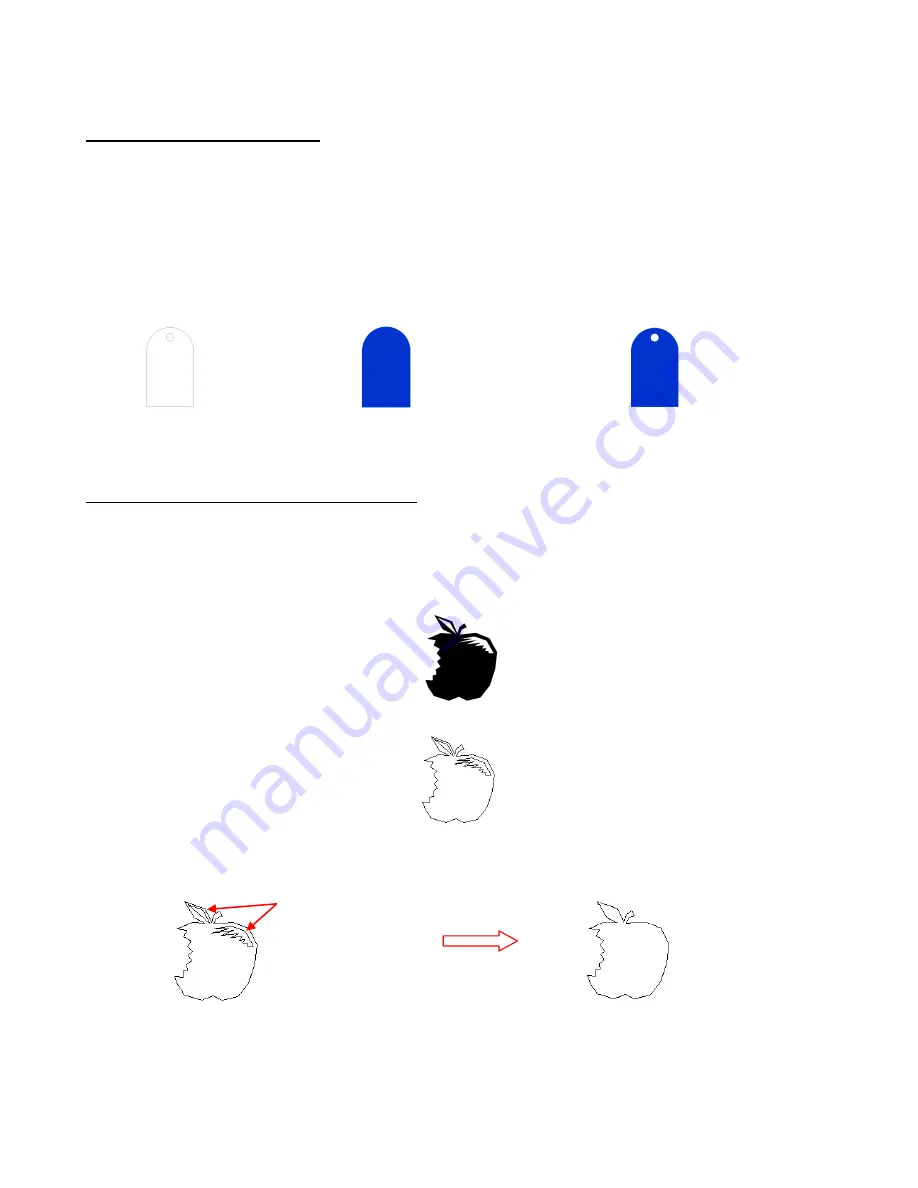
Make Path step can be used to subtract one path from another. For example, with the following tag shape,
if fill is turn on, the circular hole will disappear. But after applying Arrange>Make Path, the hole turns white
and will now appear:
Tag with fill turned off
Tag with fill turned on
Tag with fill turned on after
Make Path
is applied
7.9 Example of Editing a Vectorized Image
Using the information from the prior sections, the following image will be edited. This image is from the file
apple.cdl on the Clipart and Fonts CD, which accompanies the KNK Studio program. The purpose of this
editing will be to make the image a paper piecing (i.e. break the image into the apple, the leaf, and the
stem). But first, we will make the image simpler and more curved.
(1)
Open the apple.cdl file:
(2)
Turn off the fill by pressing
Alt-S
:
(3)
Select the image and use
Arrange>Break Path
to break the paths in the image. In this example, the
interior parts are going to be deleted. Click away from the image and then click on each interior part and
press the
Delete
key:
(4)
Next, convert all of the nodes to curve nodes for a smoother, more rounded apple:
Select these two
parts and press the
Delete key


