


55
(8)
The first step is to select the best settings for the vectorization. Click on
Trace Setup
and select settings
based on your image. Refer to
Appendix D
for a complete understanding of these settings and note that
after vectorization, you can also double click your image to try again with different settings. As a first test,
from the drop-down menu, try
Logo-Long Lines and Curves.
(9)
Click on
OK
to close the
Trace Setup
window; then click on the
Vectorization
icon. The image will be
traced. Then click on
Close
. Drag one image away from the other. Turn off
Fill
, if needed to reveal the
results shown in the left image after Step (10).
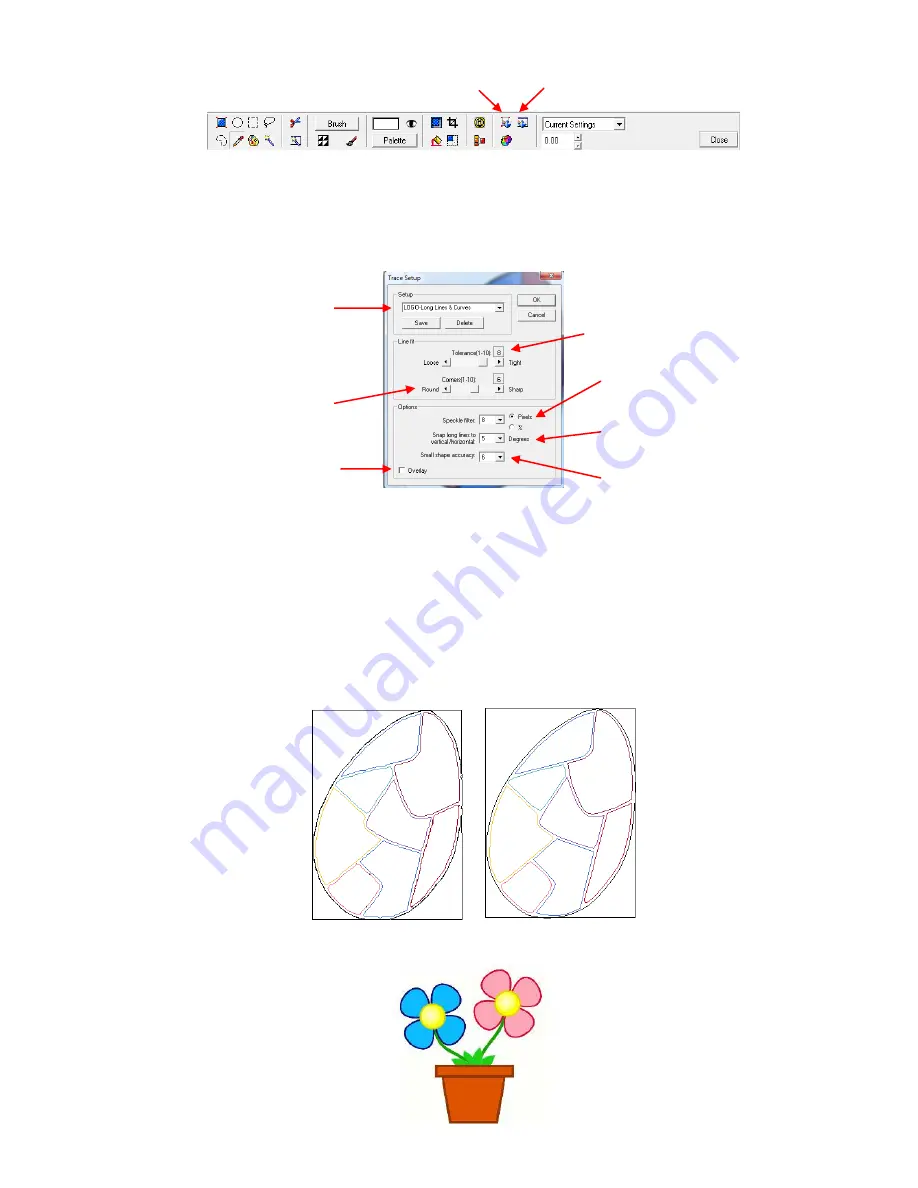
(10) In our first pass, this image was not traced very well, as shown below. However, based on using the
guidelines in
Appendix D
, the following changes to the settings were made:
Tolerance
reduced to 3,
Corners
reduced to 4,
Small Shape Accuracy
turned off, and
Overlay
selected. The new image was
greatly improved and is ready to cut. Note that you can use
Arrange>Break Path
to break the image into
individual segments, if you wish to delete the exterior rectangular border.
(11)
For a second example, let’s pick an image with
a need to differentiate between two similar colors:
Vectorization
Trace Setup
In general, first try either Logo-
Long Lines and Curves or Logo-
Complex with Detail depending
on which better describes your
image.
Decrease to get smoother tracing
but accuracy will be lost.
Select based on look of image:
Lower value for curved images,
higher value for sharp corners.
Increase to eliminate tracing
random small speckles
Only set if image is not horizontally
or vertically straight.
Set according to ratio between
smallest and largest objects.
Select to produce simpler
tracings with no overlap.
First pass
Second pass


