


54
(5)
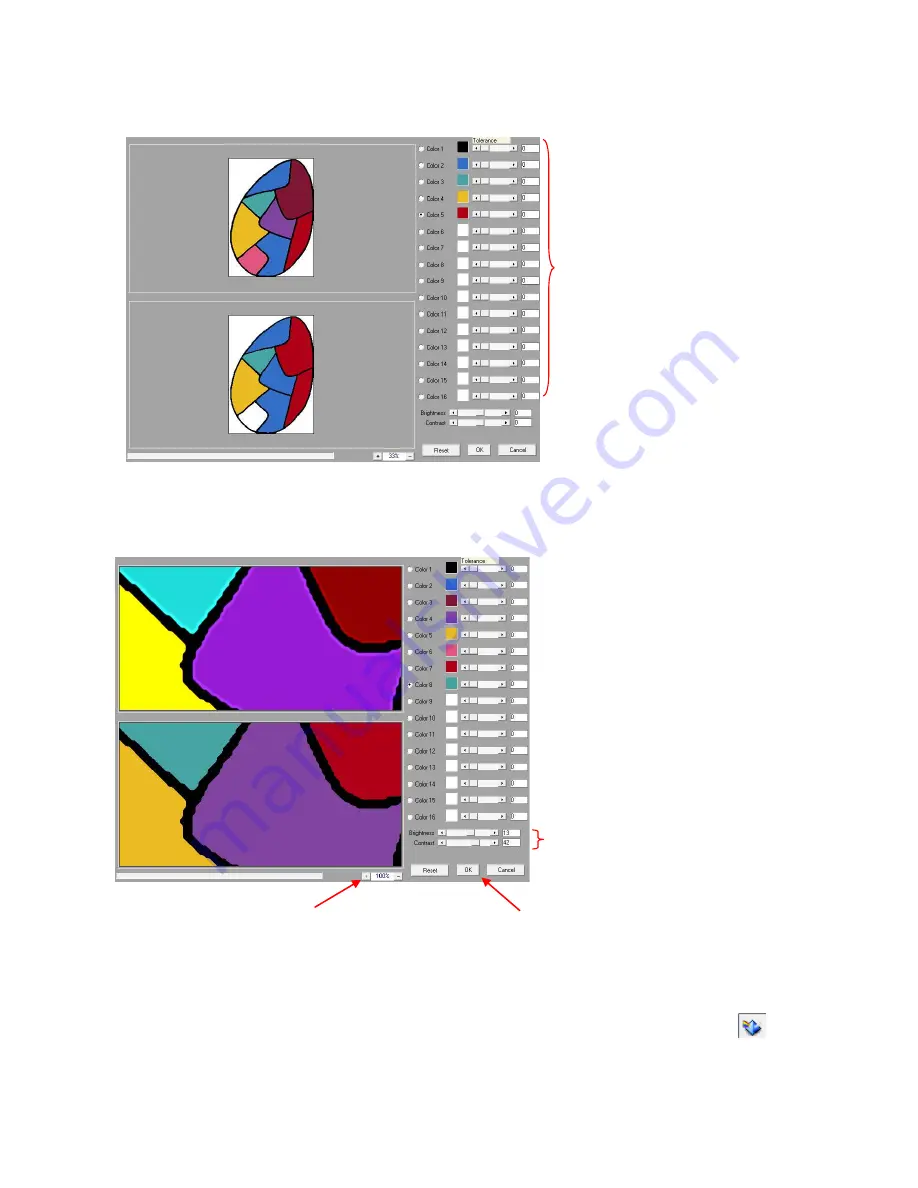
The next step is to adjust the
Brightness
and
Contrast
until the image in the lower window is as clear as
possible. Zoom in as indicated below and note that the segments no longer have lighter shades along the
black borders.
(6)
Upon clicking on
OK
, a progress bar will appear at the bottom of the screen. When it reaches 100%, your
enhanced image will appear, along with a popup window saying your image is ready to be vectorized.
(7)
Click on
OK
and then either double click your new image or select the first icon (
Accuscan
)
under
the
Scan Tools
menu on the
Tools
toolbar. The following Smart Bar will appear at the top of your screen:
Black will already be assigned. Check
the next Color # in the list and then
click on another color in the upper
image on the left. That color will then
appear in the lower image. Continue
until all desired colors are filled.
Scroll the Brightness and
Contrast bars to get a clean,
filled-in appearance.
Click here to zoom in close. You can then pan the
area by dragging your mouse over the image.
When satisfied with the lower
image, click on OK.


