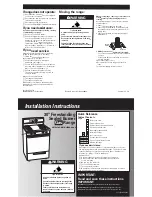
background image

8

16A.

Push in and turn the surface

burner knobs to the “LITE” position. The
surface burner flame should light within
4 seconds.

After lighting the burners, turn the
control knobs to "OFF".

If burners do not light properly, turn
control knob to the “OFF” position. Check
that burner cap is in the proper position.
Check that circuit breaker has not tripped
or house fuse has not blown. Check that
the manual gas shutoff valve is in the
“ON” position. Check operation again. 

If a surface burner does not light at this
point, contact your KitchenAid dealer for
assistance.

cooktop

burners

valve
stem

16C.

Check flame on “HI” for a

blue color. It should be clean and soft in 
character. No yellow tip, blowing or
lifting of flame should occur. Occasional
orange flashes are normal and reflect
different elements in the air or gas.

16B.

Adjusting the surface burner

or grille flame: 

NOTE:

there is no adjustment for the

griddle flame. Gas flow is at 100%,
temperature is controlled by thermostat.

Push in and turn each control knob to the
“LO” position. The “LO” setting of each
burner has been factory set to the lowest
position available to provide reliable
reignition of the burner. If it does not
stay lit on the “LO” position, check “LO”
position as follows:

a. Turn control knob to “LITE” until

burner ignites.

b. Quickly turn control knob down to

“LO” position.

c. If burner goes out, readjust valve as

follows:

Remove control knob. Insert a flat-blade
screwdriver into the hollow valve stem
and engage the slotted screw. Flame size
can be increased or decreased by turning
the screw. Adjust flame until you can
quickly turn control knob from “HI” to
“LO” position without extinguishing the
flame. Flame should be as small as
possible without going out.

ports

typical surface

burner flame at

highest setting

16.

Electronic Ignition System —
initial lighting

Surface burners use electronic ignitors in
place of standing pilots. When the
cooktop control knob is pushed in and
turned to the “LITE” position, the system
creates a spark to light the burner. This
sparking continues until the control knob
is turned to the desired setting.

Check the operation of the
surface burners.

17.

Check operation of oven element.

Turn oven selector to “BAKE”. “350F” will
show on display. Press “Enter”. First
Preheat light comes on when oven
temperature begins to rise. When second
Preheat light comes on, open oven door
and hold hand above oven floor and feel
for heat. Do not touch oven floor. Press
“Cancel” and turn oven selector to
“Reset”.

18.

Check the operation of the broiler

element. Turn oven selector to “BROIL”.
“HI” will show on display. Press “Enter”.
Look through oven window. The top
element should glow red and heat should
be radiating out of the door. Press
“Cancel” and turn oven selector to
“Reset”.

If the oven does not operate, check that
power supply is turned on, that no fuses
are blown, or no circuit breakers are
tripped. If the oven still does not operate,
contact your KitchenAid dealer or
designated service company.

19.

Reinstall the bottom vent

pushing it upward until the holes line up
at top of vent. Reattach the vent using
the 4 screws removed in step 2. Reinstall
the 2 side trim pieces using the 4 screws
(2 each side) removed in step 2.

20.

Place burner grates over burner

caps. The simmer plate may set on one
of the grates or be stored for future use.
(See Use and Care Guide.)

To get the most efficient use from your
new dual fuel range, read your
KitchenAid Use and Care Guide. Keep
Installation Instructions and Guide close
to the range for easy reference.

Summary of Contents for 8302472A

Page 1: ...the surface below the control panel Model _______________________________ Serial ________________________________ Questions regarding features operation performance parts or service Call 1 800 422 1230 or visit our web site at www kitchenaid com IMPORTANT Read and save these instructions 48 121 9 cm Commercial Style Dual Fuel Range with self cleaning thermal convection oven for residential use onl...

Page 2: ...nform with American National Standard National Fuel Gas Code ANSI Z223 1 latest edition or CAN CGA B149 latest edition installation codes WARNING If the information in this manual is not followed exactly a fire or explosion may result causing property damage personal injury or death Do not store or use gasoline or other flammable vapors and liquids in the vicinity of this or any other appliance WH...

Page 3: ... 8 cm clearance to back wall use the optional stainless steel island trim included with the range to cover the backguard mounting flanges 48 121 9 cm min upper cabinet width 48 1 4 122 6 cm opening width 20 50 8 cm 12 30 5 cm 5 1 2 14 cm 8 20 3 cm 18 45 7 cm upper cabinet to countertop gas line opening to be located in this area junction box to be located in this area 12 30 5 cm min clearance from...

Page 4: ...n the same room but external to the range and should be in a location that allows ease of opening and closing Do not block access to the shutoff valve to range shutoff valve open position G If rigid pipe is used as a gas supply line a combination of pipe fittings must be used to obtain an in line connection to the range All strains must be removed from the supply and fuel lines so range will be le...

Page 5: ... and ordinances C The range should be connected directly to the fused disconnect or circuit breaker box through flexible armored or non metallic sheathed copper cable The flexible armored cable extending from the fuse box or circuit breaker box should be connected directly to the junction box D Locate the junction box to allow as much slack as possible between the junction box and the range so tha...

Page 6: ...al 7B Where local codes permit connecting the frame ground conductor to the neutral white junction box wire not used for Canadian installations Figure 2 Grounded neutral junction box red wires white wire white and bare or green wires 3 wire cable from power supply black wires 4 wire cable from range U L or CSA listed conduit connector 1 Disconnect power 2 Connect the flexible armored cable from th...

Page 7: ...owing instructions Test all connections using an approved non corrosive leak detection solution Bubbles will show a leak Correct any leak found 14 Put a burner cap on each burner base Place burner grates over burner bases and caps 15 Reconnect power PF should appear in the clock displays Refer to your Use and Care Guide for instructions on using the electronic control 12 Open manual shutoff valve ...

Page 8: ...e flame Flame should be as small as possible without going out ports typical surface burner flame at highest setting 16 Electronic Ignition System initial lighting Surface burners use electronic ignitors in place of standing pilots When the cooktop control knob is pushed in and turned to the LITE position the system creates a spark to light the burner This sparking continues until the control knob...

Page 9: ... at www kitchenaid com When you call you will need the range model number and serial number Both numbers can be found on the model serial rating plate located on the surface below the control panel If you need service In the event that your KitchenAid appliance should need service call the dealer from whom you purchased the appliance or a KitchenAid designated service company A KitchenAid designat...

Page 10: ...WITCH 1 BRN BU V GRN W OR BU R Y R GY BK BK W BK W t BK P4 1 P4 2 P7 4 P7 2 P7 3 P3 1 P1 3 P5 4 P5 1 P5 3 P1 1 P1 5 TAN P7 1 W W TAN TAN R M BLOWER DOOR LOCK MOTOR LATCH R V P7 5 SUPPRESSOR WP 4451985 ELECTRONIC CONTROL RIGHT SLAVE DOUBLE LINE BREAK RELAY TOD NON RESETTABLE P9 1 P9 3 SEE LATCH ASSY Y ORG RS2 RS1 BK BK OFF AUTO LIGHT SWITCH LIGHT POWER SUPPLY ORG W W W R CONTROL POWER TRANSFORMER B...

Page 11: ...________ Pour toute question concernant caractéristiques utilisation performance pièces ou service téléphoner au 1 800 422 1230 ou consulter notre site Internet à l adresse www kitchenaid com IMPORTANT Lire et conserver ces instructions Cuisinière style commercial 121 9 cm 48 po deux combustibles avec four autonettoyant thermique à convection pour utilisation résidentielle seulement Dosseret néces...

Page 12: ... dégagements de séparation spécifiés sur la plaque signalétique On trouve la plaque signalétique et l étiquette d information sur les gaz combustibles sous le tableau de commande de l appareil L installation réalisée selon ces instructions doit être conforme aux dispositions des codes et règlements locaux En l absence d un code local l installation doit être conforme aux dispositions de la plus ré...

Page 13: ...6 cm 3 po maximum 50 8 cm 20 po 30 5 cm 12 po 14 cm 5 1 2 po 20 3 cm 8 po 45 7 cm 18 po entre placard mural et plan de travail Placer la canalisation de gaz dans cette zone Placer la boîte de connexion dans cette zone Dégagement de séparation de 30 5 cm 12 po min entre la cuisinière et un mur des matériaux combustibles des deux côtés de la cuisinière et au dessus de la surface de cuisson Dégagemen...

Page 14: ...manuel homologué doit être installé sur la canalisation d arrivée de gaz Ce robinet d arrêt devrait être situé dans la même pièce que la cuisinière à un emplacement permettant un accès aisé pour les manoeuvres d ouverture et de fermeture Ne pas entraver l accès au robinet d arrêt vers la cuisinière robinet d arrêt ouvert G Si la canalisation de gaz est une tuyauterie rigide utiliser une combinaiso...

Page 15: ...nière La liste des pièces fournies avec la cuisinière dépend du modèle commandé 3 Placer sur le sol derrière la cuisinière un morceau de carton provenant du côté de l emballage Saisir fermement la cuisinière de chaque côté participation deux ou plus de personnes Soulever la cuisinière d environ 8 cm 3 po et transférer la cuisinière de la palette à la feuille de carton éviter d endommager le planch...

Page 16: ...conduit homologation U L ou CSA câble à 4 conducteurs de la cuisinière conducteurs verts ou nus conducteurs blancs conducteurs rouges Figure 1 Conducteur neutre non relié à la terre 7B Si le code local permet le raccordement du conducteur de liaison à la terre connecté au châssis au conducteur neutre blanc dans la boîte de connexion cette configuration n est pas utilisée au Canada Figure 2 Conduct...

Page 17: ...rêt manuel de la canalisation de gaz Attendre quelques minutes pour que le gaz expulse l air de la canalisation installation du dosseret installation de la garniture pour îlot trou central pas utilisé 3 vis avant 4 vis nécessaires à l arrière mais pas représentées appliquer un produit d étanchéité conduit de raccordement flexible raccord droit 1 2 po robinet d arrêt manuel canalisation de gaz 1 2 ...

Page 18: ...orifices flamme typique d un brûleur standard de la table de cuisson pour le débit thermique maximum 17 Contrôle du fonctionnement de l élément du four Placer le bouton de sélection à la position BAKE cuisson au four Le message 350 F apparaît sur l afficheur Appuyer sur Enter Le témoin de préchauffage s illumine d abord puis la température commence à augmenter dans le four Lorsque le second témoin...

Page 19: ... cet appareil ménager KitchenAid contacter le marchand chez lequel il a été acheté ou contacter un établissement de service agréé par KitchenAid On peut trouver les noms et adresses des établissements de service agréés dans l annuaire local Pages jaunes à la rubrique Appareils électroménagers service et réparations Pour obtenir le nom et l adresse d un établissement de service après vente agréé on...

Page 20: ...P1 1 P1 5 TAN P7 1 BL BL TAN TAN R M VENTILATEUR R VI P7 5 SUPPRESSEUR WP 4451985 MODULE DE COMMANDE ÉLECTRONIQUE CÔTÉ DROIT ASSERVI RELAIS DISJONCTION BIPOLAIRE RELAIS DISJONCTION BIPOLAIRE TOD NON RÉARMABLE TOD NON RÉARMABLE P9 1 P9 3 SYSTÈME DE VERROUILLAGE SYSTÈME DE VERROUILLAGE JA OR RS2 RS1 N N OFF AUTO ALIMENTATION ÉCLAIRAGE ALIMENTATION ÉCLAIRAGE OR BL BL BL R TRANSFORMATEUR ALIMENTATION ...

Reviews: