5
Service Guide
78
Keysight U8001A/U8002A User’s and Service Guide
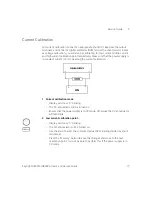
3 Middle current calibration point.
– Display will show “C” blinking.
– The M2 annunciator will be turned on.
– Use the knob to enter the computed value (DVM reading divided by shunt
resistance).
– Press the “Memory” button to save the changes and move to the next
calibration point. You will be able to perform this if the power supply is in
CC mode.
4 High current calibration point.
– Display will show “C” blinking.
– The M3 annunciator will be turned on.
– Use the knob to enter the computed value (DVM reading divided by shunt
resistance).
– Press the “Memory” button to save the changes and the whole calibration
process is done. You will be able to perform this if the power supply is in CC
mode.
5 Calibration done
– Display will show “donE CAL”
– The output is disabled and the OFF annunciator will be turned on.
6 Reenter calibration mode
– Press the “Memory” button to reenter the calibration mode. The calibration
will start with voltage calibration mode.
7 Exit calibration mode
– Turn off the power supply to exit the calibration mode.
8 Toggle between calibration modes
– Along the calibration process, you can toggle between voltage calibration
mode and current calibration mode by pressing the “Voltage/Current”
button.


