background image

Test Set Operating System

3

Getting Started Guide

61

Spyware protection

There is no anti-spyware software installed on the test set. This should not be a problem 
if you do not use the test set for a lot of internet browsing. Having spyware in the test set 
could have an impact on the test set performance.

Summary of Contents for Agilent X-Series

Page 1: ...B Wireless Communications Test Set Getting Started Guide Notice This document contains references to Agilent Please note that Agilent s Test and Measurement business has become Keysight Technologies F...

Page 2: ...ivalent agency regulation or contract clause Use duplication or disclosure of Software is subject to Agilent Technologies standard commercial license terms and non DOD Departments and Agencies of the...

Page 3: ...nologies shall pay shipping charges to return the product to Buyer However Buyer shall pay all shipping charges duties and taxes for products returned to Agilent Technologies from another country Wher...

Page 4: ...Acoustic Noise Emission Geraeuschemission LpA 70 dB Operator Position Normal Position Per ISO 7779 LpA 70 dB Am Arbeitsplatz Normaler Betrieb Nach DIN 45635 t 19 Acoustic Noise Further Information Su...

Page 5: ...display annotations 3 Test Set Operating System This chapter describes the Microsoft Windows OS configuration and the settings used with the Agilent test set software 4 Using Microsoft Windows The inf...

Page 6: ...t Set Power On Time 23 Instrument Information 24 Power requirements 24 Environmental Conditions Operating 25 Ventilation 26 Instrument Maintenance 26 Protecting against electrostatic discharge 28 2 Fr...

Page 7: ...48 Transporting a License Between X Series Test Sets 50 Windows Configuration 53 Settings that can be changed 53 Settings that must not be changed 54 Configuring Printers 56 Configuring LAN 57 Hostnam...

Page 8: ...ternet 92 Accessing the Web Control tab 96 Selecting the Get Data tab 97 Selecting the Get Image tab 98 Selecting the SCPI Telnet tab 100 Selecting the Help Tab 102 Capturing Printing Displays and Win...

Page 9: ...10 Getting Started Guide...

Page 10: ...st set and generate and view a signal The following topics can be found in this section Initial Inspection on page 12 Test Set Location and Rack Mounting Requirements on page 13 Turning on the test se...

Page 11: ...ing the contents Item Deliverable Description Getting Started Guide Provides first time power on instructions licensing information operating system information and general hardware information Agilen...

Page 12: ...test set are not obstructed The minimal required clearance is 2 inches Airflow restrictions cause additional airflow noise and cause the fans to speed up so they can draw in enough air for the requir...

Page 13: ...s 1 Connect the mouse Connect the mouse to one of the USB ports on the test set 2 Power on the test set a Position the test set so you have easy access to the power cord and plug it in b Press the pow...

Page 14: ...Agilent window The following Welcome window appears giving you information about the End User License Agreement At this time it is safe to turn off the instrument before initializing the software Afte...

Page 15: ...l required processes continue The system reboots The XSA application initializes 6 Verify the installation a On the test set press System Show System b Verify that the purchased application s appear i...

Page 16: ...eq 1 GHz g Press AMPTD Y Scale Ref Value 10 dBm h Press FREQ Center Freq 1 GHz i Press SPAN X Scale Span 8 MHz The purpose is to use a loopback cable to verify that the test set s source can generate...

Page 17: ...18 Getting Started Guide 1 Quick Start The 1 GHz signal appears on the display Steps Actions Notes...

Page 18: ...tion and Rack Mounting Requirements and Power requirements on page 24 for more details The test set can require more than 5 minutes to power on This is affected by Windows start up requirements The Ag...

Page 19: ...ue Agilent window The following Welcome window appears giving you information about the End User License Agreement At this time it is safe to turn off the instrument before initializing the software A...

Page 20: ...tem reboots Several required processes continue The system reboots The XSA application initializes 5 Verify the installation a Press System Show System b Verify that the purchased application s appear...

Page 21: ...eq 1 GHz g Press AMPTD Y Scale Ref Value 10 dBm h Press FREQ Center Freq 1 GHz i Press SPAN X Scale Span 8 MHz The purpose is to use a loopback cable to verify that the test set s source can generate...

Page 22: ...pplications exe application that lets you control your test set power on configuration You can set the configuration to pre load only the applications that you typically run This can significantly sho...

Page 23: ...result in personal injury Before turning on the test set you must connect its protective earth terminals to the protective conductor of the main power cable Insert the main power cable plug into a so...

Page 24: ...nstrument has auto ranging line voltage input be sure the supply voltage is within the specified range and voltage fluctuations do not to exceed 10 percent of the nominal supply voltage 100 120 VAC 50...

Page 25: ...operating temperature of the product by 4oC for every 100 watts dissipated in the cabinet If the total power dissipated in the cabinet is greater than 800 watts then forced convection must be used To...

Page 26: ...Quick Start 1 Getting Started Guide 27...

Page 27: ...rom the test set Be sure that all instruments are properly earth grounded to prevent build up of static charge Perform work on all components or assemblies at a static safe workstation Keep static gen...

Page 28: ...ng Started Guide Agilent Technologies 2 Front and Rear Panel Features This section describes the following features Front Panel Features E6607A B on page 30 Display Annotations on page 35 Rear Panel F...

Page 29: ...le for a measurement to measure a very specific point segment of data within the range of the current measurement data 5 Utility Keys These keys control system wide functionality such as test set conf...

Page 30: ...the default unit The arrow keys Increment and decrement the value of the current measurement selection Navigate help topics Navigate or make selections within Windows dialogs Navigate within forms us...

Page 31: ...indicates power on A yellow light indicates standby mode The front panel switch is a standby switch not a LINE switch disconnecting device The test set continues to draw power even when the line swit...

Page 32: ...the mouse 2 Left click Utility 1 in the menu as shown below 3 Left click Virtual Front Panel 2 in the menu as shown below NOTE The PC mouse and monitor are required when using the VFP For ease in usi...

Page 33: ...is in use and has been locked Only A E6607C NEN538 user or an administrator can unlock this computer Press Ctrl Alt Del to unlock this computer Under these circumstances pressing the front panel Powe...

Page 34: ...neral measurement settings and information Indicates single continuous measurement Some measurements include limits that the data is tested against A Pass Fail indication may be shown in the lower lef...

Page 35: ...rker frequency amplitude or function value Marker 7 Settings panel time and date display System Control Panel 8 Trace and detector information Trace Detector Clear Write W Trace Average A Max Hold M M...

Page 36: ...transfers over a 480 Mbps link 4 USB Connectors Standard USB 2 0 ports Type A Connect to external peripherals such as a mouse keyboard printer DVD drive or hard drive 5 MONITOR Allows connection of an...

Page 37: ...GER 2 IN Allows external triggering of measurements 15 TRIGGER 1 IN Allows external triggering of measurements 16 NOISE SOURCE DRIVE 28 V PULSED Not functional in the EXT Test Set 17 SNS SERIES NOISE...

Page 38: ...also a symbol of an Industrial Scientific and Medical Group 1 Class A product CISPR 11 Clause 4 The CSA mark is a registered trademark of the Canadian Standards Association International This symbol i...

Page 39: ...40 Getting Started Guide 2 Front and Rear Panel Features...

Page 40: ...selecting items and depressing displayed buttons It is possible to use the front panel for changing Windows configuration items but it is much easier to perform these tasks with a USB mouse and exter...

Page 41: ...plication are installed by default in the test set with fixed perpetual licenses no purchase order required Additional measurement applications are available Each application requires a license to exe...

Page 42: ...formance Agilent does not warrant the performance of the test set with non approved software installed If you install programs other than those that Agilent has tested it could cause problems with the...

Page 43: ...asure4u This user is a member of the Power Users group Using the Instrument account you can perform the following operations Install software Configure network and printer access Access files on the t...

Page 44: ...at each user s My Documents folder is mapped to the D drive This is to avoid overwriting the user s data in the event the Agilent Recovery must be performed Also this facilitates convenient backup by...

Page 45: ...pecific instrument model and serial number Transportable Perpetual licenses are identified in the product structure by a T in the second character and P in the third character of the option designator...

Page 46: ...idual application per instrument The restriction is enforced through the license redemption process of the Agilent Software Licensing ASL system Trial licenses are only available for measurement appli...

Page 47: ...tp www agilent com find ext A license key is usually for one instrument model and serial number combination The license key will only install itself on that instrument Installation procedure over USB...

Page 48: ...will not be available for use until after the power has been cycled This displays the list of installed applications If you require further assistance please contact the Agilent support team Online as...

Page 49: ...ollowing USB flash drive USB keyboard USB mouse We will refer to the test set from which the transportable license will be removed as the source instrument We will refer to the test set which will rec...

Page 50: ...ected to the internet b On the PC locate the url file on the USB flash drive that was saved in the previous step and click on it c After a few seconds the ASL Transportation Web page will appear One f...

Page 51: ...b Cycle power on the target instrument c Once the test set has re booted the application should be ready to use on the target instrument The Agilent License Services running on the target instrument l...

Page 52: ...ed You may change the following Windows settings or administrative tasks available from the Windows Control Panel to select your personal preferences To recover from problems caused by changing Window...

Page 53: ...ve all other settings unchanged You may use this feature To do this Do NOT use this feature To do this Do not change Power Options Power Scheme Power Button Hibernate Do not modify System Properties H...

Page 54: ...tual directories or their contents that came configured with the test set Uninstall these libraries interfaces or programs The Agilent I O Libraries The NET Framework or any Hotfixes or Service Packs...

Page 55: ...t have a mouse it can be done using front panel keys See Navigating Windows Without a Mouse on page 74 When setting up a new printer you may need to load the printer driver unless you are using a netw...

Page 56: ...on your LAN The pre configured Computer Name is A E6607B xxxxx where xxxxx represents the last 5 digits of the test set serial number To change the Computer Name consult the Microsoft Windows Help and...

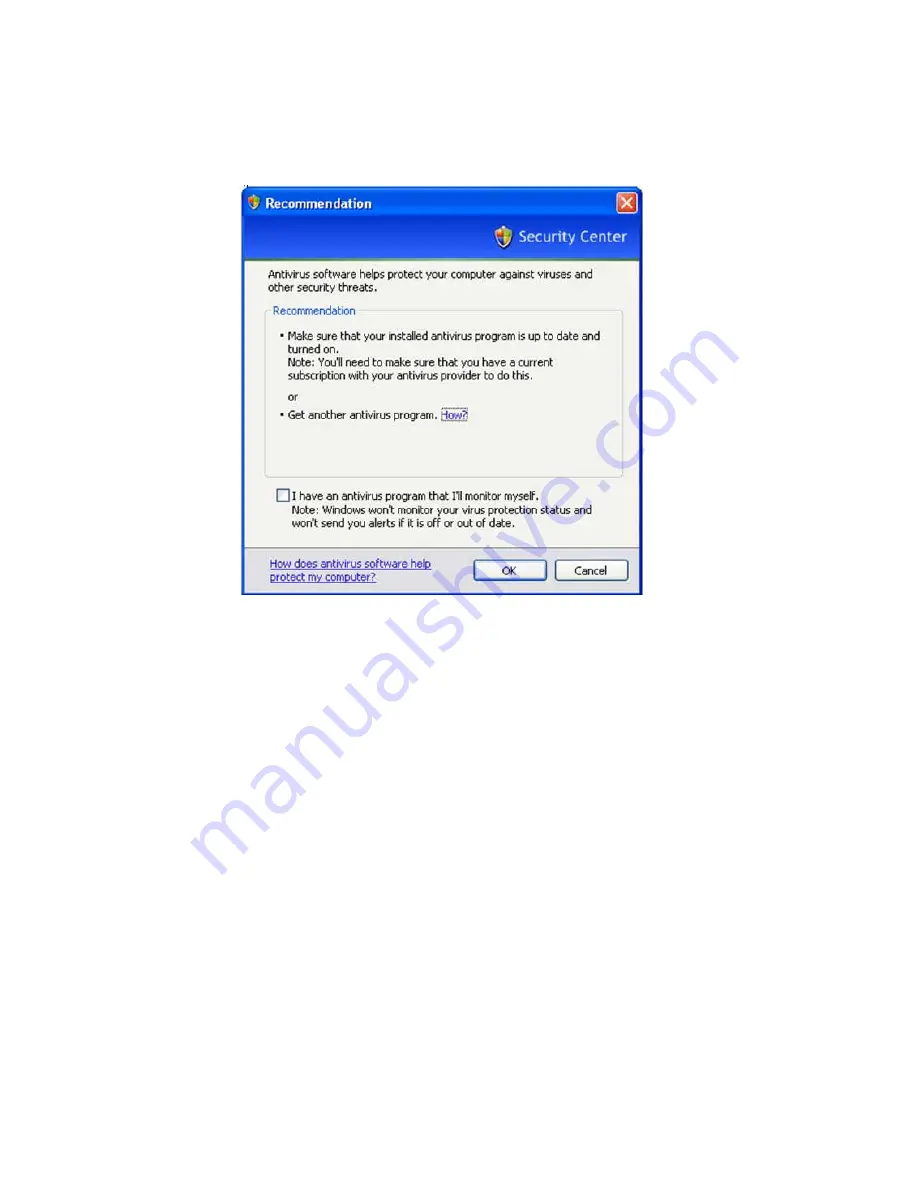
Page 57: ...system is protected Use an internet firewall Get the latest critical Windows updates Use up to date antivirus software To check the status or make changes in the security settings for your test set o...

Page 58: ...cause the test set to not operate properly Automatic updates The default test set setting is to automatically check for critical Windows Updates and notify you if the test set has internet access You...

Page 59: ...fied by Agilent on page 43 for anti virus software that has been tested by Agilent Be aware that downloading and installing Windows Updates can be network and CPU usage intensive impacting the test se...

Page 60: ...1 Spyware protection There is no anti spyware software installed on the test set This should not be a problem if you do not use the test set for a lot of internet browsing Having spyware in the test s...

Page 61: ...that you backup the data to an external storage device connected to the network or one of the test set s USB connectors Also you should perform backups at times when the test set is not being used fo...

Page 62: ...whdc system bus usb USBFAQ_intro mspx The square USB port see graphic below on the rear panel is a USB Series B port and is used for controlling the test set over USB The test set USB device driver i...

Page 63: ...ored by the Agilent Recovery process You must reload any other software that you have added in the test set The D partition is reserved for data storage The User Accounts that are configured by Agilen...

Page 64: ...tep Notes 1 Insert the mouse in one of the instrument USB ports 2 Insert the USB memory device in one of the instrument USB ports 3 Press System Alignments Backup or Restore Align Data The Alignment D...

Page 65: ...tem 3 Navigate to the following directory using Windows Explorer C Program Files Agilent SignalAnalysis Physics 4 Double Click BackupAndRestore exe The following dialog box appears 5 Set the Backup Fi...

Page 66: ...ata or programs saved on the D or E drives Any upgrades that were made to the Agilent measurement application software Restoring the original factory system software will not synchronize the code in t...

Page 67: ...drive Press 2 then press Enter to select the recovery Press 1 then press Enter to continue Press 1 then Enter to confirm It may take up to 25 minutes for this process to complete After exiting the Ag...

Page 68: ...the instrument 2 Log out of the default user instrument Select Start Log Off Log Off 3 At the log in prompt enter User Name administrator Password agilent4u 4 Uninstall the test set application Select...

Page 69: ...e or two for the installer to start 6 A window appears showing the extraction process Following the extraction screen there may be a short period where there is no activity on the screen The desk top...

Page 70: ...t turn the instrument power off or serious damage may occur If any pop up windows appear click OK or Ignore to proceed 8 When the installation has finished select Yes I want to restart my computer now...

Page 71: ...n the Startup and Recovery section click Settings 4 Under the System Startup section you can either clear the Time to display a list of operating systems check box or select the Time to display recove...

Page 72: ...otely on page 92 Capturing Printing Displays and Windows on page 103 Windows Shortcuts and Miscellaneous Tasks on page 104 The capabilities described in this section are Microsoft Windows features The...

Page 73: ...log box selects an option button Down Arrow In pull down menu Moves to next selection down in the menu In dialog box selects an option button Tab In dialog box moves to the next previous field Del Del...

Page 74: ...ist Press the Up or Down Arrow key To scroll up or down Press the Up or Down Arrow key To expand or collapse the tree for the selected topic Press the Right or Left Arrow key To go to the next or prev...

Page 75: ...own Arrow key To scroll up or down Press the Up or Down Arrow key To expand or collapse the selected Bookmark Press the Right or Left Arrow key To zoom in or out Press the Alt Left or Right Arrow key...

Page 76: ...ess the Next Window key to open the Go to Page dialog then enter the page number using the Numeric keypad and press Enter To print all or part of a document Press the Print key to open the Adobe Reade...

Page 77: ...test set from a remote computer as though you were sitting in front of the test set When you have configured the test set for remote connectivity and configured a separate computer to act as a Remote...

Page 78: ...Start Control Panel 3 Select System From the Control Panel Category View click Performance and Maintenance then click System or From the Control Panel Classic View double click System 4 Click the Remo...

Page 79: ...OM because that contains the Client software How to locate the computer name of the test set To connect a remote computer to the test set you need to know its Computer Name The Computer Name can be di...

Page 80: ...to display the System Properties dialog 2 Click the Computer Name tab of the System Properties dialog 3 To close the System Properties dialog click Cancel Locating the name from the Windows desktop w...

Page 81: ...Locating the name from the Windows desktop without a mouse Step Notes To initialize a Remote Desktop Session you need to know the Computer Name of the test set This information can be shown on the te...

Page 82: ...ge 91 Setting Remote Desktop options Only the current User or an Administrator can remotely log into the test set To see who the current user of the test set is press Ctrl Esc on the test set until yo...

Page 83: ...ay are not accessible Under Colors you may select any setting that uses 15 bits or more Selecting a color setting that uses less than 15 bits results in dithering and incorrect color rendition of the...

Page 84: ...t Windows Operating System 4 Getting Started Guide 85 5 Click the Experience tab To Optimize the performance of the Remote Desktop session choose the appropriate connection format from the drop down l...

Page 85: ...enu is generally identical to that of the corresponding front panel key The following lists additional functionality Exit Selecting this item closes the Application software Utility Page Setup Selecti...

Page 86: ...mote desktop mode the following combinations of remote keyboard keys can be used to perform the operation of the test set front panel keys Keycode commands To initiate the following front panel key Pr...

Page 87: ...Input Output Ctrl Shift O Left Arrow Left Arrow Marker Ctrl Alt K Marker Ctrl Alt N Marker Function Ctrl Alt F Meas Ctrl Alt M Meas Setup Ctrl Alt E Menu Alt Alt Mode Ctrl Shift M Mode Preset Ctrl M...

Page 88: ...Shift F5 Softkey 6 Ctrl Shift F6 Softkey 7 Ctrl Shift F7 Source Ctrl Alt U SPAN X Scale Ctrl Shift S Split Screen Ctrl Shift L Sweep Control Ctrl Shift W System Ctrl Shift Y Tab Tab Trace Detector Ct...

Page 89: ...remote computer and not to the test set Generally the effect of pressing this key combination is to display the Windows Task Manager Therefore pressing this key combination on the remote computer doe...

Page 90: ...ication display window then select Utility Virtual Front Panel The Virtual Front Panel appears as shown below When you click a button in the Virtual Front Panel it performs the operation of the corres...

Page 91: ...orld Wide Web or a local internet using the built in Embedded Server functionality This section provides details of how to use this functionality The test set may also be accessed and controlled using...

Page 92: ...bled E6607B This control near the bottom of the screen displays further settings and configuration information At the left side of the page are a set of tabs that provide access to configuration infor...

Page 93: ...y assigned IP address and other TCP IP parameters of the test set 2 Click on Modify Configuration A password entry dialog appears By default this password is set at the factory as agilent However you...

Page 94: ...e effect Before clicking Apply you may use the Undo Changes button to revert all settings to their previous values 4 Use Start Identify and Stop Identify to enable and disable the LXI status indicator...

Page 95: ...y default this password is set at the factory as agilent However you may subsequently change the password Press System I O Config Reset Web Password on the test set front panel to change the password...

Page 96: ...nt measurement type captured results consist of either Trace Data or Measurement Results The captured data is formatted as a Comma Separated Value CSV file which may be saved on the client computer s...

Page 97: ...b page indicates this Selecting the Get Image tab Selecting the Get Image tab captures a screen from the test set display The image is captured as a Portable Network Graphics PNG file to the default f...

Page 98: ...Using Microsoft Windows Operating System 4 Getting Started Guide 99 A typical screen capture image appears as follows...

Page 99: ...CPI Telnet session the test set application must be running Step Notes 1 Click SCPI Telnet A password entry dialog appears By default this password is set at the factory as agilent However you may sub...

Page 100: ...ft Windows Operating System 4 Getting Started Guide 101 SCPI commands and queries may be entered using the command line interface 3 To exit the telnet session press Ctrl on the client computer keyboar...

Page 101: ...Getting Started Guide 4 Using Microsoft Windows Operating System Selecting the Help Tab Selecting the Help tab displays basic help information about each of the other tabs plus performance tips as sh...

Page 102: ...rogram like Microsoft Paint 3 Paste the clipboard contents into the program The keyboard shortcut Ctrl v will paste the contents of the clipboard 4 Save the image in a file Step Notes 1 Click on the w...

Page 103: ...art Menu Ctrl Esc Cycle through all open applications Alt Tab Select the first menu of a menu bar Alt Move through menu headings Left Arrow Right Arrow Open drop down a menu Down Arrow Move through it...

Page 104: ...set application If the taskbar is not set to auto hide the lower part of the test set display is obscured by the taskbar Step Notes 1 Press Alt to select the File menu in the menu bar The focus must...

Page 105: ...o hide behavior by doing the following Restoring taskbar auto hide mode Step Notes 1 Click Start Control Panel If not using a mouse press Ctrl Esc 2 In Classic View click Taskbar and Start Menu or in...

Page 106: ...er do one of the following Either click Start All Programs then select Startup or Click Start My Computer then navigate to the folder C Documents and Settings All Users Start Menu Programs Startup Add...

Page 107: ...108 Getting Started Guide 4 Using Microsoft Windows Operating System...

Page 108: ...hnologies 5 Troubleshooting Check the Basics on page 110 Problems with Microsoft Windows Operating System on page 112 Returning a test set for Service on page 113 No operator serviceable parts inside...

Page 109: ...being performed when the problem first appeared Are all of the settings correct o If the test set is not functioning as expected return the test set to a known state by pressing Mode Preset o Is the...

Page 110: ...In If External is selected changing the setting to Sense allows the test set to sense the presence of an external reference and use it only if it is available The frequency of the reference should be...

Page 111: ...rade test set performance and measurement speed Those that can be safely modified are described in Settings that can be changed on page 53 The X Series Wireless Communications Test Set operates in an...

Page 112: ...creen A serial number label is also attached to the rear panel of the test set Locations for Agilent Technologies Americas Canada 1 877 894 4414 Brazil 55 11 3351 7012 Mexico 001 0800 254 2440 ext 261...

Page 113: ...he warranty expires you can purchase the service documentation that provides all necessary test and maintenance information You can order the service documentation Option 0BW assembly level troublesho...

Page 114: ...Getting Started Guide 115 the display have completed a functional test or have any other specific data on the performance of your test set please include a copy of this information An example of the t...

Page 115: ...by electrostatic discharge 3 Use a strong shipping container The carton must be both large enough and strong enough to accommodate the test set A double walled corrugated cardboard carton with 159 kg...

Page 116: ...83 drive C use 64 drive D use 64 drive partitioning 55 drive recovery 67 Drivers settings Microsoft Windows 54 E electrostatic discharge ESD protecting against 28 Embedded Web Server Get Data Page 97...

Page 117: ...tion 78 embedded web server 92 internet access 92 repair tag 114 replacing battery 26 restoring your instrument 62 running Windows without a mouse 74 S saving a window image 103 saving data to interna...

Page 118: ...e and date 54 Shortcut keys 104 Startup Folder 107 System Properties 54 Tab settings 54 taskbar auto hide 105 user accounts 53 virus protection 53 Windows Classic Style 54 Windows firewall 59 Windows...

Page 119: ...120 Getting Started Guide Index This information is subject to change without notice Keysight Technologies 2014 Published in USA December 2014 E6607 90033 www keysight com...

Reviews: