Kessler CINESHOOTER Complete User'S Manual Download Page 29

support.kesslercrane.com

Page 28 of 33

USER GUIDE

GETTING CREATIVE

While the CineShooter system offers several shooting modes that cover the majority of 

needs for everyday shooting, we also encourage users to think outside the box to utilize the 

CineShooter system to capture unique shots.  Once you begin to think of your CineShooter and 

its external motor axes as something akin to a giant robotic Erector Set, the possibilities to 

configure, stack, and repurpose each component makes this an even more powerful system.

Note: Users should always adhere to the specifications and rating limitations of the hardware to avoid damaging 

your unit.  Stressing the system beyond its rated weight capacity, balance, and intended use is done so at the 

owners’ discretion. The end user therefore assumes any and all liability for damaging the unit and is responsible 
for all repair costs if the unit is damaged during unintended operation.

GETTING CREATIVE

CINESHOOTER SYSTEM 

STANDARD MODE

Standard Mode is how the unit was intended to be used. With the camera mounted 

perpendicular to the Arca L or H-Bracket, this mode allows the greatest range of operation with 

the widest amount of camera configurations and balances.  

However, the CineShooter head may also be used in Standard Mode to mount other utility 

items to the head such as small lights, flags, triggers and dump baskets for high speed 

photography, or any other rigging you can think of that may require an automated cue.

Additionally, the entire head can be  mounted at 90 degress along a vertical axis, or completely 

inverted on devices such as cranes and jibs to operate more akin to a traditional PTZ (Pan/Tilt/

Zoom) Head with remote operation. 
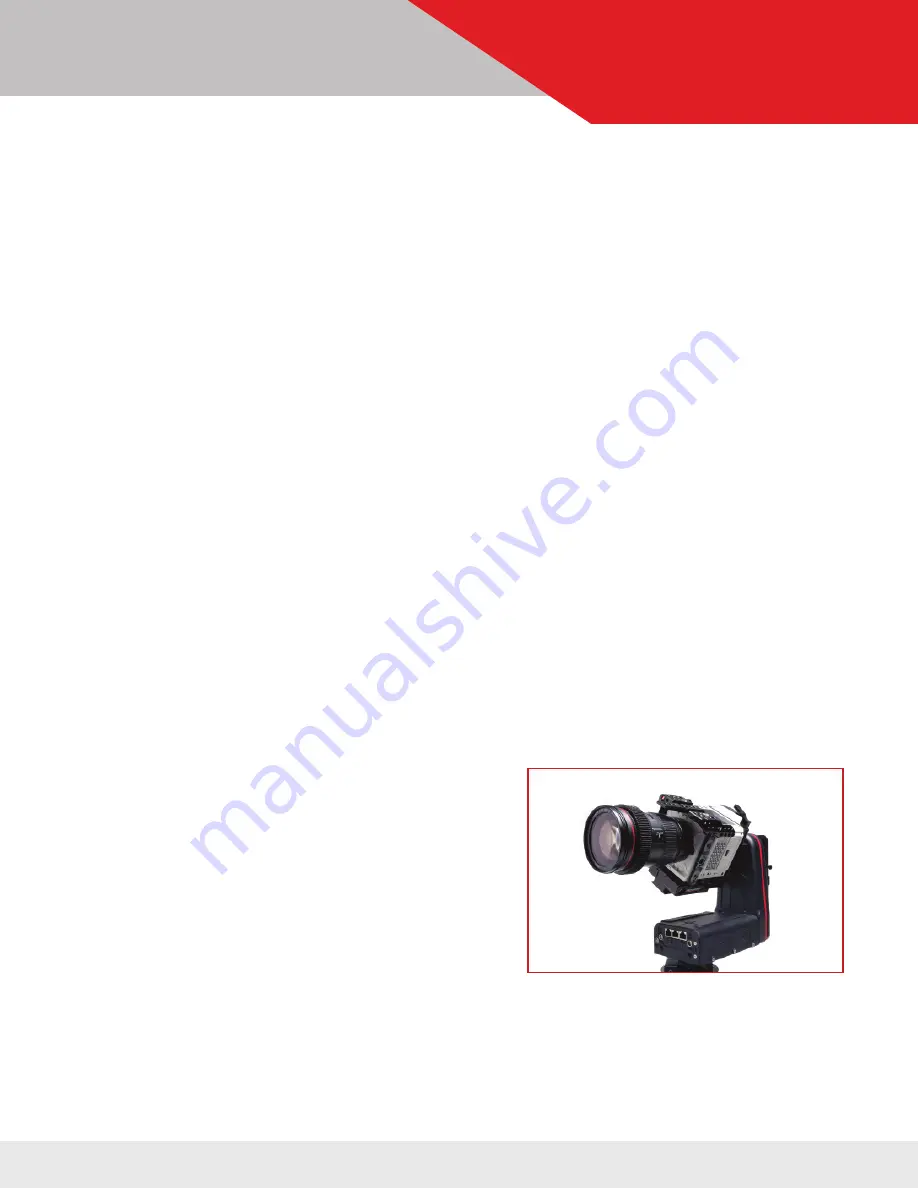
ROLL MODE

Roll Mode requires the camera to be mounted parallel 

to the Arca L-Bracket.  The Tilt Axis then becomes a 

functional Roll Axis.  This mode performs best when 

the camera sensor is mounted on the nodal center 

of the Roll Axis to create a perfect free-spinning 

roll without wobble.  This type of shot can create 

some energetic shots for music videos, dazzling 

abstract macro photography, a disorienting “Vertigo” 

type effect, can be synced with a rotating set to , or 

tracked with the motion of the milky way to create 

some interesting astro timelapses.

Note: 

The Heavy Duty Support Module and H-Bracket cannot be used in this mode. Also note that any cabling 

off the camera may get tangled or twisted if not dressed properly.  This works best with a self-powered, wire-free 

Summary of Contents for CINESHOOTER

Page 1: ...http kesslercrane com support support kesslercrane com 574 400 2251 COMPLETE USER MANUAL...

Page 2: ...22 Program Move 21 Manual Move 21 Turntable 22 Settings 22 Setting Up a Move 23 25 Loop Scrub 23 Time Lapse 24 Stop Motion 25 Updating Firmware 26 27 Wireless Update via CineShooter Remote App 26 Man...

Page 3: ...recommended that users verify they are running the most current version of firmware before operating the CineShooter system for the first time Firmware can be downloaded and installed wirelessly via t...

Page 4: ...t Display Screen Easy to navigate display screen that permits onboard programming and operaiton EXT Port This is the CANbus port and is for wired bridging with accessories such as a Second Shooter Pro...

Page 5: ...ESHOOTER PAN TILT HEAD There are many ways to power your CineShooter Depending on what options and accessories you re using you have the option of powering your system via The provided 12v barrel conn...

Page 6: ...ensor align directly on the tilt nodal plane Also note the height and width of your camera build to ensure clearance when completing a full roll rotation Using an unpowered CineShooter Pan Tilt Head m...

Page 7: ...that reference point center your camera on the L Bracket or H Frame of the CineShooter NOTE Balancing the camera by shifting your mounting plate may cause you to move the camera off the nodal center...

Page 8: ...h is located by a notch marking on the L Bracket Arca Mount The horizontal alignment Which is located by the perpendicular line in the crosshair marking on the top of the CineShooter Base as seen in t...

Page 9: ...amera to avoid any difficulties such as camera crashing on the tilt axis if the camera payload is too high or unbalanced For standard operation you may Mount directly to the horizontal slide slot avai...

Page 10: ...andard L Bracket using the supplied 20 or 3 8 16 camera screws Just orient your camera 90 degrees so the lens is pointing toward the ports side Keep your Kwik Release Receiver oriented normally but in...

Page 11: ...Release Receiver located on both the CineShooter head and the end plate TaketheH FrameandslideintobothMiniKwikRelease Receivers Adjust the height and tighten down Mount camera Note The center point fo...

Page 12: ...d interract with the FreeMotion feature 2 1 2 3 INSTALLATION OPERATION NOTE The Smart Button only activates FreeMotion when programming a move otherwise the function is disengaged and the Smart Button...

Page 13: ...different gear ratios allowing for the adjustment of overall motor speed operating volume and torque Note The metal pin on the Slider Motor stores the extra pulley when not in uses ADDING AN ADDITIONA...

Page 14: ...stalling ACCESSORY INSTALLATION CINESHOOTER SYSTEM 1 2 Install the Small Pulley onto the Slider Motor The pre installed belt labled 110XL on the Slider Motor is to be used in most applications However...

Page 15: ...TER SYSTEM Choose between the following pulley combinations Fast Normal and Slow FAST LOW TORQUE This combination is only compatible with CineSlider and Stealth sliders 6 NORMAL SLOW HIGH TORQUE This...

Page 16: ...GUIDE ACCESSORY INSTALLATION CINESHOOTER SYSTEM Place screw cap back on slider pulley point Push down pulley if needed and tighten Avoid over tightening Connect CAT5 cable from Slider motor to the SLI...

Page 17: ...intended for mounting to the Pan motor but can be used on any third party cheeseplate or home made rigging with correct spacing and accepts 20 threading To mount to a slider We recommend using a Kess...

Page 18: ...built on 15mm rods for the motor to attach to Slide motor onto 15mm rod orienting the motor so the gearing aligns with the desired gear ring Fo cus Iris or Zoom on your lens If the motor has trouble...

Page 19: ...l reboot and will now say WiFi Enabled 2 3 4 5 1 USING KOS CINESHOOTER SYSTEM USING KOS SOFTWARE To use the CineShooter system with kOS software you will need kOS for CineShooter installed on your Mac...

Page 20: ...l PAIRING PS4 XBOX CONTROLLER TO CINESHOOTER REMOTE PS4 Controller Hold down the PS button and the Share button simultaneously for 5 seconds or until the lights flash Open your phone settings go to Bl...

Page 21: ...P BRIDGE MODE Plug in the Bridge Cable from the EXT port on your CineShooter to one of the expansion ports on the bottom of your connecting controller Once the CineShooter Controller are powered on us...

Page 22: ...this effectively sets the timing from 1ST KEY FRAME to 2ND KEY FRAME and 2ND KEY FRAME to 3RD KEY FRAME The lower the percentage entered the faster the movement will be from 1ST KEY FRAME to 2ND KEY...

Page 23: ...to continue desired motion SETTINGS This section allows you to select and adjust the following options Operation Mode Standalone Master Slave WiFi settings Quiet Mode settings Control Options Inverts...

Page 24: ...e it will take to complete an entire camera move Ramp Percentage value indicates the change in speed of the movement over the entire move Often described as an ease in and ease out the indicated time...

Page 25: ...navigating Up and Down on the joystick Press Down on the joystick and select NEXT 2 3 1 Set the RAMP value by selecting with Enter and adjusting Up and Down with the joystick RAMP Percentage value in...

Page 26: ...era comes to a stop Select AUTO ADVANCE or Manual ADVANCE by pressing Enter to toggle selections Auto Advance In this mode after the camera fires the system will automatically advance to the next posi...

Page 27: ...matically check for firmware updates and you will be prompted with an update notification If you haven t previously connected to your CineShooter WIFI network you will need to go to your phone s WIFI...

Page 28: ...lay FIRM WARE UPDATE READY The Controller will show up as a USB device on your computer titled CineShooter Go to the location where you extracted CINESHOOTER IMG Select CINESHOOTER IMG and drag to the...

Page 29: ...nge of operation with the widest amount of camera configurations and balances However the CineShooter head may also be used in Standard Mode to mount other utility items to the head such as small ligh...

Page 30: ...tless ways to configure and use your system We invite you to play and explore to see what other configurations you re able to come up with Discover a great new configuration Share it with us at ideas...

Page 31: ...rves will also be influencing the motor speed Adjust curves accordingly to achieve desired speed I CAN T PROGRAM CONTROL ANY MOTORS BESIDES PAN AND TILT By default the on board Pan and Tilt axes are s...

Page 32: ...package until a better balance is achieved See the balancing section of this manual if uncertain I CAN T DO DIAGONAL MOVEMENTS ON THE JOYSTICK The joystick is a single direction interface meaning it...

Page 33: ...oad from 15 lbs to 25 lbs Exposure The length of time the camera s shutter is open when taking a photograph Delay Amount of time between photos Ramp Rate of change of acceleration deceleration Damping...

Page 34: ...ther call our sup port team directly at 574 400 2251 or email us at ideas kesslercrane com SHARE YOUR WORK We always love to see both behind the scenes photos and video as well as your final proj ects...

Reviews: