1-34 (No.RA020<Rev.002>)
Note:
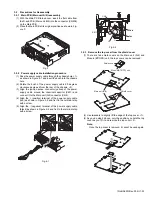
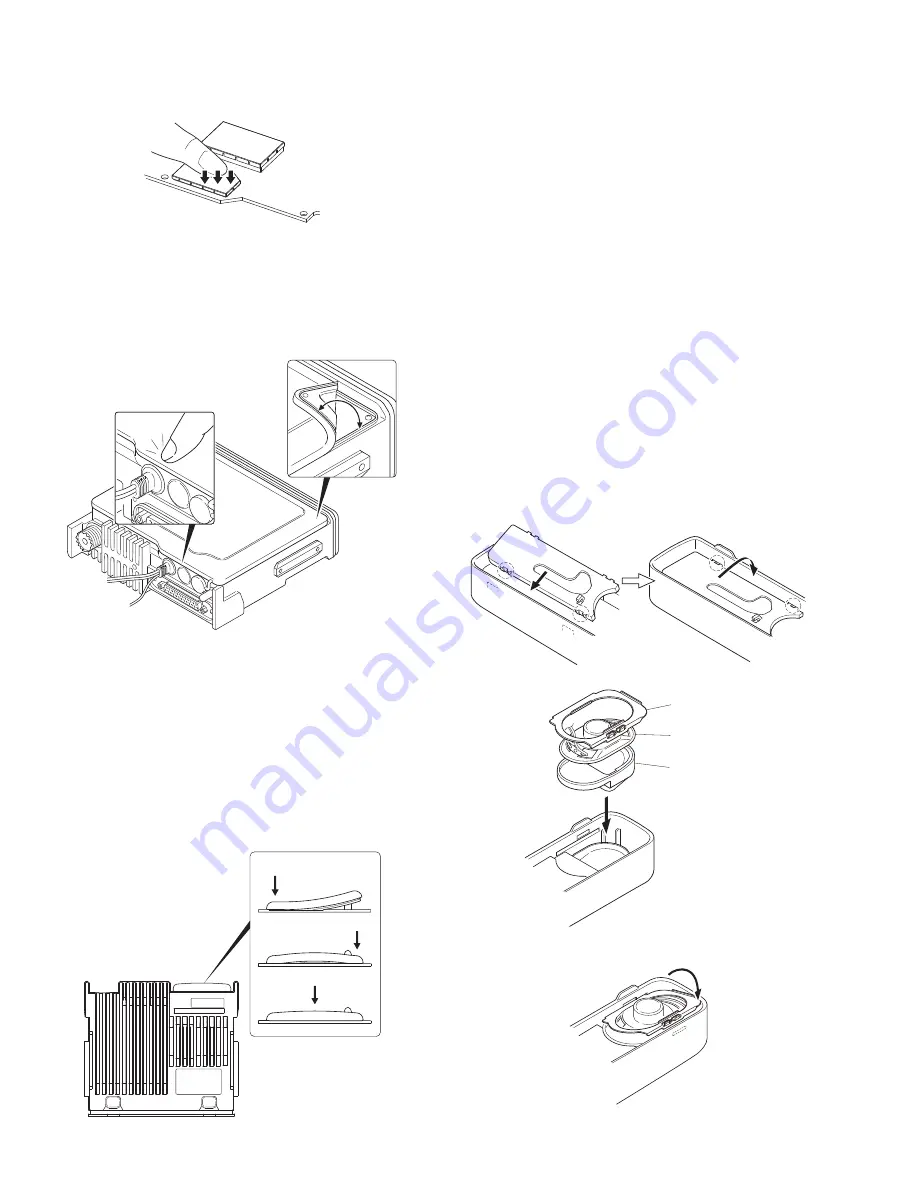
Push evenly on the top cover and be careful that you do
not bend it as you install it on the shield cover.
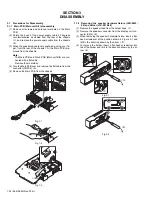
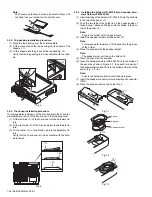
3.2.4 Top packing installation procedure
(1) Place the top packing over the shielding plate.
(2) Fit the convex tab of the top packing into the hollow of the
chassis. <1>.
(3) Fit the chassis into the groove of the top packing. <2>
Verify that the top packing is in close contact with the chas-
sis.
Fig.5
3.2.5 D-sub cap installation procedure
To improve water resistance, fit the D-sub cap into the D-sub ter-
minal hardware fixture of the transceiver in the following order:
(1) Fit the left side <1> of the D-sub cap into the hardware fix-
ture.
(2) Fit the right side <2> of the D-sub cap into the hardware fix-
ture.
(3) Fit the center <3> of the D-sub cap into the hardware fix-
ture.
Verify that the D-sub cap is in close contact with the hard-
ware fixture.
Fig.6
3.2.6 Installing the holder (J1K-0019-00) and speaker hard-
ware fixture (J2B-0023-00)
(1) Insert two tabs of the holder (J1K-0019-00) into the hollows
in the top of the panel. <1>
(2) Push the two tabs of the holder in on the opposite side of
those in step 1 above and fit them into the hollow in the bot-
tom of the panel. <2>
Note:
Push in the holder until it snaps in place.
(3) Install the speaker holder onto the panel. <3>
Note:
To improve water resistance, fit the panel into the groove
of the holder.
(4) Place the speaker into the speaker holder.
Note:
The speaker must not ride on the holder rib.
(5) Place the spacer on the speaker.
(6) Insert the hardware fixture (J2B-0023-00) into the hollow of
the panel as shown in Figure 7-3, then push two parts of
the hardware fixture and fit it into the hollow of the top of the
panel. (Fig. 7-3 <4>)
Note:
Push in the hardware fixture until it snaps in place.
(7) Insert the speaker connector into the display unit connector
(CN5).
(8) Place the speaker lead on the holder hook.
Fig.7-1
Fig.7-2
Fig.7-3
<1>
<2>
<1>
<2>
<3>
<1>
<1>
<2>
Spacer
Speaker
Speaker holder
<3>
<4>
Summary of Contents for NX-5700
Page 106: ...MEMO ...
Page 137: ...MEMO ...

