


1-800-KEATING
|
GAS FRYER - SERIES PRE-2000
3
• Pressure regulator installed in the appliance is
adjusted for the manifold pressure marked on
the serial plate.
• Adequate air supply to the appliance.
• Inline pressure regulator, not supplied by Keating,
must be installed outside the appliance (when
needed to maintain the specified manifold
pressure marked on the serial plate.
• The equipment is operated in the manner intended
using the proper utensils.
• Keep the equipment clean and have it checked
periodically.
• Burner air adjustments, mechanical maintenance
and repairs must be performed by qualified service
personnel.
If the equipment is not installed, operated and main-
tained in accordance with the above, concentrations of
carbon monoxide in excess of the established limits
could be present in the kitchen environment.
ALL PERSONNEL IN THE WORK PLACE WHO MAY BE
SUBJECT TO ANY EXPOSURE OF CARBON MONOXIDE
MUST BE WARNED OF SUCH POSSIBLE EXPOSURE.
THIS WARNING SHOULD BE CONVEYED IN A MANNER
SO THAT IT IS CLEARLY UNDERSTOOD BY THE
EMPLOYEE, AND THE EMPLOYEE SHOULD BE ASKED
IF IN FACT HE OR SHE UNDERSTANDS THE CORRECT
METHOD OF OPERATION OF THE EQUIPMENT AND
THAT A RISK OF EXPOSURE EXISTS IF THE EQUIPMENT
IS OPERATED IMPROPERLY
FIRST STEPS
NATIONAL CODE REQUIREMENT
The installation must conform with local codes, or in
the absence of local codes, with the National Fuel
Gas code, ANSI Z223.1 or the Natural gas Installation
Code, CAN/CGA-B149.1 or the Propane Installation
Code, CAN/CGA-B149.2. Flexible connectors must
comply to ANSI Z221.69/CAN/CGA1.16.
When pressure testing at test pressures less than or
equal to 1/2 psig (3.45 KPA), fryer
must be isolated
from gas supply piping. When pressure testing at test
pressures above 1/2 psig (3.45 KPA), fryer
must be
disconnected
from gas supply piping system.
POSITIONING
The fryer must be no closer than 6 inches from any
combustible material and 16 inches away from any
open fl ame. The fryer must be placed under an ex-
haust hood with a fi re retardant system. Your ventila-
tion hood, when installed, must conform to the current
ANSI/NFPA 96 standard. ALL connections and place-
ment must comply with local and national codes. It is
the responsibility of the owner and local installer to
comply with these regulations when installing the fryer.
Counter model and fl oor model fryers must be re-
strained to prevent tipping when installed in order to
avoid splashing, spilling, etc. of hot liquid. The re-
straining method may be a manner of installation or by
separate means.
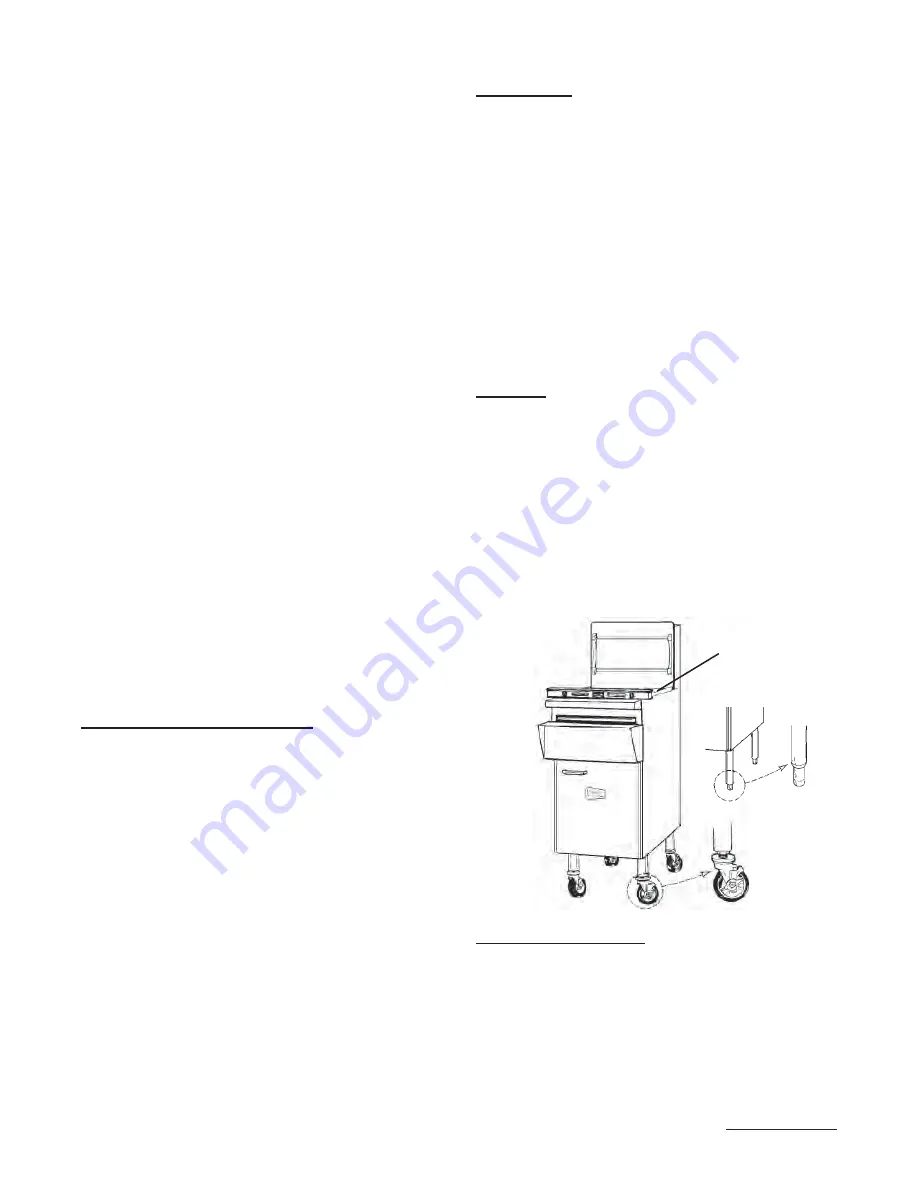
LEVELING
The fryer will operate at its highest effi ciency when
properly leveled. Place a level on fryer vessel from
side to side. For fryers on legs, the bottom foot of the
leg is adjustable. Turn counter clockwise to decrease
height or clockwise to increase height until level.
For fryers on casters, the casters are adjustable by
loosening the jam nut and turning the caster in or out.
When the desired level is reached, tighten the jam nut.
Adjustments of more than 3/4" are not recommended
on any caster. The same procedure should be followed
to level the fryer from front to back.
Figure 1
RESTRAINING DEVICES
1. On fryer installations with casters, casters and jam
nuts must be completely tightened. Adequate means
must be provided to limit the movement of the ap-
pliance without depending on the connector and the
quick-disconnect device or its associated piping to
limit the appliance movement.
Fryer must also be restrained to prevent tipping when
installed so that hot liquid splashing is avoided.
Caster
Level
Leg
Summary of Contents for pre 2000 series
Page 30: ......


