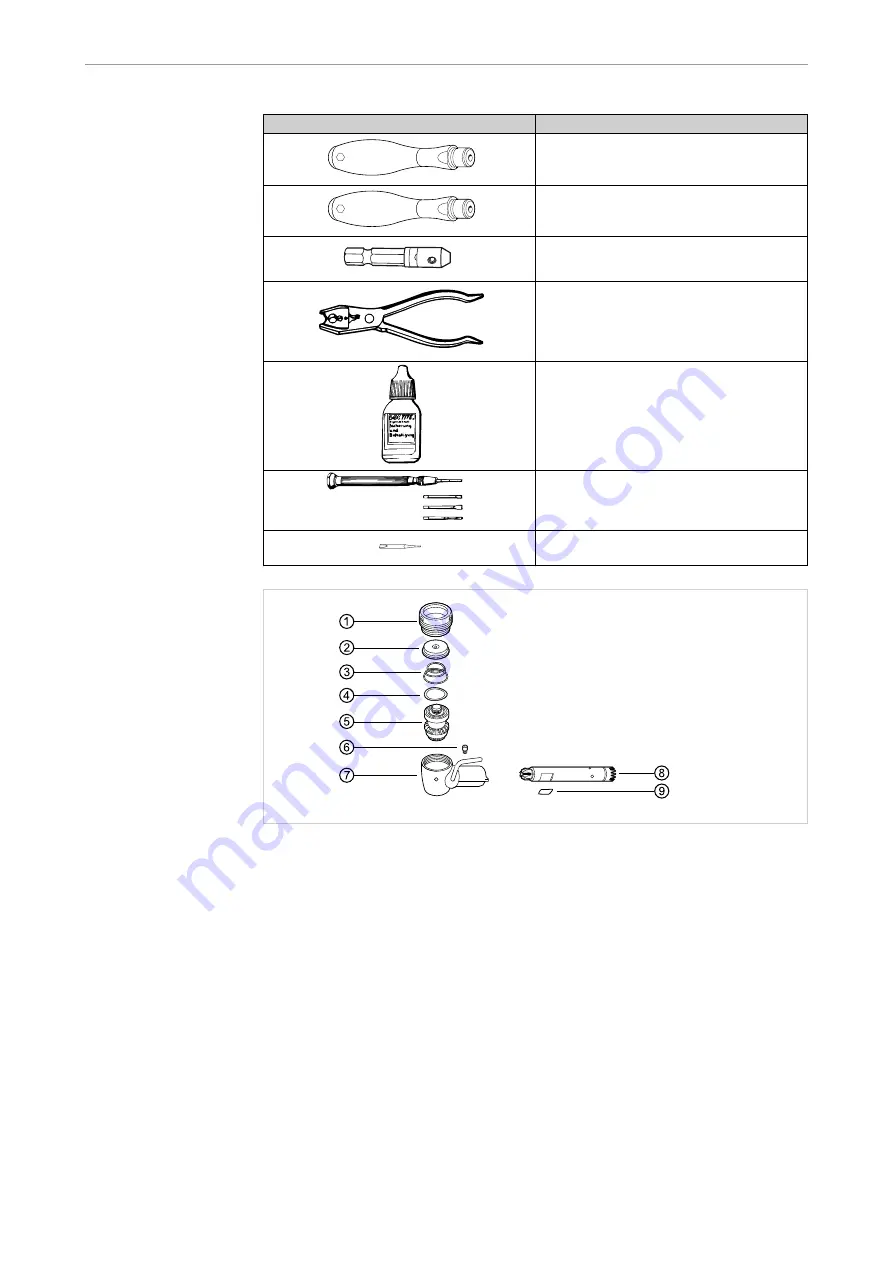
Tool
Name
Torque handle A (Mat. no. 1.002.4578),
100 Ncm
Torque handle B (Mat. no. 1.006.9911)
with 5 Ncm
Blade holder (Mat. no. 0.411.2271)
Assembly pliers (Mat. no. 0.411.2421)
603
Loctite 603 adhesive
(Mat. no. 0.359.2009)
Screwdriver (Mat. no. 0.308.0004)
Screwdriver bit (Mat. no. 0.410.0784)
▶ Insert the assembled head drive ⑤ in the head casing ⑦ and insert the spring
washer ④.
▶ Insert the button ② into the cover ① and insert the ball spring ③.
▶ Screw the cover ⑦ completely into the head casing and tighten to 100 Ncm
with the wrench, the universal bit holder and the torque handle.
▶ Insert the spring ⑨ (curvature upwards) into the milled edge on the adapter
⑧.
▶ Use the assembly pliers to slide the adapter ⑧ into the head casing ⑦, lining
up the threaded bore for the screw ⑥ at the same time.
▶ Insert the screwdriver bit in the blade holder and affix it.
▶ Insert the blade holder in the universal bit holder.
▶ Wet the screw ⑥ with the adhesive and use the screwdriver insert and torque
handle B to screw it into the head casing ⑦ and tighten it to 5 Ncm.
▶ Allow the adhesive to harden for 5 minutes at 120 °C.
Technician's instructions SURGmatic S201 L - 1.009.0470
3 Assembly | 3.1 Assembly of the SURGmatic S201 L
10/19


