11
Caution
In order to prevent accidents or injuries,
keep in mind the weight of the appliance
when selecting a storage location for it (see
Specifications).
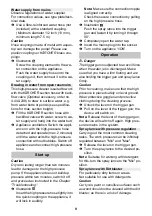
Park the machine on an even surface.
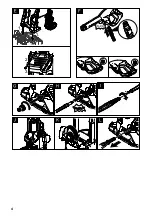
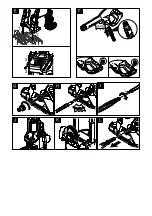
Press the disconnect on the trigger gun
and remove the high pressure hose
from the trigger gun.
Push the casing of the quick coupling
for the high pressure hose toward the
rear and disconnect the high pressure
hose from the appliance.
Insert the trigger gun with the spray
lance into the holder for the trigger gun.
Stow away the mains cable, the high-
pressure hose and accessory on the
appliance.
Prior to extended storage periods, as dur-
ing the winter, also observe the instructions
in the Care section.
Caution
Protect the appliance and its accessories
against frost.
The appliance and its accessories can get
destroyed through frost if there is any water
residues in them. To avoid damage to
them:
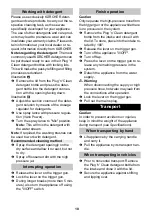
Completely drain all water from the ap-
pliance: Switch the appliance on with
detached high pressure hose and de-
tached water supply (max. 1 minute)
and wait, until no more water exits at the
high pressure connection. Turn off the
appliance.
Store the appliance and the entire ac-
cessories in a frost free room.
Danger
Turn off the appliance and remove the
mains plug prior to any care and mainte-
nance work.
The appliance is maintenance free.
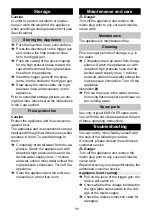
Prior to longer periods of storage, e.g. in
the winter:
Completely drain all water from the ap-
pliance: Switch the appliance on with
detached high pressure hose and de-
tached water supply (max. 1 minute)
and wait, until no more water exits at the
high pressure connection. Turn off the
appliance.
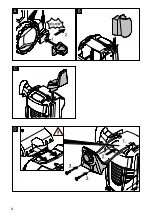
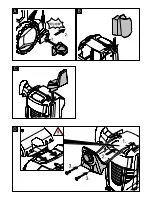
Illustration
Pull out the sieve in the water connec-
tion using flat-nose pliers and clean un-
der running water.
Use only original KÄRCHER spare parts.
You will find a list of spare parts at the end
of these operating instructions.
You can rectify minor faults yourself with
the help of the following overview.
If in doubt, please consult the authorized
customer service.
Danger
Turn off the appliance and remove the
mains plug prior to any care and mainte-
nance work.
Repair works may only be performed by the
authorized customer service.
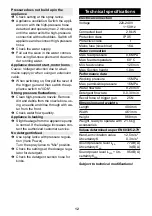
Pull on the lever of the trigger gun; the
device will switch on.
Check whether the voltage indicated on
the type plate corresponds to the volt-
age of the mains supply.
Check the mains connection cable for
damages.
Storage
Storing the Appliance
Frost protection
Maintenance and care
Maintenance
Cleaning
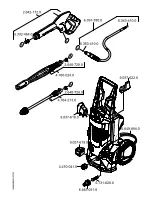
Spare parts
Troubleshooting
Appliance is not running
Summary of Contents for K 7
Page 1: ...59659590 01 13 K 7 English...
Page 2: ...2...
Page 3: ...3...
Page 4: ...4...
Page 13: ......
Page 14: ......
Page 16: ...I N O Vario Power x i M 220 240 1 50 V Hz 2 8 kW IP X5 I 16 0 6 60 12...
Page 17: ...KARCHER...
Page 18: ...Vario Power Mix 5 0 OFF Plug n Clean 180 0 OFF Plug n Clean...
Page 19: ...90 I N O Vario r e w o P n i M x a M KARCHER KARCHER Plug n Clean Plug n Clean...
Page 20: ...KARCHER EN 12729 BA KARCHER 4 730059 1 2 13 7 5 KARCHER KARCHER 4 440238 KARCHER...
Page 22: ...30 30 IEC 60364 30...
Page 23: ...30 1 10 1 5 2 10 30 2 5 2...
Page 24: ...KARCHER...
Page 25: ......
Page 26: ......
Page 27: ......
Page 28: ...59659590 01 13 K 7...

