

9
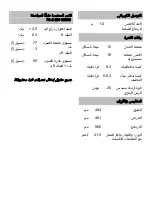
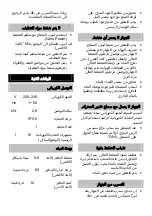
Observe regulations of water supplier.
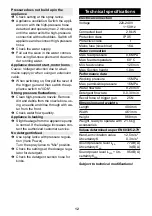
For connection values, see type plate/tech-
nical data.
Use a fibre-reinforced water hose (not
included) with a standard coupling.
(Minimum diameter 1/2 inch (13 mm),
minimum length 7.5 m).
Caution
Hose couplings made of metal with aquas-
top can damage the pump! Please use
plastic couplings or KÄRCHER brass cou-
plings.
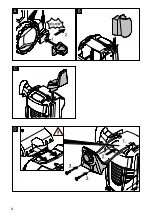
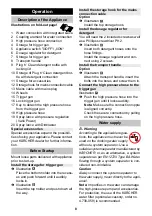
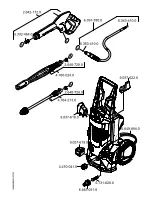
Illustration
Screw the coupling element to the wa-
ter connection on the appliance.
Push the water supply hose onto the
coupling unit, then connect it to the wa-
ter supply.
This high-pressure cleaner is suited to work
with the KÄRCHER suction hose with back-
flow valve (Optional accessory, order no.
4.440-238) to draw in surface water, e.g.
from water butts or ponds (see specifica-
tions for max. suction height).
Fill the KÄRCHER suction hose with
backflow valve with water, screw to wa-
ter supply and hang into the water butt.
Appliance ventilation: Switch the appli-
ance on with the high-pressure hose
detached and operate (max. 2 minutes)
until the water exits the high-pressure
connection without bubbles. Switch off
appliance and reconnect high-pressure
hose.
Caution
Dry runs lasting longer than two minutes
lead to damages to the high pressure
pump. If the appliance does not build up
pressure within two minutes, switch it off
and proceed as instructed in the Chapter
"Troubleshooting".
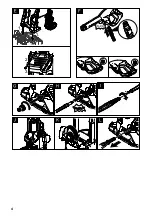
Illustration
Insert the high pressure hose tightly into
the quick coupling on the appliance, it
will lock in audibly.
Note:
Make sure the connection nipple
is aligned correctly.
Check the secure connection by pulling
on the high pressure hose.
Illustration
Push the spray lance into the trigger
gun and fasten it by turning it through
90°.
Completely open the water tap.
Insert the mains plug into the socket.
Turn on the appliance “I/ON”.
몇
Danger
The trigger gun is subjected to a recoil force
when the water jet is discharged. Make
sure that you have a firm footing and are
also holding the trigger gun and spray lance
firmly.
Caution
Prior to cleaning, make sure that the high
pressure is placed safely on level ground.
Wear protective goggles and protective
clothing during the cleaning process.
Unlock the lever on the trigger gun.
Pull on the lever of the trigger gun; the
device will switch on.
Note:
Release the lever of the trigger gun;
the device will switch off again. High pres-
sure remains in the system.
Carrying out the most common cleaning
tasks. The work pressure can be infinitely
regulated between "Min" and "Max".
Release the lever on the trigger gun.
Turn the spray lance to the desired po-
sition.
Note
: Suitable for working with detergent;
for this, turn the spray lance to the "Mix" po-
sition.
For particularly dirty items or areas.
Not suitable for use with detergents.
Caution
Car tyres, paint or sensitive surfaces such
as wood should not be cleaned with the dirt
blaster, as there is a risk of damage.
Water supply from mains
Drawing in water from open reservoirs
Start up
Operation
Spray lance with pressure regulation
Spray lance with Dirtblaster
Summary of Contents for K 7
Page 1: ...59659590 01 13 K 7 English...
Page 2: ...2...
Page 3: ...3...
Page 4: ...4...
Page 13: ......
Page 14: ......
Page 16: ...I N O Vario Power x i M 220 240 1 50 V Hz 2 8 kW IP X5 I 16 0 6 60 12...
Page 17: ...KARCHER...
Page 18: ...Vario Power Mix 5 0 OFF Plug n Clean 180 0 OFF Plug n Clean...
Page 19: ...90 I N O Vario r e w o P n i M x a M KARCHER KARCHER Plug n Clean Plug n Clean...
Page 20: ...KARCHER EN 12729 BA KARCHER 4 730059 1 2 13 7 5 KARCHER KARCHER 4 440238 KARCHER...
Page 22: ...30 30 IEC 60364 30...
Page 23: ...30 1 10 1 5 2 10 30 2 5 2...
Page 24: ...KARCHER...
Page 25: ......
Page 26: ......
Page 27: ......
Page 28: ...59659590 01 13 K 7...


