36
DN1611-1809
Configuring in a WAN (continued)
3. Click the
General
tab.
4. Select the
Number of controller loops
in the text box under
Loop Configuration
. The KT-NCC can
physically support 7 controller loops.
5. In the
KT-NCC Time Zone configuration
area, you must select the appropriate
Time zone setting.
Note:
It is advisable to check with the Network Administrator if the site where you are installing the KT-
NCC is situated in an area where daylight saving time is in effect.
6. Check the box underneath it if you want the system to
Automatically adjust the clock for daylight
saving changes
.
7. When applicable, select the
Graphic
or
Video View
that pertains to the KT-NCC.
8. Move to the
Ethernet Port #1
tab.
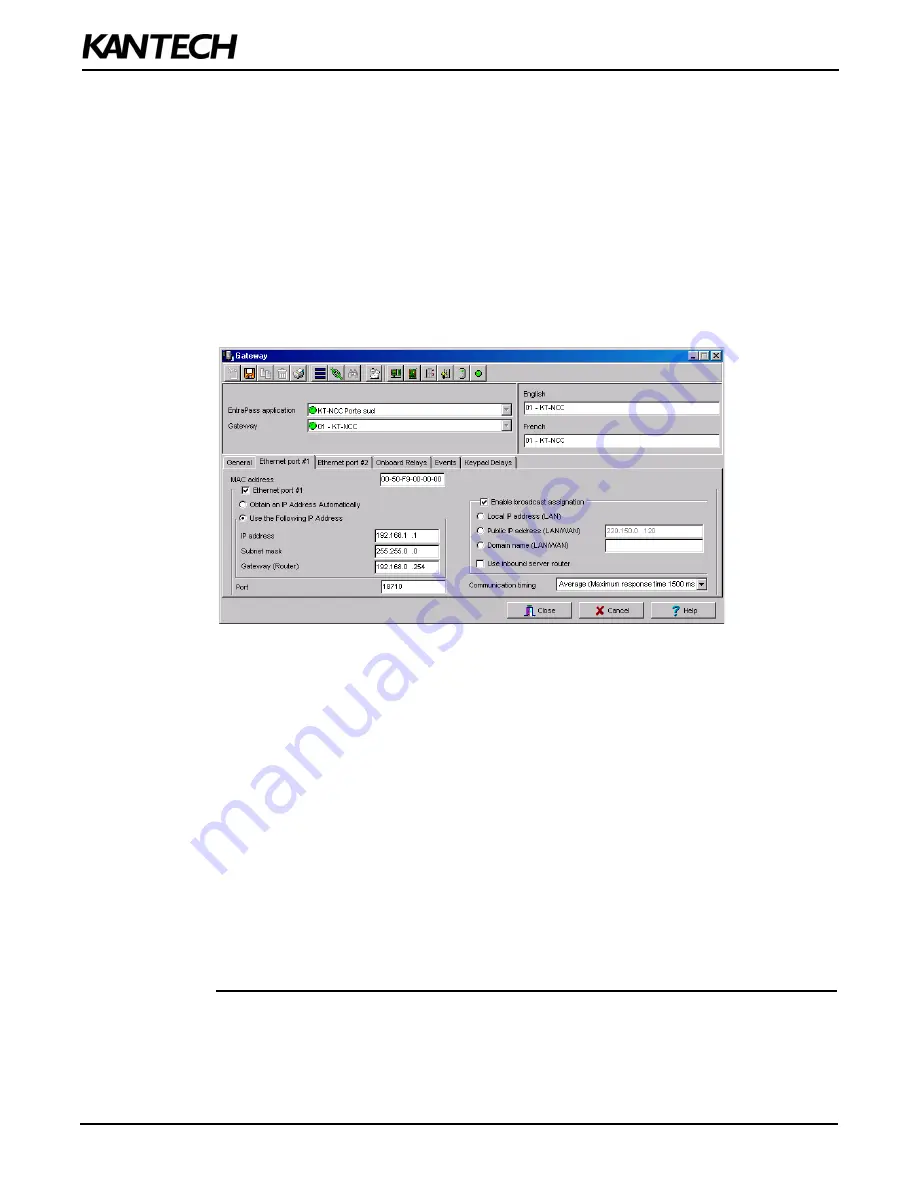
Figure 21: Gateway Window - Ethernet Port #1
9. Enter the KT-NCC
MAC address
.
10.The
Online
option
is checked by default.
11. Select the
Obtain an IP Address Automatically
option.
12.Port
18710
is automatically assigned to KT-NCC by default. It is advisable not to modify it. However,
if you have to configure several KT-NCCs, ensure that every KT-NCC has a unique port number. This
is necessary when forwarding ports to an IP address.
13.The option
Broadcast configuration
is selected by default.
14.Select the
Public IP address (LAN/WAN)
option and enter the IP address.
15.Check the
Use inbound server router
option.
16.Select the appropriate
Communication timing
(Consult Table 5 on Page 22).
17.Click the save icon. Close the Gateway dialog.
18.To verify if the server is communicating with the KT-NCC, you can monitor the incoming messages in
the Desktop Message list. (It may take a few minutes between saving the configuration to the first
message broadcast to the server.) Or, you can check the connection status in the Connection List
(See instructions on page 37).
19.If you have more than one KT-NCC gateway, configure them all at this time.


