


VR-N100U
USERS
MANUAL
Page 86 of 98
All Items Are Subject To Change Without Notice
Feb. 2004 Rev 1.0
3. If you select the
N
, you will be returned to the
Set Server Name
screen. If you select the
Y
, the VR-N100U will reboot.
The LCD Panel will keep you informed about what is happening. Only when you reboot the system will the new
addresses and Server Name go into effect.
6.5.6. Rebooting
VR-N100U supports 3 types of reboots and they can be executed from the LCD Display.
#
Types of Reboots
1 Normal
Reboot
2 Factory
Defaults
Reboot
3
Safe Halt Reboot
1. When your system is operating normally, the LCD Panel will display the Server Name and the IP address, the
Steady
State Display
. If you want to reboot the system, simply depress the Enter key. You will be prompted for the admin
password. Use the Up and Down arrow keys to cycle through the numbers, letters and the dash to spell out the
password. This screen did not display the first time you started up the system. The
Password
entry screen does not
display until after you have setup your system in the VR-N100U Web browser interface. It will display from that point
on whenever you press the Enter key. Depress the Enter key repeatedly to accept the password and advance to the
Network Setup
screen.
2. Depress the Down key to move through the screens until the
Reboot
… screen displays. Depress the Enter key. The
first of the
Reboot Type
screens displays. There are three kinds of reboots you can perform. A
Normal Reboot
just
reboots the system. A
Factory Defaults Reboot
resets all configurable VR-N100U functions to their original, fresh-
from-the-factory settings. The contents of the VR-N100U Users List and the Groups List are lost. The Server Name
and all defined Volume Sets are also lost when a reset-to-defaults reboot is selected. A
Power Off Reboot
will power
down your system using a managed, controlled process designed to protect the system’s equipment prior to power
off. The
Status
light will remain solid red, indicating the VR-N100U can be powered off. Turn the power switch to the
Off position, or unplug the power cord from the outlet. Do not remove the power cord from the system to power it off.
Use the Down key to cycle through the different reboot choices until you get to the one you want. Use the Enter key
to select your choice of Reboot, select the
Y
on the confirmation screen and depress the Enter key to begin the
Reboot. The LCD Panel will display progress messages regarding the state of the reboot.
6.5.7. View Events
The last LCD Panel option is
View Events
. Depress the Enter key to display the
Password
screen. Enter your admin password
using the Up and Down keys to display the characters and numbers in the password. Depress the Enter key to accept the
password and display the
Network Settings
screen. Depress the Down key to cycle to the
View Events
screen. The current
event will scroll across the screen (the LCD Panel is reading this from the
Event Log
in the System Utilities). Use the Up and
Down keys to view the other events recorded in the Event Log.
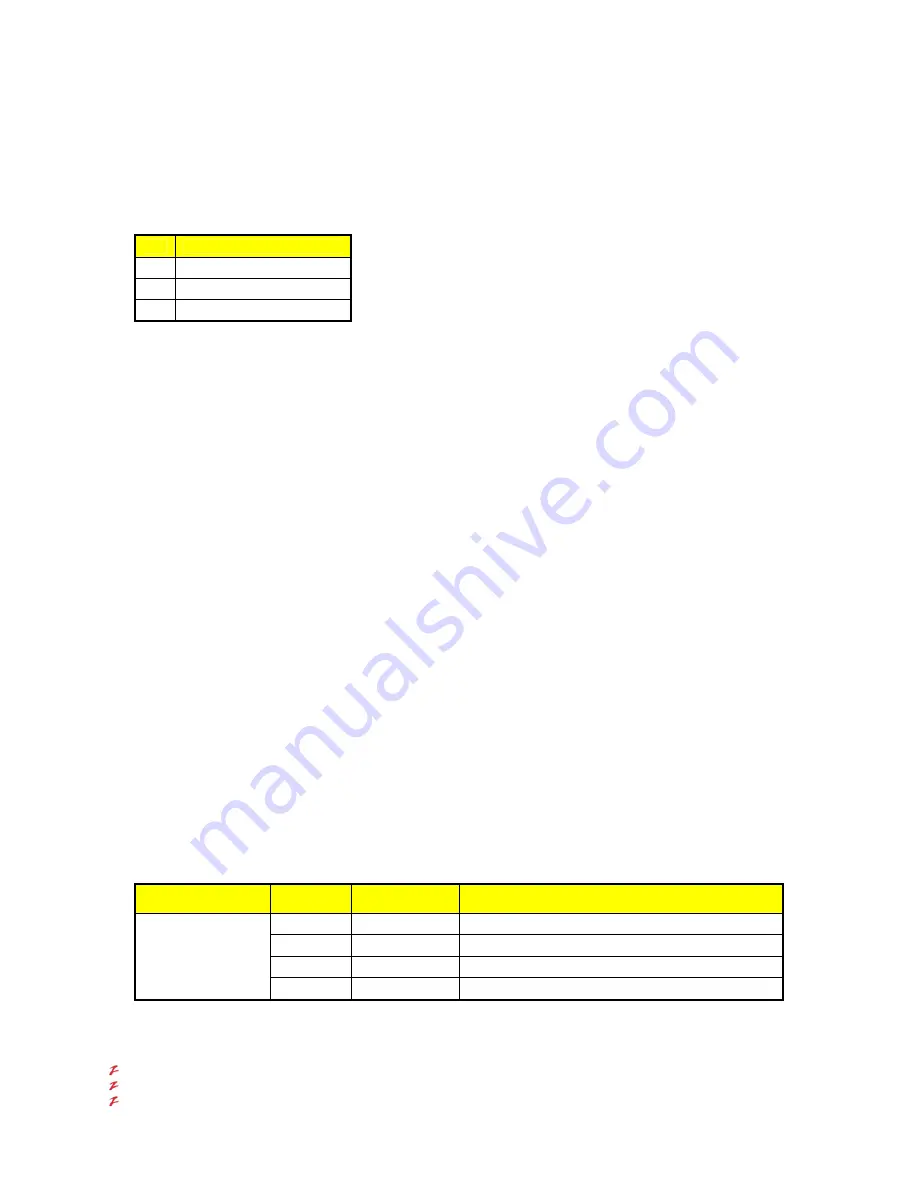
6.5.8. Manual Reboot Status
If the VR-N100U is manually rebooted, the
Status
LED is the only indicator light that is of concern. The chart below provides
a summary of this information:
LED
Interval in
seconds
Color
Operation Performed
4 ~ 8
Solid Amber
System Reboot
8 ~ 12
Solid Red
Safe Halt
12 ~ 16
None – LED Off
Factory Defaults Reboot
Status
16 +
Original State
Ignores the Reset button until pushed again
If the VR-N100U’s
Status
LED begins flashing red during a reboot, it indicates a hardware failure on the VR-N100U board.
Hardware failures, if they exist, are detected during the power-on self-test and include the following:
Boot RAM failure
RAM
failure
Flash
failure