


VR-N100U
USERS
MANUAL
Page 32 of 98
All Items Are Subject To Change Without Notice
Feb. 2004 Rev 1.0
3.4. The
Administration
“Networks” Utilities
Proceed to select the
Administration
icon on the VR-N100U Toolbar to get back to the main Administration Utilities page.
From there, select the
Networks
Utility Page link to navigate to the following pages.
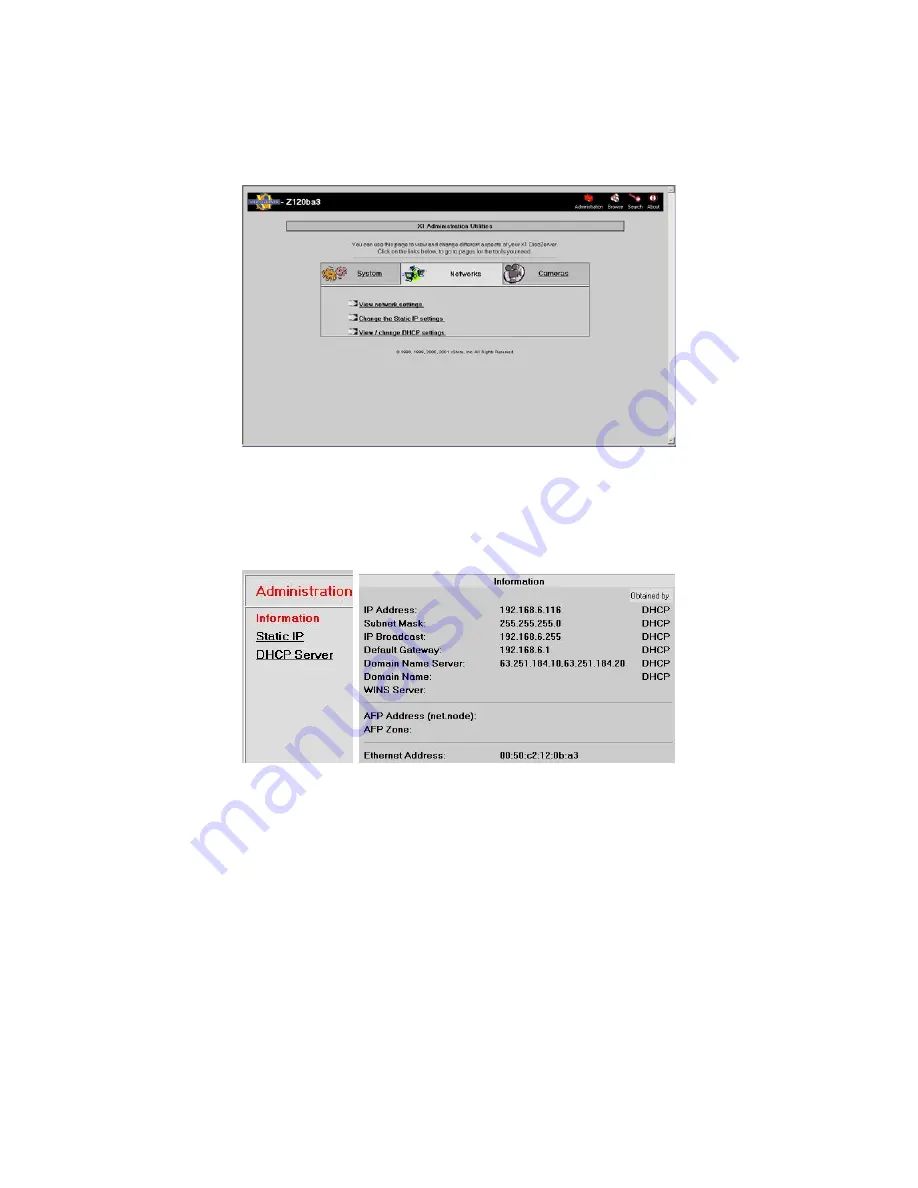
3.4.1. Network Information
By selecting the
View network settings
link, it will bring you to the
Information
page that provides an overview of all of the
network settings for your VR-N100U. One of the immediate management benefits of the
Information
page is that from a
single screen, the administrator is able to determine the current networking setting of the VR-N100U.
This page displays the IP Address, Subnet Mask, IP Broadcast, Default Gateway, DNS, Domain Name, WINS Server, AFP
and Ethernet Address information of the VR-N100U as well as how some of the settings were obtained. Details regarding any
of these network parameters can be found in the
7. Glossary of Terms
section of the manual.
3.4.2. Static IP Setup
Administrators can easily setup static IP addresses for each VR-N100U in the event that there is no DHCP server being
utilized on the network. By selecting the
Static IP
link, the window will display a form with seven fields. Information regarding
IP Address
,
Subnet Mask
,
IP Broadcast
and
Default Gateway
must be filled in along with selecting
Yes
for
Enable Static IP
Address
. Proceed to click the
Save
button, and then a reboot screen will appear. You must select the
Yes
button so that VR-
N100U can go through an automatic reboot using the new IP address and the other information you provided in the form. If
you click on
Cancel
, the information you provided will still be saved, however, it will not be activated until you reboot the VR-
N100U.