


VR-N100U
USERS
MANUAL
Page 28 of 98
All Items Are Subject To Change Without Notice
Feb. 2004 Rev 1.0
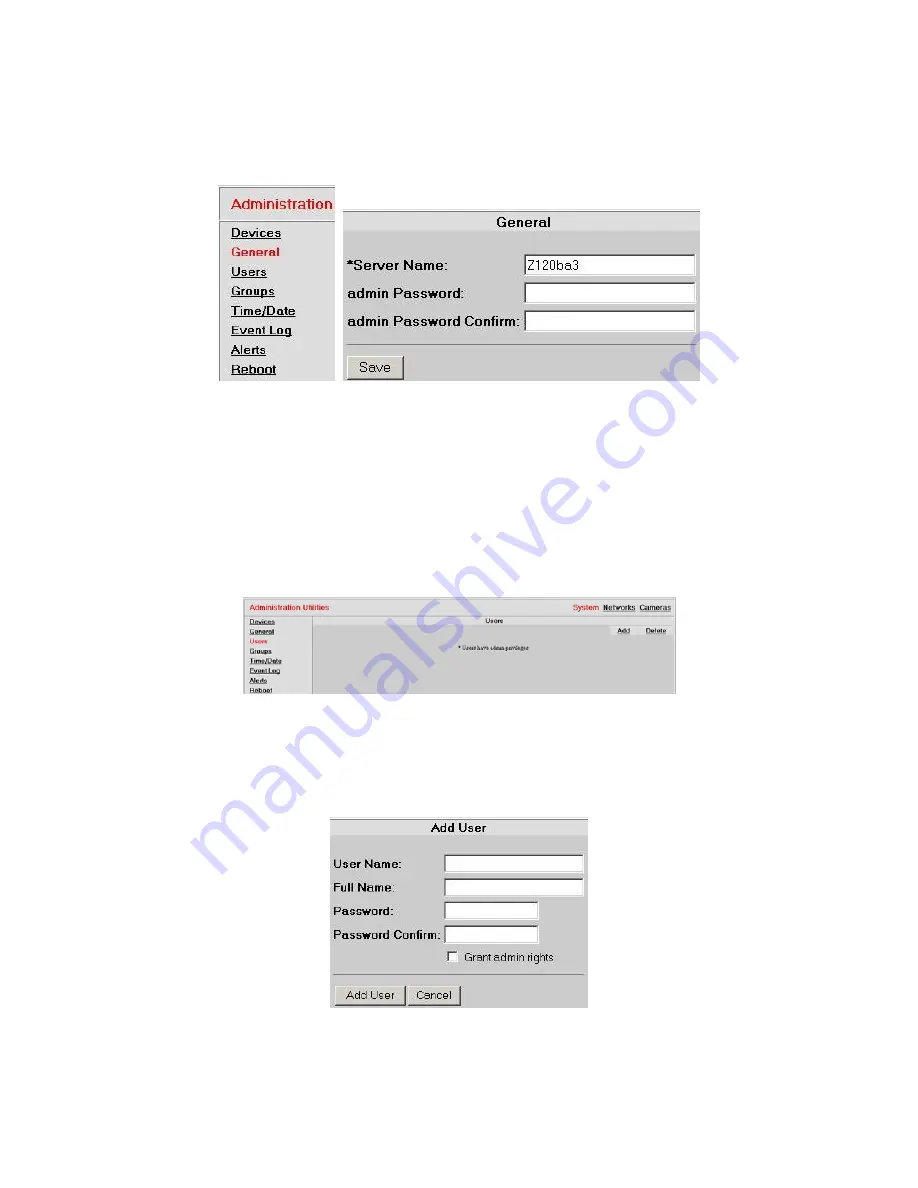
3.3.2. General Settings
The
General
page allows the VR-N100U administrator to easily change the security appliance’s
Server Name
as well as
update the
admin Password
settings.
The Server Name has a maximum length is 24 alphanumeric characters, where the dash/minus sign (-) is not allowed as the
first or last character. For the admin Password, there is a limit of 15 alphanumeric characters with both the comma (,) and
blank space ( ) are unsupported characters. When you change any of these setting, generally it will require VR-N100U to
reboot to activate the new changes.
3.3.3. Managing Users and Groups
In order to set up the secured system, you have to create a VR-N100U
Users List
. You will include in this list the name of
every user who needs to have access to at least one network IP camera on any of the available VR-N100U security
appliances. The Users List is managed in the
Users
System Utility and can support thousands of entries. This utility allows
you to add and delete users, and edit user profiles.
By clicking on the
Add
button, the
Add User
page will appear prompting you to enter the
User Name
,
Full Name
and VR-
N100U
Password
. The User Name can have up to 24 alphanumeric characters and the underscore with the following
characters classified as unsupported (\ / : ; , * ?). The Full Name can have up to 49 alphanumeric characters with the following
classified as unsupported (? * \ " \ / < > ` ' , : &). The Password can have up to 15 alphanumeric characters, excluding the
comma (,) and blank space ( ). If you want the user you are adding to have administrative rights to VR-N100U, click on the
Grant admin rights
checkbox.
By clicking on the
Delete
button, the
Delete User
page will appear prompting you to select the checkbox(es) next to the
name(s) of the user(s) you want to delete. Click on the
Delete
button and a
Deleting Users
confirmation page appears, listing
your selections. If you are satisfied with the selection(s), click on the
Delete
button, or else select
Cancel
button to return to
the
Delete Users
page without deleting the selected users. Change your selections, or click on the
Cancel
button to return to
the
Users
page.