background image

24

English

Care And Maintenance

Handle your CDs carefully, and they will last a long time.

Compact Discs

Only CDs bearing this mark can be used with 
this System. However, continued use of irregu-
larly shaped CDs (heart-shape, octagonal, etc.) 
can damage the System.

Remove the CD from its case by holding it at 
the edges while pressing the case’s center hole 
lightly.

Do not touch the shiny surface of the CD, or 
bend the CD.

Put the CD back in its case after use to prevent 
warping.

Be careful not to scratch the surface of the CD 
when placing it back in the case.

Avoid exposure to direct sunlight, temperature 
extremes, and moisture. 

A dirty CD may not play correctly. If a CD 
does become dirty, wipe it with a soft cloth in a 
straight line from center to edge. 

CAUTION: Do not use any solvent (for example, 
conventional record cleaner, spray thinner, ben-
zine, etc.) to clean a CD.

General Notes

In general, you will have the best performance by keeping your CDs 
and the mechanism clean.

Store CDs in their cases, and keep them in cabinets or on 
shelves.

Keep the system’s CD cover closed when not in use.

Cleaning the lens

If the lens in the CD pickup is dirty, dropout, etc., could degrade 
sound.
Open the CD cover and clean the lens as shown.

Use a blower (available from a camera store) to blow dust off 
the lens.

If there are fingerprints, etc. on the lens, gently wipe clean with 
a cotton swab.

Moisture Condensation

Moisture may condense on the lens inside the 
System in the following cases:

After turning on heating in the room.

In a damp room.

If the System is brought directly from a cold 
to a warm place.

Should this occur, the System may malfunction. 
In this case, leave the System turned on for a 
few hours until the moisture evaporates, unplug 
the AC power cord, and then plug it in again.

Cassette Tapes

If the tape is loose, it may get stretched, cut, or 
caught in the cassette. Take up the slack by 
inserting a pencil in one of the reels and rotat-
ing.

Do not touch the tape surface.

Do not store the tape:
-

In dusty places

-

In direct sunlight or heat

-

In moist areas

-

On a TV or speaker

-

Near a magnet

Cassette Deck

If the heads, capstans, or pinch-rollers of the Cassette Deck 
become dirty, the following may occur:
-

Loss of sound quality

-

Discontinuous sound

-

Fading

-

Incomplete erasure

-

Difficulty recording

Clean the heads, capstans, and pinch-rollers using a cotton 
swab moistened with alcohol.

If the heads become magnetized, the Unit will produce noise or 
lose high frequency notes.

To demagnetize the heads, turn off the Unit, and use a head 
demagnetizer (available at electronics and record shops).

Blower

Lens 

Pinch-rollers

Capstans

Erase head

Record/play head

UX-V6V(U)-eng.fm  Page 24  Thursday, August 5, 1999  2:59 PM

Summary of Contents for UX-V6V

Page 1: ... NUMBER CANCEL KEY CONTROL DIGITAL ECHO ON SCREEN V INTRO UP SET DOWN TUNER BAND TAPE VOLUME CD UX V6V For Customer Use Enter below the Model No and Serial No which are located either on the rear bot tom or side of the cabinet Retain this information for future reference Model No Serial No INSTRUCTIONS LVT0352 001A U UB US UX MICRO COMPONENT SYSTEM UX V6V ...

Page 2: ...connect the mains line The power can be remote controlled IMPORTANT FOR LASER PRODUCTS REPRODUCTION OF LABELS 1 CLASSIFICATION LABEL PLACED ON EXTERIOR SURFACE 1 2 WARNING LABEL PLACED INSIDE THE UNIT 2 1 CLASS 1 LASER PRODUCT 2 DANGER Invisible laser radiation when open and interlock failed or defeated Avoid direct exposure to beam 3 CAUTION Do not open the top cover There are no user service abl...

Page 3: ...ld be placed in the areas shown by the dimensions below 3 Bottom Place on the level surface Maintain an adequate air path for ventilation by placing on a stand with a height of 10 cm or more 15 cm 15 cm UX V6V UX V6V 10 cm 15 cm 15 cm 15 cm 1 cm 1 cm TAPE MICRO COMPONENT SYSTEM TUNER CD CD OPEN CLOSE PHONES MD AUX BAND STANDBY ON DOWN UP MULTI CONTROL RETURN SELECT NEXT PREV UX V6V Front view Side...

Page 4: ...use video CDs or CD Gs you can replace the lead vocal on your favourite songs with your own Digital Echo applied to your voice through the microphone gives you a professional sound Basic information that is the same for many different functions e g setting the volume is given in the section Basic Operations and not repeated under each function The names of buttons controls and display messages are...

Page 5: ...w is pointed at is the same as the voltage Load the batteries as indicated in the illustration making sure that they are positioned correctly with and with R6P SUM 3 AA 15F CAUTION To avoid battery leakage or explosion Remove batteries when the Remote Control will not be used for a long time When you need to replace the batteries replace both batteries Do not use an old battery with a new one Do n...

Page 6: ...ally Strip vinyl shield from cut line twist wire core FM SW 7 21 85MHz Wire Antenna L OPTICAL DIGITAL OUT L R R 20 mm 10 mm AM EXT FM EXT AM LOOP FM SW 75Ω Outdoor FM antenna wire Outdoor SW 7 21 85MHz antenna wire Note Before attaching a 75 ohm coaxial lead the kind with a round wire going to an outdoor antenna or an outdoor SW antenna disconnect the supplied FM SW Wire Antenna L OPTICAL DIGITAL ...

Page 7: ...nnecting Audio Equipment Connect signal cords not supplied between the System s LINE IN AUX LINE OUT terminals and the output input terminals of the external MD recorder tape deck etc You can now listen to the external source through the System or record the System s CD player cassette tape or tuner to an external unit Connecting a TV Connect the video cord supplied between the System s VIDEO OUT ...

Page 8: ...ngle touch With COMPU PLAY you can play a CD a tape or turn on the radio with a single press of the play button for that function COMPU PLAY turns the power on for you then starts the function you have selected If the System is not ready for example no CD is loaded the System still turns on so that you can load a CD The COMPU PLAY buttons are The System automatically turns on with the following op...

Page 9: ...e STANDBY ON indicator lights in red Some power is always consumed even though power is turned off called Standby Mode To switch off the System completely unplug the AC power cord from the wall outlet You will need to reset the clock after about 20 minutes after unplugging System You can adjust the brightness of the display When the System is Turned On To dim brightness press the DIMMER button on ...

Page 10: ...Control to adjust the bass level TREBLE Control You can adjust the treble level high frequency range level between 6 and 6 0 Flat 1 Press the TREBLE button on the Remote Control 2 Press the UP or DOWN button on the Remote Control to adjust the treble level In the System is in Standby the digital clock and analog clock ap pear on the display at the same time Only the analog clock is dis played when...

Page 11: ...r at the same time the 50kHz spacing is selected for FM broadcast 10 kHz Intervals 9 kHz Intervals Note When you change the setting the preset stations are erased You will need to preset the stations again See page 9 However SW preset stations are stored One Touch Radio Just press the TUNER BAND button to turn on the System and start playing the station you were last tuned to You can switch from a...

Page 12: ...o store in memory To change the preset stations simply repeat the same steps above Using the Remote Control In each band you can automatically preset 15 stations The System will automatically give each station a preset number starting from the lowest frequency and moving up the frequency 1 Select a band FM AM or SW by pressing the TUNER BAND button 2 Press the AUTO PRESET button on the Remote Cont...

Page 13: ...ically turned on If a CD is already loaded it will start playing from the first track If no CD is inserted NO DISC appears on the display and the CD Player does not play 1 Press the CD OPEN CLOSE 0 button on the Unit or the CD 0 button on the Remote Control The CD cover opens 2 Place a CD into a compartment with its label side out as shown below Press down on the CD s center until you hear a click...

Page 14: ...s the 4 or button the tracks making up the program will successively be displayed in the programmed order To delete all the tracks in the program in stop mode press the 7 button Pressing the CD 0 button to open the CD cover will also clear the programmed tracks To exit the program mode while the CD Player is stopped press the PROGRAM button to turn off the CD PROGRAM indicator Even if the power is...

Page 15: ... connecting the LINE OUT signals to your TV See page 4 To view a picture of video CDs or CD Gs it is required to set the System s TV system according to your TV system Relationship among the playable CDs System s TV sys tem and your TV system 1 Turn off the power to set the System in Standby mode 2 Press the VCD NUMBER button on the Unit for more than two seconds The current TV system NTSC for exa...

Page 16: ...t 1 Press the VCD NUMBER button SEL 1 will blink on the display 2 Press the VOLUME or button to select the item SEL XX and press the SELECT button to play it back On the Remote Control 1 Press the VCD NUMBER UP or DOWN button to select the item SEL XX you want to play 2 Press the SELECT button to play it back The next track will be automatically played after the current track is finished While a p...

Page 17: ...an play the video CDs with the PBC function without using the menu screen as it they were without the PBC function 1 Load a video CD with the PBC function 2 Select the playback mode Do not press the CD 8 button yet Normal Play Press the button or button on the Remote Control to se lect the track you want to play For example to start from the beginning press the but ton once to select the track 1 P...

Page 18: ... be also displayed on the TV screen Viewing the Video Intro of Video CDs You can check the contents of a video CD watching the first five seconds of each track on the video CD 1 Play the video CD Video CD with the PBC function Perform Continuous Play See page 14 For example to start from the beginning press the but ton once to select the track 1 and then press the CD 8 but ton Video CD without the...

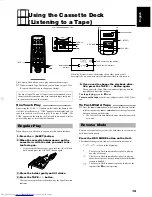
Page 19: ... EJECT button 2 When the cassette holder opens put the cassette in with the side you want to lis ten facing up If the cassette holder does not open turn the Unit off then back on and press the EJECT button again 3 Close the holder gently until it clicks 4 Press the TAPE button The tape is played in the direction shown by the Tape Direction indicator 5 If you need to change the playback direc tion ...

Page 20: ...ng level Two small tabs on the back of the cassette tape one for side A and one for side B can be removed to prevent accidental erasure or recording To record on a cassette with the tabs removed you must cover the holes with adhesive tape first However when a type II tape is used only cover part of the hole as shown since the other part of the hole Type II detection slot is used to detect the tape...

Page 21: ...laying a video CD with the Playback Control function using the menu screen Menu Driven Play you cannot carry out the CD Direct Recording When you carry out the CD Direct Recording for a video CD with the Playback Control function play it back without using the menu screen Continuous Play See page 14 7 Press the REC button on the Unit The TAPE REC indicator lights up and the System begins re cordin...

Page 22: ... sound Press the BASS TREBLE button on the Remote Control to con trol the tone See Tone Control on page 7 To exit MD AUX mode you will automatically switch out of MD AUX mode when you select another source Note For operation of the external equipment refer to its Instruc tions You can record the System s source to external equipment which is connected to the LINE OUT or OPTICAL DIGITAL OUT termi n...

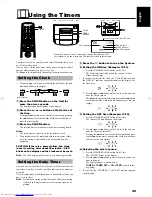
Page 23: ...N If there is a power failure the clock loses its setting after about 20 minutes 0 00 blinks on the display and the clock must be reset Note The clock may gain or lose one to two minutes per month Once you have set the Daily Timer the timer will be activated at the same time every day It can be cancelled and re activate whenever you wish The Timer indicator on the display shows when the Daily Time...

Page 24: ...ower failure occurs you will lose the timer setting and you will have to reset them 5 Minute Snoozing When the timer turns on the music on you can turn it off for 5 minute Press the TIMER SNOOZE button on the Unit The SNOOZE indicator lights up on the display and the music will turn off for five minutes Using the Remote Control By setting the Sleep Timer you can fall asleep to music and know that ...

Page 25: ...ot supplied by plugging it into the MIC 1 and or MIC2 jack 3 Press the KARAOKE MODE MPX button on the Unit until V MASKING appears on the display Each time you press the button Karaoke mode changes as fol lows Lch MONO Rch MONO V REPLACE V MASKING NORMAL back to the beginning You can also select V MASKING during playback 4 Play an audio CD 5 Adjust the main volume and the MIC LEVEL control as you ...

Page 26: ...e echo Note During recording you cannot switch the echo Adjusting the Music Key During playback a CD or in Stop mode you can adjust the music key level between 6 and 6 0 Normal key You can use this function for only CDs 1 Press the KEY CONTROL button on the Remote Control The current key level e g KEY 0 appears on the display 2 Within five seconds press the UP or DOWN button on the Remote Control ...

Page 27: ...s shown Use a blower available from a camera store to blow dust off the lens If there are fingerprints etc on the lens gently wipe clean with a cotton swab Moisture Condensation Moisture may condense on the lens inside the System in the following cases After turning on heating in the room In a damp room If the System is brought directly from a cold to a warm place Should this occur the System may ...

Page 28: ...e CD skips The CD is dirty or scratched Clean or replace the CD The CD does not play The CD is upside down Put the CD in with the label side up You are unable to operate the Remote Con trol The path between the Remote Control and the sensor on the Unit is blocked The batteries have lost their charge Remove the obstruction Replace the batteries The cassette holder cannot be opened During tape playi...

Page 29: ...1 710 kHz except for Saudi Arabia 531 1 602 kHz for Saudi Arabia only at 9 kHz channel space 530 1 710 kHz except for Saudi Arabia 530 1 600 kHz for Saudi Arabia only at 10 kHz channel space SW Tuner Tuning Range 2 3 21 85 MHz Speaker Specifications eachunit Type 1 way bass reflex type Magnetically Shielded Type Speakers 8 cm cone Impedance 4 ohms Dimensions 140 mm 230 mm 217 mm W H D Mass Approx ...

Page 30: ...T L R R IMPORTANT for mains AC line BEFORE PLUGGING IN do check that your mains AC line voltage corresponds with the position of the voltage selector switch provided on the outside of this equipment and if different reset the voltage selector switch to prevent from a damage or risk of fire electric shock ...

Reviews: