


January 31, 2003 6:13 pm
Page 8
— 8 —
Master Page: Right
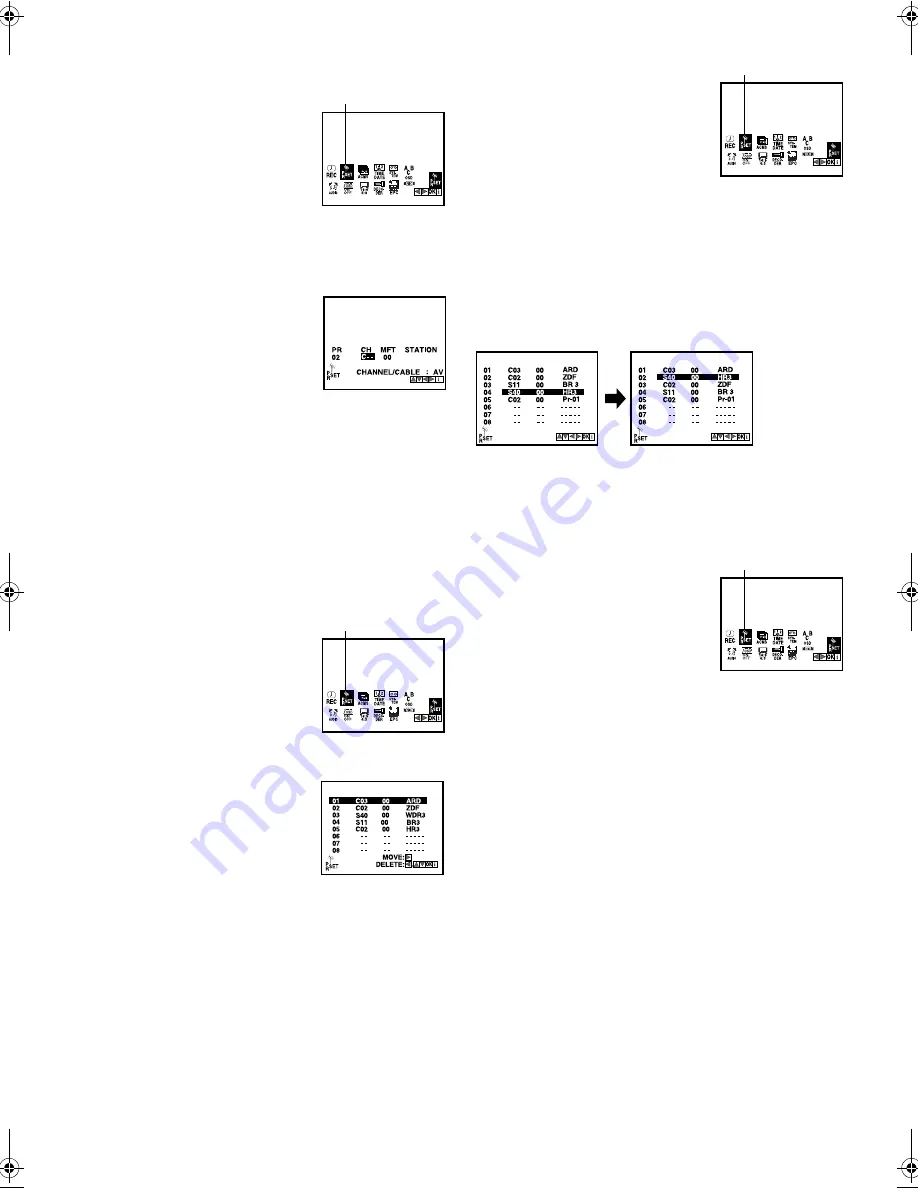
Manual Channel Set
Store channels that were not stored during Plug&Play or Auto
Channel Set.
A
Access Main Menu screen, then
Manual Channel Set screen
Press
MENU
. Press
w
e
to select the icon
“PR SET”, then press
OK
.
●
The Manual Channel Set screen of the
channel position currently received
appears.
B
Access Confirmation screen
Press
MENU
.
C
Select position
Press
rt
to select the open channel position, then press
OK
.
D
Select band
Press
AV
to select C (regular) or S (cable).
E
Input channel
Press the
number keys
or
rt
to input the
channel number you want to store. Input
“0” before any single number entries.
●
For fine tuning adjustment, press
e
to select “MFT” setting, then
press
rt
to perform fine tuning.
●
To input the registered station name, press
e
to select
“STATION” setting, then press
OK
. Press
rt
until the desired
station name appears.
F
Store new channel
Press
MENU
. The Confirmation screen appears.
●
Repeat steps
3
–
6
as necessary.
G
Return to normal screen
Press
MENU
.
Deleting a channel
A
Access Main Menu screen, then
Manual Channel Set screen
Press
MENU
. Press
w
e
to select the icon
“PR SET”, then press
OK
.
●
The Manual Channel Set screen of the
channel position currently received
appears.
B
Access Confirmation screen
Press
MENU
.
C
Select position
Press
rt
to select the channel you want
to delete.
D
Delete channel
Press
w
. The channel directly beneath the
cancelled one moves up one line.
●
Repeat steps
3
–
4
as necessary.
E
Return to normal screen
Press
MENU
.
Changing station channel positions
A
Access Main Menu screen, then
Manual Channel Set screen
Press
MENU
. Press
w
e
to select the icon
“PR SET”, then press
OK
.
●
The Manual Channel Set screen of the
channel position currently received
appears.
B
Access Confirmation screen
Press
MENU
.
C
Select position
Press
rt
to select the station you want to move, then press
e
.
D
Select new position
Press
rt
to move the station to the new position, then press
OK
.
Example
: If you moved the station in position 4 to position 2, the
stations originally in positions 2 and 3 each move down one
space.
●
Repeat steps
3
–
4
as necessary.
E
Return to normal screen
Press
MENU
.
Changing station name (A)
A
Access Main Menu screen, then
Manual Channel Set screen
Press
MENU
. Press
w
e
to select the icon
“PR SET”, then press
OK
.
●
The Manual Channel Set screen of the
channel position currently received
appears.
B
Access Confirmation screen
Press
MENU
.
C
Select position
Press
rt
to select the channel, then press
OK
.
D
Select station name
Press
e
to select “STATION” setting, then press
OK
. Press
rt
until the desired station name appears, then press
OK
.
E
Check setting
Press
MENU
. The Confirmation screen appears.
●
Repeat steps
3
–
5
as necessary.
F
Return to normal screen
Press
MENU
.
PR SET
PR SET
PR SET
PR SET
HR-V505_205E-001EN.fm Page 8 Friday, January 31, 2003 6:13 PM


