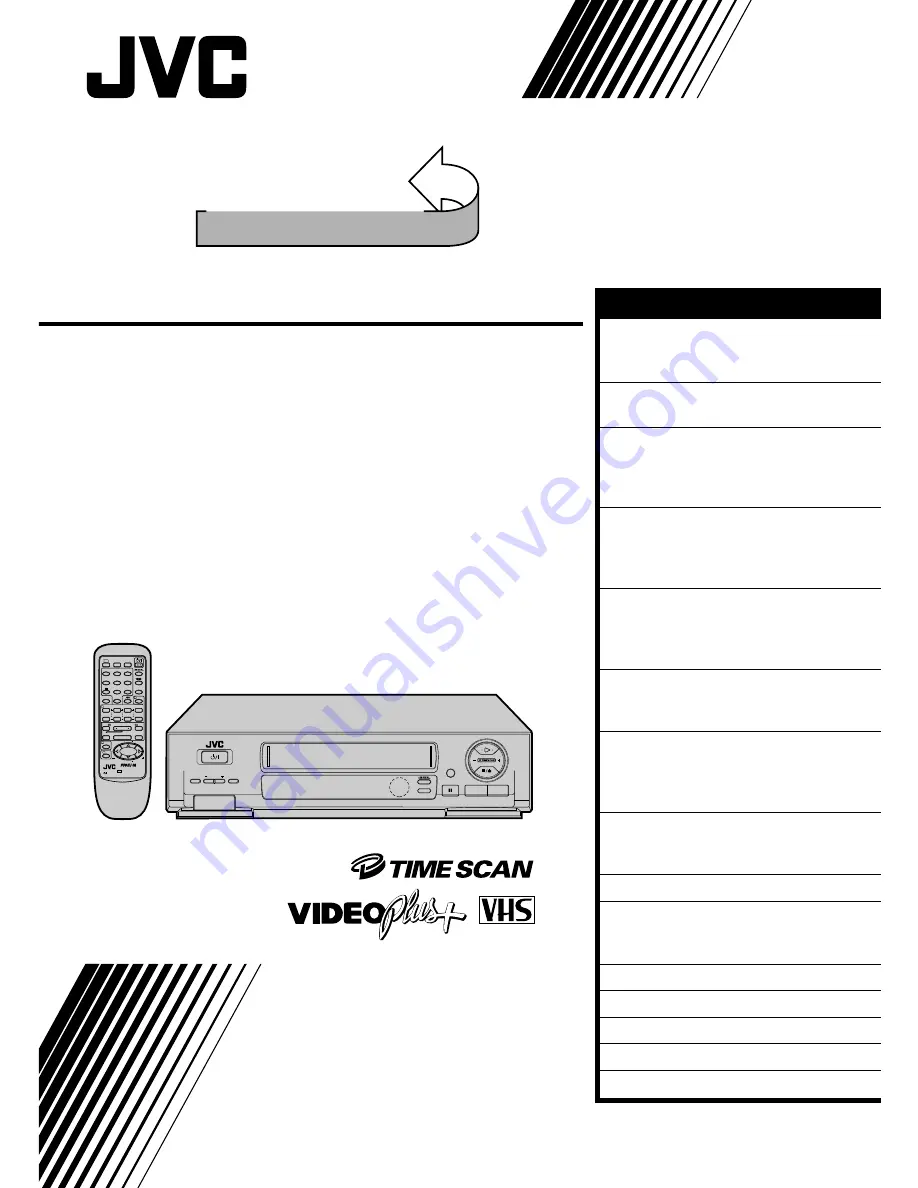
background image

HR-DD445EK

VIDEO CASSETTE RECORDER

INSTRUCTIONS

LPT0002-0D7B

TM

PAL

SEE

QUICK SET UP GUIDE

ON REAR SIDE

SEE

QUICK SET UP GUIDE

ON REAR SIDE

SP/ LP

q

TIMER

STANDBY/ON

TV PROG

COUNTER

RESET

1

¡

REC

1

4

¢

7

STOP

3

PLAY

8

PAUSE

FF        

¡

TV

1

2

3

4

5

/ADD TIME

6

7

/     

8

/DAILY

0

/AUX

9

/WEEKLY

TV/VCR

(MONITOR)

.

CANCEL

/C.RESET

PROG CHECK

4  TIMER

TV PROG

DATE

STOP

START

PROG

/MENU

OK

C.MEMORY

TV VOL 

TV VOL

DISPLAY

2

1

3

EXPRESS PROGRAMMING

PUSH JOG

Press and hold  TV  button while pressing
       , TV PROG. + / –, TV / VCR

REW

CONTENTS

SAFETY FIRST

2

Safety Precautions ...................... 2
Some Do's And Don'ts ............... 3

INSTALLING YOUR NEW RECORDER 4

Basic Connections ...................... 4

INITIAL SETTINGS

6

Video Channel Set ...................... 6
Auto Set Up ............................... 8
Video Plus+ Setup .................... 10

PLAYBACK

12

Basic Playback ......................... 12
Playback Features ..................... 13
TimeScan ................................. 16

RECORDING

18

Basic Recording ....................... 18
Recording Features ................... 19
B.E.S.T. Picture System ............. 20

TIMER RECORDING

22

Video Plus+ Timer Recording ... 22
Regular Timer Programming ..... 24

EDITING

28

Edit To Or From Another Video
Recorder .................................. 28
Edit From A Camcorder ............ 29

SYSTEM CONNECTIONS

30

Connection To A Satellite
Receiver ................................... 30

SPECIAL FEATURES

32

TUNER SET

34

Auto Channel Set ..................... 34
Manual Channel Set ................. 36

CLOCK SET

42

TROUBLESHOOTING

44

QUESTIONS AND ANSWERS

46

SPECIFICATIONS

47

INDEX

48

Summary of Contents for HR-DD445EK

Page 1: ...Y FIRST 2 Safety Precautions 2 Some Do s And Don ts 3 INSTALLING YOUR NEW RECORDER 4 Basic Connections 4 INITIAL SETTINGS 6 Video Channel Set 6 Auto Set Up 8 Video Plus Setup 10 PLAYBACK 12 Basic Playback 12 Playback Features 13 TimeScan 16 RECORDING 18 Basic Recording 18 Recording Features 19 B E S T Picture System 20 TIMER RECORDING 22 Video Plus Timer Recording 22 Regular Timer Programming 24 E...

Page 2: ... prior to connecting or disconnecting any signal lead or aerial The rating plate and the safety caution are on the rear of the unit WARNING DANGEROUS VOLTAGE INSIDE WARNING TO PREVENT FIRE OR SHOCK HAZARD DO NOT EXPOSE THIS UNIT TO RAIN OR MOISTURE Safety Precautions Video tapes recorded with this video recorder in the LP Long Play mode cannot be played back on a single speed video recorder The ST...

Page 3: ... switched on when it is unattended unless it is specifically stated that it is de signed for unattended operation or has a standby mode Switch off using the switch on the equipment and make sure that your family knows how to do this Special arrangements may need to be made for infirm or handicapped people DON T use equipment such as personal stereos or radios so that you are distracted from the re...

Page 4: ...e depends on the type of TV you have RF CONNECTION To Connect To A TV With NO 21 pin AV input connector SCART a Disconnect the TV aerial cable from the TV b Connect the TV aerial cable to the ANT IN jack on the rear panel of the recorder c Connect the provided RF cable between the RF OUT jack on the rear panel of the recorder and the TV s aerial connector Before operating the recorder make sure th...

Page 5: ... ATTENTION If you have finished all the necessary connections go to Video Channel Set on page 6 then perform Auto Set Up on page 8 do NOT press the button on the recorder remote control to turn on the recorder s power before you start Auto Set Up Back of Recorder ...

Page 6: ...ess TV PROG or to set the video recorder to a vacant channel between 22 and 69 which is not occupied by any local station in your area Refer to list on page 41 for details of broadcast stations in your area Then set your TV to UHF channel 36 and check if the two vertical white bars appear clearly on the screen if so go to step 3 If not re set the video recorder to another vacant channel and try ag...

Page 7: ...ay panel shows the following SET VIDEO CHANNEL 2 Press TV PROG until the display panel shows OUT Now the video channel is set to off EXIT VIDEO CHANNEL SET MODE 3 Press OK TURN OFF THE RECORDER 4 Press With AV Connection q 1 1 4 7 3 8 1 2 3 4 5 6 7 8 0 9 4 2 1 3 4 To view picture signals from the video recorder set your TV to its AV mode After you finish this step go to Auto Set Up on page 8 TV PR...

Page 8: ...tions and stores them in the recorder s memory then automatically sets Video Plus assigned Guide Program number for those stations according to the broadcast area q 1 1 4 7 3 8 1 2 3 4 5 6 7 8 0 9 4 2 1 INITIAL SETTINGS cont ATTENTION Once you have performed Auto Set Up even if the recorder s memory backup has expired all the stored stations and their Guide Program numbers remain in the recorder s...

Page 9: ...V and select its VIDEO channel or AV mode then make sure that all necessary stations have been stored in the recorder s memory by using the TV PROG button s If station names ID Z pg 40 have also been stored in the recorder s memory the station name will be displayed at the top left corner of the screen for about 5 seconds when the recorder is tuned to a different station If you want to set the tun...

Page 10: ...wing steps will help you check the settings and make corrections if necessary Turn on the TV and select the VIDEO channel or AV mode INITIAL SETTINGS cont IMPORTANT As Channel 5 has started its service on March 30th 1997 the Guide Program Numbers of some stations have been changed as follows Station Name Guide Program Number Before Now CHANNEL 5 5 RTE1 IRELAND 5 6 NETWORK 2 IRELAND 6 7 For details...

Page 11: ...d ERROR appears on screen for a few seconds Input the correct PlusCode number Repeat steps 4 and 5 as necessary CLOSE MENU 6 Press MENU and selection is complete If you already know the Guide Program number for a station 1 After step 3 press PUSH JOG The GUIDE PROG number starts to flash 2 Enter the Guide Program number using the NUMBER keys or PUSH JOG fi then press PUSH JOG The TV PROG number st...

Page 12: ... START PLAYBACK 3 Press PLAY BEST appears blinking in the recorder s display panel during automatic tracking Z pg 20 Playback picture quality of LP recordings will not be as high as SP recordings STOP PLAYBACK 4 Press STOP on the remote or STOP EJECT on the recorder s front panel Then press STOP EJECT to remove the cassette Turn on the TV and select the VIDEO channel or AV mode q 1 1 4 7 3 8 1 2 3...

Page 13: ...E SCAN or on the recorder To resume normal playback press PLAY NOTE In the still or frame by frame playback mode the picture may be distorted and there may be a loss of colour fi TIME SCAN PAUSE 1 4 7 3 8 1 2 3 4 5 6 7 8 0 9 4 2 1 3 PAUSE P L A Y TV PROG PUSH JOG Slow Motion ACTIVATE SLOW MOTION PLAYBACK 1 Press PUSH JOG or TIME SCAN during playback to decrease speed in the forward direction To pl...

Page 14: ... and the recorder searches for the index code indicating the start of the last timer recorded programme Once it s found playback begins automatically The front display panel tells you how many programmes have been recorded If you have for example 3 programmes REVIEW and 3 appear and blink To watch the first of the 3 programmes press REVIEW three times The recorder searches and begins playback auto...

Page 15: ... To cancel Counter Memory press C MEMORY again Repeat Playback Your video recorder can automatically play back the whole tape 20 times repeatedly START PLAYBACK 1 Press PLAY ACTIVATE REPEAT PLAYBACK 2 Press PLAY and hold for over 5 seconds then release The Play indicator on the display panel blinks slowly The tape plays 20 times automatically and then stops STOP PLAYBACK 3 Press STOP at any time t...

Page 16: ... with NTSC playback q 1 PLAY FF R E W TIME SCAN MENU P L A Y FF REW O K PUSH JOG 1 2 3 4 5 Audio signal during TimeScan Sound of 1 3 and 5 is heard Sound of 2 and 4 is not heard Output audio signal is normal monaural sound Playback tape High Speed Search ACTIVATE HIGH SPEED SEARCH 1 During playback or still press FF for forward high speed search or REW for reverse high speed search To resume norma...

Page 17: ...ight corner of the TV screen for approx 5 seconds The display may be distorted To resume normal playback press PLAY Picture and audio may become distorted when the recording speed changes When this happens resume normal playback once and then try using TimeScan again The picture may be noisy or there may be a loss of colour when you change the playback speed More noise will appear with LP recordin...

Page 18: ... recordings will not be as high as SP recordings START RECORDING 4 Press and hold RECORD and press PLAY on the remote control or press RECORD on the recorder PAUSE RESUME RECORDING 5 Press PAUSE Press PLAY to resume recording STOP RECORDING 6 Press STOP on the remote control or STOP EJECT on the recorder Then press STOP EJECT to remove the cassette q 1 P A U S E 5 1 4 7 3 8 1 2 3 4 5 6 7 8 0 9 4 2...

Page 19: ...utes to 6 hours selectable in 30 min increments and shuts the recorder off after recording is finished START RECORDING 1 Press RECORD on the recorder ENGAGE ITR MODE 2 Press RECORD again blinks and 0 30 appears on the front display panel SET RECORDING DURATION 3 If you want to record for more than 30 minutes press RECORD to extend the time Each press extends recording time by 30 minutes NOTE You c...

Page 20: ...ress PUSH JOG to set to ON RETURN TO NORMAL SCREEN 5 Press MENU START RECORDING 6 Press and hold RECORD and press PLAY on the remote or RECORD on the recorder The recorder spends approximately 7 seconds assessing the condition of the tape then begins recording When the BEST indicator begins blinking that means adjustment is complete Pressing the recorder s RECORD button while BEST is displayed doe...

Page 21: ...ally checks the condition of the tape and after approximately 7 seconds re enters RECORD PAUSE 2 Press PLAY to start recording If you want to bypass the B E S T system and begin recording immediately set B E S T to OFF in step 4 on page 20 Playback The recorder assesses the quality of the tape once you initiate playback When watching a tape recorded with B E S T set to ON it is recommended that yo...

Page 22: ...een and Err appears on the display panel Press CANCEL to backspace and input a valid PlusCode number If ERROR GUIDE PROG appears on the screen see ATTENTION Regarding Guide Program Number Set on page 23 TIMER RECORDING Before performing Video Plus Timer Recording Be sure to read Video Plus Setup Z pg 10 Insert a cassette with the safety tab in place The recorder will come on automatically Turn on ...

Page 23: ...eceiver Users To timer record a satellite broadcast using Video Plus perform steps 1 6 and before the selected programme begins select the appropriate channel on the satellite receiver Then set the receiver s timer If your satellite receiver doesn t have a timer leave the unit s power switched on 1 4 7 3 8 1 2 3 4 5 6 7 8 0 9 4 2 1 3 NUMBER ATTENTION Regarding Guide Program Number Set ERROR GUIDE ...

Page 24: ...E DATE 5 Press DATE The current date appears on screen The date you enter appears in its place SP SP P1 START STOP SP OFF DATE TV PROG 25 12 MENU EXIT P1 START STOP 21 00 SP OFF DATE TV PROG 25 12 MENU EXIT TIMER RECORDING cont 1 4 7 3 8 1 2 3 4 5 6 7 8 0 9 4 2 1 3 Now available from some TV stations PDC Programme Delivery Control is a service designed to assure safe accurate timer recording With ...

Page 25: ...Monday Friday Either WEEKLY or DAILY appears on the screen Pressing the button again makes the corresponding indication disappear q 1 1 4 7 3 8 1 2 3 4 5 6 7 8 0 9 4 2 1 3 SP P1 START STOP 21 00 22 00 SP OFF DATE TV PROG 25 12 1 BBC 1 MENU EXIT NOTES You can programme this recorder to timer record as many as 8 programmes If you try to programme the recorder to record a ninth PROGRAM FULL appears o...

Page 26: ... CANCEL All information you input is deleted REVISE PROGRAMME INFORMATION 2 Input the appropriate data using the START STOP DATE and TV PROG buttons on the remote control TIMER RECORDING cont Timer Warning WARNING TIMER RECORDING TO START SOON CANCEL If you have programmed your recorder to timer record a programme or a series of programmes a warning appears on screen to tell you that the recording...

Page 27: ...ter to MODE SET then press OK SELECT MODE 3 Press PUSH JOG to select either ON or OFF RETURN TO NORMAL SCREEN 4 Press MENU NOTE For safety when Auto timer is set to OFF all other recorder functions are disabled while the Timer mode is engaged To disengage the timer press TIMER 5 MODE SET AUTO TIMER OFF O S D ON B E S T ON TIME SCAN ON AUDIO 5 ON OFF MENU EXIT MAIN MENU MODE SET AUTO CH SET MANUAL ...

Page 28: ... SCART connector as illustrated below When Using Your Video Recorder As The Source Player connect its AV1 IN OUT connector to the recording deck When Using Your Video Recorder As The Recording Deck connect its AV2 IN or AV1 IN OUT connector to the source player SET RECORDING DECK S INPUT MODE 2 Set to AUX With this video recorder press NUMBER key 0 and or TV PROG to select depending on the connect...

Page 29: ...V1 IN OUT connector via the optional cable adapter SET RECORDER S INPUT MODE 2 Press the NUMBER key 0 and or TV PROG to select the appropriate input mode depending on the connec tor being used AU 1 for the AV1 IN OUT connector or AU 2 for the AV2 IN connector START CAMCORDER 3 Engage its Play mode START RECORDER 4 Engage its Record mode TV PROG NUMBER 0 Recorder Cable adapter not provided VIDEO OU...

Page 30: ...onnection to a satellite receiver NOTES When connecting your recorder to a TV equipped with 21 pin SCART connectors follow the illustration above using the cables shown in gray For details check your satellite receiver s instruction manual Satellite Receiver Unit Outdoor Unit Aerial TV Aerial cable Back of Recorder ANT IN RF OUT Satellite Cable Mains outlet ...

Page 31: ...31 RF OUT ANT IN EXT 2 EXT 1 Aerial terminal 21 pin SCART connectors Back of TV ...

Page 32: ...URES On Screen Dispiay NOTES When you use this recorder as the player for editing be sure to set O S D to OFF before starting During playback the operation mode indicators may be disturbed depending on the type of tape being used You can choose whether or not to have various operational indicators appear on screen by setting this function ON or OFF TURN ON THE RECORDER 1 Press ACCESS MAIN MENU SCR...

Page 33: ...the Stop mode you press FF REW or perform an Index Search The position of 5 in relation to 0 beginning or end shows you where you are on the tape O S D Z pg 32 must be set to ON or the indicator will not appear NOTE Depending on the type of tape used there may be times when the indication is not correct 3 1 23 45 REMAIN 2 35 0 Beginning End ...

Page 34: ...gns all receivable stations in your area TURN ON THE RECORDER 1 Press ACCESS MAIN MENU SCREEN 2 Press MENU twice PERFORM AUTO CHANNEL SET 3 Move the highlight bar pointer to AUTO CH SET by pressing PUSH JOG fi then press OK The Auto Set screen appears and remains on screen while the recorder searches for receivable stations As Auto Channel Set progresses the mark on the screen moves from left to r...

Page 35: ... be stored in order and the station names may not be stored correctly 5 5 PR CH ID PR CH ID 01 26 BBC1 08 02 33 BBC2 09 03 23 ITV 10 04 30 CH4 11 05 37 CH5 12 06 13 07 14 5 EDIT CANCEL DELETE MENU EXIT 5 5 PUSH JOG IMPORTANT Depending on the reception conditions the station names may not be stored correctly and auto Guide Program Number Set may not work properly If the Guide Program numbers are no...

Page 36: ...of CH Press the NUMBER keys to input the channel number you want to store For fine tuning adjust ment press PUSH JOG until the channel number begins blinking then press PUSH JOG fi While tuning F or F appears ENTER NEW CHANNEL INFORMATION 5 Press OK and the Confirmation screen appears Repeat steps 3 through 5 as necessary CLOSE CONFIRMATION SCREEN 6 Press MENU To input the station name see page 38...

Page 37: ...f you moved the station in position 3 to position 7 the stations originally in positions 4 7 each move up one space Repeat steps 1 and 2 as necessary CLOSE CONFIRMATION SCREEN 3 Press MENU SELECT ITEM 1 Press PUSH JOG fi until the item you want to delete begins blinking DELETE CHANNEL 2 Press CANCEL The item directly beneath the cancelled one moves up one line Repeat steps 1 and 2 as necessary CLO...

Page 38: ... CLOSE CONFIRMATION SCREEN 4 Press MENU Set Stations A TUNER SET cont NOTE First perform step 1 of the above procedure SELECT STATION NAME CHARACTER 2 Press PUSH JOG and the first letter of the station name begins blinking ENTER NEW CHARACTER 3 Press PUSH JOG fi to cycle through the characters A Z 0 9 space and stop when the desired one is indicated then press PUSH JOG to enter Enter the remaining...

Page 39: ... PUSH JOG fi until the channel you want to tune begins blinking ACCESS MANUAL CH SET SCREEN 2 Press OK three times The Manual Ch Set screen appears PERFORM TUNING 3 Press PUSH JOG fi until the picture is its clearest Then press OK The Confirmation screen appears Repeat steps 1 through 3 as necessary CLOSE CONFIRMATION SCREEN 4 Press MENU Fine Tuning Channels Already Stored MENU OK PUSH JOG ...

Page 40: ...RAI2 RAI2 RAI3 RAI3 RB1 RB1 RB3 RB3 Rikisutvarpid S RKPS RTBF 1 RTB1 RTBF 2 RTB2 RTE 1 RTE1 RTL RTL RTL 2 RTL2 RTP RTP STATION NAME ID SAT SAT 1 SAT1 Scottish TV SCOT SC4 SC4 SDR SDR SDR1 SDR1 SFB1 SFB1 SFB3 SFB3 SKY Sky One SKY1 Sky Net SKYN Sport SPRT SR 1 SR1 Super RTL SRTL STV Test STVT STV 1 STV1 STV 2 STV2 Suedwest3 SW3 SWF 1 SWF1 Schweiz4 SWZ4 TYNE TEES TEES Text TEXT TF1 TF1 TNT int TNT TR...

Page 41: ...lneston 62 55 59 65 Midlands Ridge Hill 22 28 25 32 Sutton Coldfield 46 40 43 50 The Wrekin 26 33 23 29 Waltham 58 64 61 54 North Belmont 22 28 25 32 Emley Moor 44 51 47 41 BBC1 BBC2 ITV CH4 North West Caldbeck 30 34 28 32 Winter Hill 55 62 59 65 North East Bilsdale West Moor 33 26 29 23 Chatton 39 45 49 42 Pontop Pike 58 64 61 54 Scotland Angus 57 63 60 53 Black Hill 40 46 43 50 Sandale 22 Caldbe...

Page 42: ...matic adjustments at regular intervals by reading data from a PDC signal The Just Clock option appears in the Clock Set and Auto Clock Set screens and can be set ON or OFF the default setting is ON Press OK until the Just Clock setting begins blinking then press PUSH JOG fi to change the setting IMPORTANT If you turn off Just Clock off the accuracy of your recorder s built in clock may be reduced ...

Page 43: ... the hour then press OK The minutes display begins blinking Repeat the procedure to set the minutes day month and year SET JUST CLOCK 5 The default setting is ON Set as desired by pressing PUSH JOG fi then press OK If you set to OFF you can disregard the next step as you won t be able to receive regular clock adjust ments SET CLOCK DATA SOURCE PRESET 6 The recorder is preset to receive clock setti...

Page 44: ...AV connection the TV receiver is not set to the AV mode The automatic tracking mode is engaged The automatic tracking mode is engaged The video heads may be dirty CORRECTIVE ACTION If you are using the RF OUT connec tion set the TV receiver to the VIDEO channel Z pg 6 Perform Video Channel Set Z pg 6 If you are using the AV connection set the TV to its AV mode Try manual tracking Z pg 14 Try manua...

Page 45: ... The timer is engaged but there s no cassette loaded The loaded cassette has had its Record Safety tab removed TIMER has been pressed when there are no programs in memory or the timer record information has been programmed incorrectly The end of the tape was reached during timer recording The recorder s preset positions have been set incorrectly CORRECTIVE ACTION Position the camcorder so its micr...

Page 46: ...h the recorder off and unplug the mains power cord Then plug it in again and turn the recorder on Take out the cassette After checking the cassette operate the unit as usual RECORDING Q When I pause and then resume a recording the end of the recording before the pause is overlapped by the beginning of the continuation of recording Why does this happen A This is normal It reduces distortion at the ...

Page 47: ...Double Azimuth helical scan system Signal to noise ratio 45 dB Horizontal resolution 250 lines Frequency range 70 Hz to 10 000 Hz Input Output 21 pin scart connector x 2 IN OUT x 1 IN x 1 SPECIFICATIONS TUNER TIMER TV channel storage capacity 99 positions AUX position AU Tuning system Frequency synthesized tuner Channel coverage UHF channels 21 69 470 862 MHz Aerial output UHF channels 22 69 Adjus...

Page 48: ... frame by frame playback Z pg 13 variable speed search Z pg 16 8 PLAY Button plays back tape Z pg 12 cancels Pause Still Slow Search modes Z pg 13 16 9 STOP EJECT Button stops tape ejects tape during Stop mode Z pg 12 0 Display Panel provides clear view of various displays and indicators Z pg 49 Infrared Beam Receiving Window is where remote control should be aimed when in use SP LP Button selects...

Page 49: ...eo recorder is in the Counter Memory mode Z pg 15 6 Channel Display shows preset position where the station currently being received is stored Ex Preset position 1 will be displayed as CH 1 Mode shows external input mode selected Clock Display shows current time Z pg 9 42 7 Instant REVIEW Indicator blinks after timer recording and shows how many programmes have been timer recorded Z pg 14 8 Casset...

Page 50: ...sables PDC record ing Z pg 22 25 7 AUX Button selects recorder s auxiliary input mode Z pg 28 8 PROG CHECK Button accesses Program screens displays to check the program that you have programmed next program s information screen display appears each time button is pressed Z pg 26 9 STOP Button inputs programme Stop Time Z pg 24 0 START Button accesses Regular Program screen inputs programme Start T...

Page 51: ...V VOL Button controls volume of con nected TV Z Operating JVC TVs to the right Installing Batteries 1 Open the battery compartment cover 2 Insert 2 AA size batteries provided in the correct directions 3 Replace the cover How To Use The remote control can operate most of your video recorder s functions as well as basic functions of JVC TV sets See below Point the remote control toward the sensor wi...

Page 52: ...VICTOR COMPANY OF JAPAN LIMITED ...

Reviews: