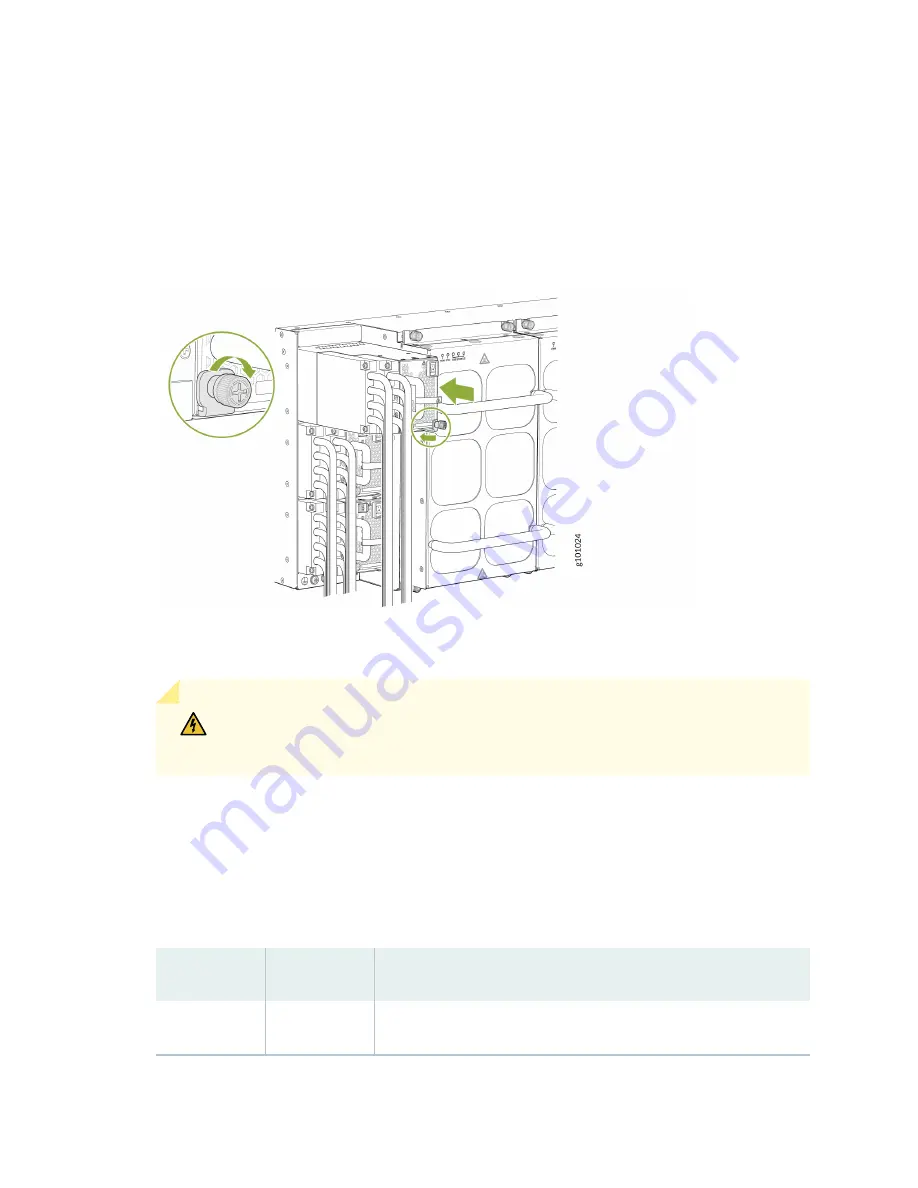
14. Push the captive screw into the power supply faceplate. Ensure that the screw is seated inside the
corresponding hole on the faceplate.
15. Tighten the captive screw by turning it clockwise with the Phillips (+) screwdriver, number 1. When
the screw is completely tight, the latch locks into the router chassis.
Figure 63: Install a JNP10K-PWR-DC2 in an MX10004
16. Route INP1 cables to a power source and INP2 to another power source. The JNP10K-PWR-DC2
shares power, so if power dips on one input, the power supply is able to load balance internally.
WARNING: Ensure that the power cords do not block access to router components
or drape where people can trip on them.
17. Set the three DIP switches to indicate the number of input sources and to indicate high or low
power. See
and
.
Set both enable switches to the on position when using both source inputs. When not using source
redundancy, set the unused source to the off position. The LED turns red and indicates an error if a
source input is not in use and the enable switch is on.
Table 51: Set the JNP10K-PWR-DC2 DIP Switches
Switch
State
Description
1
On
IP0 is present.
159


