Adding Your Sensor to NSM
31
Chapter 5: Adding the Sensor to NSM
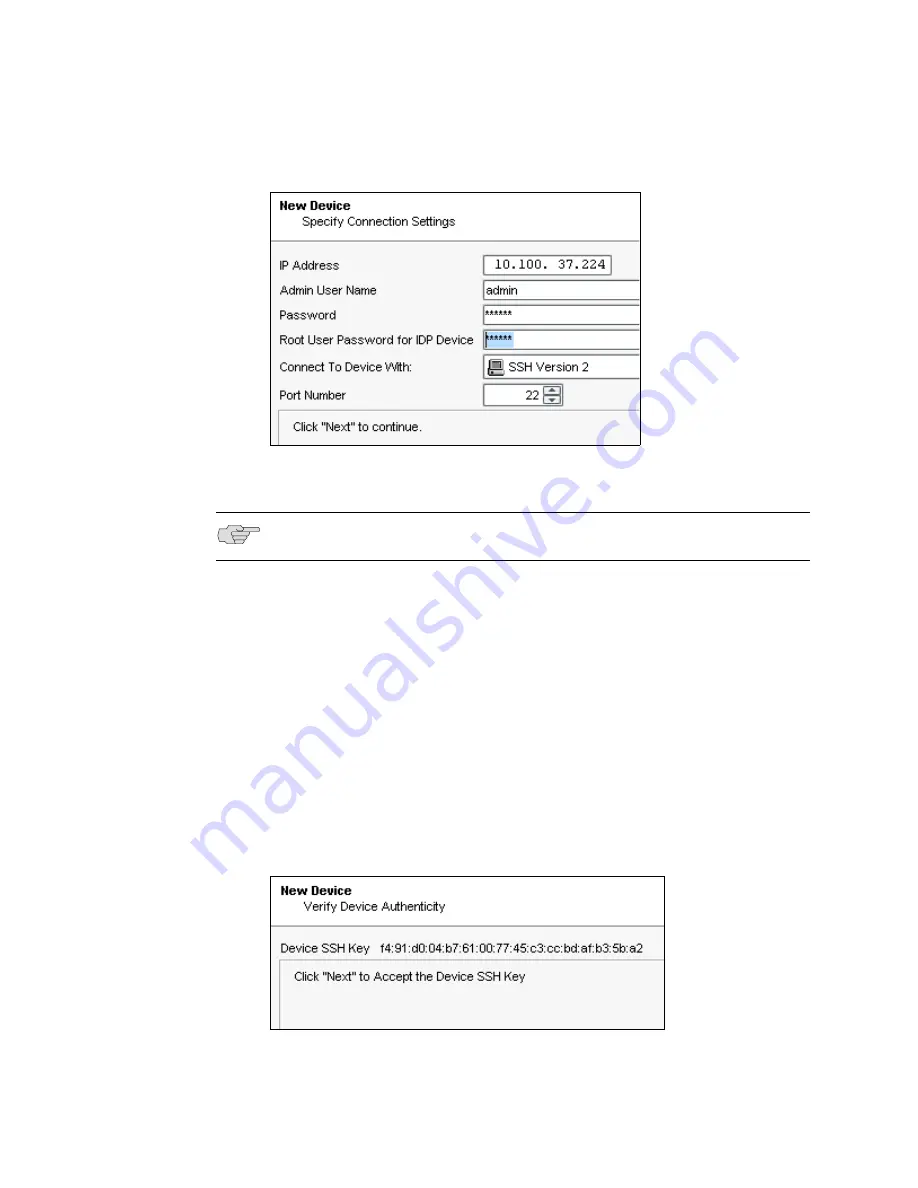
Figure 14: Add Device Wizard - Connection Settings
6.
Enter the following connection information:
a.
Enter the IP address of the sensor.
b.
Enter
admin
in the Admin User Name box.
c.
Enter the password for the admin user name. The default password is
abc123.
d.
Enter the password for the device root user. The default password is
abc123.
e.
Select
SSH Version 2
as the connection method. Leave the port number as
22.
f.
Click
Next
to open the Verify Device Authenticity dialog box (Figure 15).
After a moment, the wizard displays the SSH key fingerprint information.
Figure 15: Add Device Wizard - Verification Settings
NOTE:
All passwords handled by NetScreen-Security Manager are case-sensitive.
Summary of Contents for IDP 250
Page 6: ...vi Table of Contents IDP 75 250 800 and 8200 Installation Guide...
Page 8: ...viii List of Figures IDP 75 250 800 and 8200 Installation Guide...
Page 10: ...x List of Tables IDP 75 250 800 and 8200 Installation Guide...
Page 14: ...IDP 75 250 800 and 8200 Installation Guide xiv Requesting Technical Support...
Page 20: ...IDP 75 250 800 and 8200 Installation Guide 6 IDP Configuration Basics...
Page 48: ...IDP 75 250 800 and 8200 Installation Guide 34 Checking the Status of Your Sensor...
Page 52: ...IDP 75 250 800 and 8200 Installation Guide 38 Reimaging the IDP Sensor...
Page 56: ...IDP 75 250 800 and 8200 Installation Guide 42 Replacing a Hard Drive IDP 800 and 8200 Only...
Page 68: ...IDP 75 250 800 and 8200 Installation Guide 54 Index...


