background image

P5415479


1

1. Safety Summary

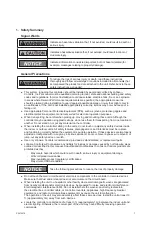
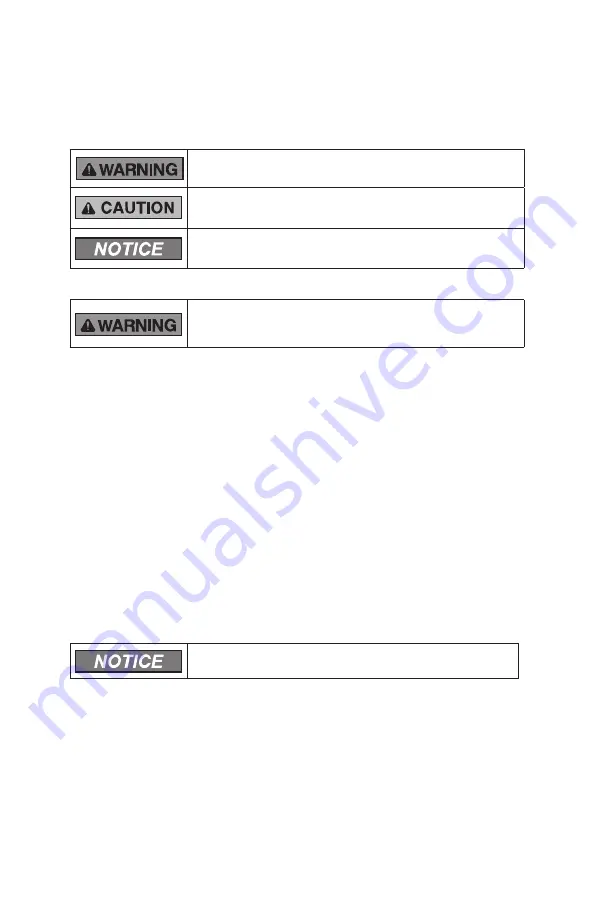
Signal Words


Indicates a hazardous situation that, if not avoided, could result in death or 
serious injury.

Indicates a hazardous situation that, if not avoided, could result in minor or 

moderate injury. 

Indicates information considered important, but not hazard-related (for 
example, messages relating to property damage).

General Precautions

To reduce the risk of serious injury or death, read these instructions 

thoroughly and follow all warnings or cautions included in all manuals that 

accompanied the product and are attached to the unit. 

Refer back to these 

safety instructions as needed.


This system, including this controller, should be installed by personnel certi

fi

 ed by Johnson 

Controls, Inc. Personnel must be quali

fi

 ed according to local, state and national building and safety 

codes and regulations. Incorrect installation could cause leaks, electric shock, 

fi

 re or an explosion. 

In areas where Seismic Performance requirements are speci

fi

 ed, the appropriate measures 

should be taken during installation to guard against possible damage or injury that might occur in 

an earthquake. If the unit is not installed appropriately correctly, injuries may occur because of a 

falling unit


Use appropriate Personal Protective Equipment (PPE), such as gloves, protective goggles and 

electrical protection equipment and tools suited for electrical operation purposes. 


When transporting, be careful when picking up, moving and mounting these units. Although the 

controller may be packed using plastic straps, do not use them for transporting from one location to 

another. Do not stand on or put any material on the controller. 


When installing the controller cabling to the units, do not touch or adjust any safety devices inside 

the indoor or outdoor units. All safety features, disengagement, and interlocks must be in place 

and functioning correctly before the equipment is put into operation. If these devices are improperly 

adjusted or tampered with in any way, a serious accident can occur. Never bypass, wire around, or 

jump-out any safety device or switch. 


Use only Johnson Controls recommended, provided as standardized, or replacement parts.


Johnson Controls will not assume any liability for injuries or damage caused by not following steps 

outlined or described in this manual. Unauthorized modi

fi

 cations to Johnson Controls products are 

prohibited as they…


May create hazards which could result in death, serious injury or equipment damage; 


Will void product warranties; 


May invalidate product regulatory certi

fi

 cations;


May violate OSHA standards;

Take the following precautions to reduce the risk of property damage.


Do not touch the main circuit board or electronic components in the controller or remote devices. 

Make sure that dust and/or steam does not accumulate on the circuit board.


When installing the unit in a hospital or other facility where electromagnetic waves are generated 

from nearby medical and/or electronic devices, be prepared for noise and electronic interference 

Electromagnetic Interference (EMI). Do not install where the waves can directly radiate into 

the electrical box, controller cable, or controller. Inverters, appliances, high-frequency medical 

equipment, and radio communications equipment may cause the unit to malfunction. 

The operation of the unit may also adversely affect these same devices. Install the unit at least 10 

ft. (approximately 3m) away from such devices.  


Locate the controller at a distance of at least 3 ft. (approximately 1m) between the indoor unit and 

electric lighting. Otherwise, the receiver part of the unit may have dif

fi

 culty receiving operation 

commands. 

Summary of Contents for CIW01

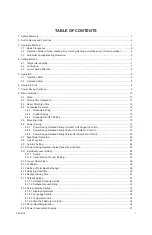
Page 1: ... Manual Model CIW01 IMPORTANT READ AND UNDERSTAND THIS MANUAL BEFORE USING THIS WIRED CONTROLLER KEEP THIS MANUAL FOR FUTURE REFERENCE OK Menu Back Help ECO On Off A C MODE SPEED TEMP COOL LOUV Adj Meeting Room LOUV FLTR ...

Page 2: ......

Page 3: ...ving 16 8 6 1 Power Saving Detailed Setting Outdoor Unit Capacity Control 17 8 6 2 Power Saving Detailed Setting Indoor Unit Rotation Control 19 8 6 3 Power Saving Detailed Setting Intermittent Operation Control 20 8 7 Night Quiet Operation 22 8 8 Quick Function 23 8 9 Comfort Setting 24 8 10 Power Saving Operation Noise Reduction Schedule 25 8 11 Individual Louver Setting 28 8 11 1 Setting 28 8 1...

Page 4: ... Information 42 10 Other Indications 42 10 1 In Normal Condition 42 10 1 1 Main Sub Controller 42 10 1 2 Central Control 43 10 1 3 Priorities 43 10 1 4 External Power Saving Control Processing 43 10 1 5 Defrosting 43 10 1 6 Operation Restriction 44 10 2 In Alarm Condition 45 10 2 1 Alarm 45 10 2 2 Power Failure 45 10 2 3 Electromagnetic Interference EMI 45 ...

Page 5: ...adjust any safety devices inside the indoor or outdoor units All safety features disengagement and interlocks must be in place and functioning correctly before the equipment is put into operation If these devices are improperly adjusted or tampered with in any way a serious accident can occur Never bypass wire around or jump out any safety device or switch Use only Johnson Controls recommended pro...

Page 6: ...he unit to the customer according to the information in all manuals that accompanied the system All manuals and warranty information must be given to the user or left near the Indoor Unit Electrical Precautions Take the following precautions to reduce the risk of electric shock fire or explosion resulting in serious injury or death Only use electrical protection equipment and tools suited for this...

Page 7: ...e power lines do not apply tension to the cables Secure the suspended cables at regular intervals but not too tightly Make sure that the terminals do not come into contact with the surface of the electrical box If the terminals are too close to the surface it may lead to failures at the terminal connection Do not clean with or pour water into the controller as it could cause electric shock and or ...

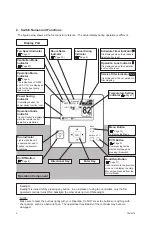
Page 8: ...Page 8 Run Indicator Lights while the unit is operational and it flashes in abnormal conditions Room Name Indicator Page 35 Operation Component Temperature Setting Indicator Page 7 ECO Button Page 9 Power saving can be started or stopped by pressing this switch Back Help Button Page 37 Used to return to the previous screen or to display the Help Menu when pressed from the Normal Mode Menu Button P...

Page 9: ...by using warm water less than 122 F 50o C If the water temperature is higher than 122 F 50 C it will cause damage to plastic parts 3 Operation Method 3 1 Basic Procedures 1 Function Selection By pressing or the icon moves to the next function in order of the functions MODE SPEED LOUV and TEMP 2 Change of Settings With the function MODE SPEED LOUV or TEMP selected press or The setting is changed 3 ...

Page 10: ...lows Cooling mode changes to heating mode when the indoor temperature is heating setpoint 2 F 1 C Heating mode changes to cooling mode when the indoor temperature is cooling setpoint 2 F 1 C NOTE The function selection setting is required for Dual setpoint activation Function selection setting is needed for the use of automatic cooling heating operation and changing AUTO COOL HEAT temperature Refe...

Page 11: ...et of Setting Temperature function is selected at function selection F3 the temperature is automatically returned to the preset temperature after the temperature set point change You can choose reset time from 15 30 60 or 90 minutes Refer to Installation Manual and Service Manual for detailed information about Automatic Reset of Setting Temperature and Cooling Lower Limit Value and Heating Upper L...

Page 12: ...al louver position may not match during the auto swing operation To set the louver positions set the angle after checking the position on the LCD The louver may NOT stop immediately after the switch is pressed 5 Operation 5 1 Operation Start Press On Off The run indicator turns on and the operation starts NOTE Temperature Air Flow Setting Temperature set point and airflow settings are retained aft...

Page 13: ...n is displayed OK Menu Back Help Power Save Guide Sav Mode Capacity Cntl Sav ON OFF ON Sav Level HIGH Rtrn Sel Adj Back Schedule No Setting Detailed Setting NOTES Each time when pressing and Back Help simultaneously for 3 seconds the operation lock state switches alternately between locked and unlocked Select what is to be locked at the function selection setting Refer to Installation Manual and S...

Page 14: ...e in operation or other reasons The reason is shown as a footer message 1 Press Menu The menu is displayed 2 Select a function by pressing or and press OK is displayed if the function is not available 3 Press Back Help to return to Normal Mode Operation Mode Indication Menu Power Saving Setting Elevating Grille Operation Schedule Reset Filter Sign Time 01 05 Simple Timer 15 10 Fri Entr Rtrn Sel Ba...

Page 15: ...ion Do not set the same time for both ON OFF timers Menu Power Saving Setting Elevating Grille Operation Schedule Reset Filter Sign Time 01 05 Simple Timer 15 10 Fri Entr Rtrn Sel Back OK OK Menu Back Help Simple Timer Execute Not Used ON Time OFF Time 15 10 Fri Entr Rtrn Sel Adj OK Back Simple Timer Execute Everyday ON Time 08 30 OFF Time 15 10 Fri Entr Rtrn Sel Adj Back OK OK Menu Back Help 4 Pr...

Page 16: ... operation at a set time Temperature can be also set with Schedule Timer operation Five different schedule timers maximum can be set for each day of the week 1 Select Operation Schedule from the Menu and press OK 2 Select Day Time Setting by pressing or and press OK NOTE If the present time has not been set yet Set Date Time is displayed automatically Refer to Section 8 15 Adjusting Date Time 3 Pr...

Page 17: ...imers maximum can be set for each day of the week When setting other days of the week press Menu The schedule setting screen of the next day is displayed 5 Press OK The confirmation screen is displayed is indicated when the scheduled operation is activated 6 Select Yes by pressing or and press OK The setting is confirmed and the screen returns to normal mode To set other days of the week select Se...

Page 18: ...lle Operation Schedule Reset Filter Sign Time 01 05 Simple Timer 15 10 Fri Entr Rtrn Sel Back OK Back OK Operation Schedule Schedule ON OFF Holiday Setting Day Time Setting 15 10 Fri Entr Rtrn Sel Back OK 0 6 12 18 Sun Mon Tue Wed Thu Fri Sat Holiday Setting 15 10 Fri Entr Rtrn Sel Hol ON OFF 5 Select Yes by pressing or and press OK The holiday setting is confirmed and the screen returns to normal...

Page 19: ... schedule ON OFF setting is confirmed and the screen returns to normal mode turns on when schedule operation is ON turns off when schedule operation is OFF Menu Power Saving Setting Elevating Grille Operation Schedule Reset Filter Sign Time 01 05 Simple Timer 15 10 Fri Entr Rtrn Sel Back OK Back OK Operation Schedule Schedule ON OFF Holiday Setting Day Time Setting 15 10 Fri Entr Rtrn Sel Back OK ...

Page 20: ...F is set as OFF 1 Select Power Saving Setting from the Menu and press OK The Power Saving Setting screen is displayed 2 Select Power Saving Mode Setting by pressing or and press OK The Power Saving Mode Setting screen is displayed Menu Power Saving Setting Elevating Grille Operation Schedule Reset Filter Sign Time 01 05 Simple Timer 15 10 Fri Entr Rtrn Sel Back OK Back OK Detailed Setting Power Sa...

Page 21: ...aving ON OFF turns OFF It is necessary to assign a value of capacity control as follows Sav LOW Sav MED Sav HIGH The cooling heating capacity can decrease when using the Power Saving function 1 Select Power Saving Mode Setting from the Menu screen and press OK The Power Saving Setting screen is displayed 2 Select Detailed Setting by pressing or and press OK The power saving Detailed Setting screen...

Page 22: ... Back Help 6 By pressing or the setting function changes as follows LOW MED HIGH LOW Only MED Only HIGH Only Press OK after completing the setting 7 The confirmation screen is displayed Select Yes by pressing or and press OK to confirm the setting The screen returns to normal mode If the power saving setting is available set it ON using the Power Saving Guidance Capacity Control Chg level LOWяMEDя...

Page 23: ...y control Power Saving ON OFF turns OFF This function can only be used when the operation mode is in COOL or HEAT The cooling heating capacity can decrease when using the Power Saving function 1 Select Power Saving Setting from the menu screen and press OK 2 The Power Saving Setting screen is displayed Select Detailed Setting with or and press OK 3 Select Rotation Control with or and press OK The ...

Page 24: ...n as follows If the Power Saving Mode changes the Power Saving Detailed setting in intermittent operation control the Power Saving ON OFF turns OFF The cooling heating capacity can decrease when using the Power Saving function Cool Dry Mode Heat Mode SAV LOW Normal Mode 20min Fan Mode 10min Normal Mode 25min Fan Mode 5min SAV MED Normal Mode 17min Fan Mode 13min Normal Mode 20min Fan Mode 10min SA...

Page 25: ...confirmation screen is displayed Select Yes with or and press OK to confirm the setting The screen returns to normal mode If the Power Saving Setting setting is accessible set it ON using Power Saving Guidance Back OK Detailed Setting Power Saving Mode Setting Power Saving Setting Entr Rtrn Sel Detailed Setting Intermittent Control Rotation Control Capacity Control Entr Rtrn Sel Back Detailed Sett...

Page 26: ... Reduction from the menu screen and press OK The Operation Noise Reduction setting screen is displayed Setting Outdoor Unit Setting Name Not Available No Setting LOW Setting 1 MED Setting 2 HIGH Setting 3 2 By pressing or the setting changes as follows OFF LOW MED HIGH Select the level and press OK 3 The setting confirmation screen is displayed Select Yes with or and press OK to confirm the settin...

Page 27: ...e to the setting temperature The operation starts regardless of the fan speed setting of the controller when in cooling mode 1 Select Quick Function from the Menu screen and press OK The Quick Function screen is displayed 2 By pressing or the Quick mode changes as follows OFF COOL Only HEAT Only COOL HEAT Select the Quick mode and press OK 3 The setting confirmation screen is displayed Select Yes ...

Page 28: ...t Setting from the Menu screen and press OK The Comfort Setting screen is displayed 2 By pressing or the Comfort Setting Mode changes as follows OFF LOW MED HIGH Select the Control Cool Air level and press OK 3 The setting confirmation screen is displayed Select Yes with or and press OK to confirm the setting The screen returns to normal mode Menu Function 10 Sav reduction Schedule Comfort Setting...

Page 29: ...ting changes as follows Capacity Control Intermittent Control Noise Reduction Press OK The power saving schedule setting or noise reduction schedule screen is displayed as Sav Reduction Schedule 3 Select the Day Time Setting with or and press OK The weekly schedule setting screen is displayed When the current time is not set the Time Adjusting screen is displayed automatically CORRECT INCORRECT ME...

Page 30: ...oise reduction control and the icon indicates the canceled time period In case of a holiday setting the icons appear as follows and To copy a setting press and OK simultaneously for the selected day The setting data of the previous day is copied The figure above displays the ON Time at 8 30 the OFF Time at 12 15 and the power saving level as LOW If the schedule control is activated the icon is dis...

Page 31: ...ermittent Control cannot be selected 3 Select Schedule ON OFF with or and press OK 4 The Schedule ON OFF setting confirmation screen is displayed When schedule is ON select Turn OFF schedule function When schedule is OFF select Turn ON schedule function Select Yes with or and press OK to confirm the schedule ON OFF setting The screen returns to normal mode Menu Function 10 Sav Reduction Schedule C...

Page 32: ...al Louver Setting 8 11 1 Setting This setting is available only for indoor units that allow an individual louver control Each louver angle can be set individually NOTES This function is available only when the indoor unit corresponds to an individual louver This function cannot be set if the unit is stopped The fan speed changes to LOW while this function is being set After the setting is complete...

Page 33: ...Louver Open Close 03 05 Individual Louver Setting 15 10 Fri Entr Rtrn Sel Back OK Back OK Cancel INDV Louver SET Individual Louver Setting Individual Louver Setting Entr Rtrn Sel Back OK Cancel individual louver setting Cancel INDV Louver SET 01 03 Yes No Sel Entr Rtrn Back OK Cancel INDV Louver SET 01 01 01 02 01 03 Select unit to cancel 01 04 Entr Rtrn Sel NOTE If there is one indoor unit connec...

Page 34: ...ime from the sub controller If more than two minutes modification is done the main controller is set at the same time Check Main or Sub at the Main Sub Remote from the Help Menu Current Setting 1 Select Adjusting Date Time from the Menu screen and press OK 2 Press or and select yyyy mm dd hh mm OK Set date time Adjusting Date Time Yes No Sel Entr Rtrn Back 5 The confirmation screen is displayed Se...

Page 35: ...ht Saving Time Yes No Sel Entr Rtrn 15 10 Fri Stop Daylight Saving Time 1 Select Daylight Saving Time from the Menu screen and press OK 2 The Daylight Saving Time screen is displayed Select Put 1h backward using or and press OK 3 The Daylight Saving Time confirmation screen is displayed Select Yes using or and press OK to confirm the setting The screen returns to normal mode Back OK Put 1h backwar...

Page 36: ... Adj Back OFF Time 15 10 Fri OK OK Menu Back Help 4 Press OK to finish the Setback Setting The confirmation screen is displayed Press Back Help to return to operation setting screen 5 Select Yes by pressing or and press OK The setting is confirmed and the screen returns to normal mode OK Set timer operation Setback Setting Yes No Sel Entr Rtrn Back 15 10 Fri OK Menu Back Help OK Menu Back Help OK ...

Page 37: ...ck operation cannot be ON OFF while wired controller operation is prohibited 8 18 Screen Display Setting 8 18 1 Display Adjustment Function Time Format Changes the time form to 12 hour or 24 hour Brightness Adjusts the brightness of backlight Backlight Changes the time 5 15 or 30 seconds between ON and OFF of backlight Contrast Adjusts the degree of difference between light and dark elements of th...

Page 38: ... and dark elements of the LCD is changed On Off lamp Press or and the brightness of the run indicator is changed OK Menu Back Help OK Menu Back Help OK Menu Back Help OK Menu Back Help 4 The confirmation screen is displayed Select Yes by pressing or and press OK The setting is confirmed and the screen returns to normal mode 3 Press or to select the language and press OK 8 18 2 Language Setting Thi...

Page 39: ...age Setting Display Adjustment Entr Rtrn Sel Back OK OK Menu Back Help OK Menu Back Help OK Menu Back Help OK Menu Back Help OK Menu Back Help OK Menu Back Help 4 Press or and select setting data If Temperature Unit is selected it changes as follows Degrees C Degrees F If Temperature Width is selected it changes as follows 0 5ºC 1ºC Press OK when all settings are complete When the selected languag...

Page 40: ...layed By pressing or the setting changes as follows Display Non display Select the setting and press OK Screen Display Setting Main Sub Display Temperature Unit Language Setting Display Adjustment Entr Rtrn Sel Back OK OK Menu Back Help OK Menu Back Help OK Menu Back Help OK Menu Back Help OK Menu Back Help OK Menu Back Help 4 The setting confirmation screen is displayed Select Yes with or and pre...

Page 41: ...ing or and press OK The setting is confirmed and the screen returns to normal mode OK Menu Back Help OK Menu Back Help OK Menu Back Help OK Menu Back Help 8 20 Power Consumption Display This function displays the power consumption of the outdoor unit compressor The value of each displayed in Graph List format is 1 day 24h every 2 hrs 1 week 7 days and 1 year 12 months NOTES The numerical value is ...

Page 42: ...eek ago 1 week ago This week 2 years ago 1 year ago 1 year ago This year OK ECO Menu Back Help OK ECO Menu Back Help OK Menu Back Help Graph List Display Press ECO to change the Power Consumption display as follows Graph List Display Scale Change the scale using or OK ECO Menu Back Help OK ECO Menu Back Help 5 Press Back Help to return to the Menu screen OK Power Consumption wk kWh yy Grph Next Pa...

Page 43: ... unchanged for approximately 10 minutes the screen returns automatically to normal mode OK Menu Back Help OK Menu Back Help OK Menu Back Help OK Menu Back Help 9 2 Current Setting Display This function displays the setting content of the operating condition of the air conditioning and controller 1 Select Current Setting from the Menu screen and press OK 2 The Current Setting screen is displayed Pr...

Page 44: ...ontrol ON OFF Operation Mode Fan Speed Louver Setting Temperature List of indications for the Current Setting 3 Press Back Help The screen returns to the Help Menu To return to normal mode press Back Help again 9 3 Indicators on LCD This function is used for explaining each icon on the LCD 1 Select About Indication from the Help Menu and press OK Explanations of indicators on the LCD are displayed...

Page 45: ...Indicator is turned OFF when operation stops Next Page Rtrn Back OK Help Menu Contact Information Troubleshooting About Operation Current Setting Entr Rtrn Sel About Indication Back OK Menu Back Help OK Menu Back Help OK Menu Back Help OK Menu Back Help OK Menu Back Help OK Menu Back Help OK Menu Back Help 5 Press Back Help The screen returns to the Help Menu To return to normal mode press Back He...

Page 46: ...bleshooting About Operation Current Setting Entr Rtrn Sel About Indication Back OK Menu Back Help OK Menu Back Help 10 Other Indications 10 1 In Normal Condition 10 1 1 Main Sub Controller The icon MAIN is displayed as ON when the controller is set as MAIN Use the main controller to set principal power saving When there is a single controller the icon MAIN is not displayed as ON The icon SUB is di...

Page 47: ...ontroller Restrict icon is displayed as ON and the setting modifications of the Operation Mode and Temperature Setting from the sub controller are restricted Main Controller Sub Controller 10 1 4 External Power Saving Control Processing During Outdoor Capacity Control setting in process of the central controller or outdoor unit The icon Ext Sav is displayed as ON However if the controller is set f...

Page 48: ... an instance where the operation mode set by the central station is different from the operation mode of the outdoor unit when the outdoor unit is operating in a mode other than heat cool simultaneous operation The current operation mode and the message Other remote are in HEAT setting is flickering Flickering Setback Operation In case the setback operation is enabled and the card key is removed s...

Page 49: ...oduct and contact your distributor or contractor 10 2 2 Power Failure All the indications are OFF Once the unit is stopped by power failure for longer than 2 seconds the unit is not started again although power recovers Perform the starting procedures again If the power recovers within 2 seconds the unit starts again automatically 10 2 3 Electromagnetic Interference EMI There could be an instance ...

Page 50: ......

Page 51: ......

Page 52: ...Code No LIT 12013123 Issued September 2019 P5415479 rev 4 2017 Johnson Controls Inc ...

Reviews: