18
9.14
Limit switch
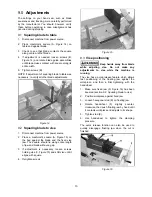
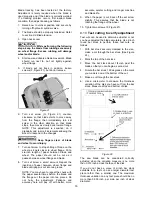
The stop screw (F, Figure 27) activates a limit
switch to shut off the saw when it reaches down
position.
The stop screw has been set at the factory. If
future adjustment is needed, loosen the hex nut
and rotate the screw, then retighten the hex nut.
Figure 27
10.0
Operating controls
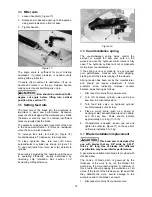
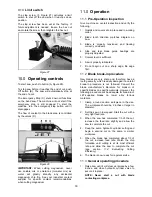
To start saw, push On button (A, Figure 28).
To stop saw before it reaches the end of cut, push
Off button (B). The saw will automatically stop at
the end of a cut.
The Emergency Stop (C) shuts down all functions
on the band saw. The machine will not start if the
emergency stop is still engaged. To start the
machine, turn the emergency stop button until it
disengages
The flow of coolant to the blade area is controlled
by the valves (D).
Figure 28
IMPORTANT:
When cutting magnesium, never
use soluble oils or emulsions (oil-water mix) as
water will greatly intensify any accidental
magnesium chip fire. See your industrial coolant
supplier for specific coolant recommendations
when cutting magnesium.
11.0
Operation
11.1
Pre-Operation inspection
Give machine an overall inspection and verify the
following:
1. Guards and covers are in place and in working
order.
2. Blade tooth direction matches diagram on
bow.
3. Blade is properly tensioned, and tracking
correctly on wheels.
4. Side and rear blade guide bearings are
properly adjusted.
5. Coolant level is sufficient.
6. Saw is properly lubricated.
7. Do not begin cut on a sharp edge; file edge
first.
11.2
Blade break-in procedure
New blades are very sharp and, therefore, have a
tooth geometry which is easily damaged if a careful
break-in procedure is not followed. Consult the
blade manufacturer’s literature for break-in of
specific blades on specific materials. However, the
following procedure will be adequate for break-in of
JET-supplied blades on lower alloy ferrous
materials.
1. Clamp a round section workpiece in the vise.
The workpiece should be 2 inches or larger in
diameter.
2. Set the saw on low speed. Start the cut with a
very light feed rate.
3. When the saw has completed 1/3 of the cut,
increase the feed rate slightly and allow the
saw to complete the cut.
4. Keep the same hydraulic cylinder setting and
begin a second cut on the same or similar
workpiece.
5. When the blade has completed about 1/3 of
the cut, increase feed rate. Watch the chip
formation until cutting is at its most efficient
rate and allow the saw to complete the cut
(see
section 11.4, Evaluating Cutting
Efficiency
).
6. The blade is now ready for regular service.
11.3
General operating procedure
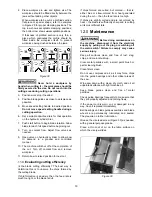
1. Raise bow until it will clear workpiece by a few
inches, and close hydraulic cylinder valve to
secure it in place.
NOTE: Never start a cut with blade
contacting workpiece.
Summary of Contents for HVBS-710G
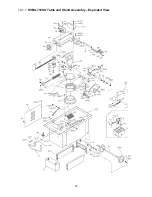
Page 23: ...23 14 1 1 HVBS 710SG Table and Stand Assembly Exploded View...
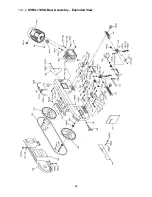
Page 24: ...24 14 1 2 HVBS 710SG Bow Assembly Exploded View...
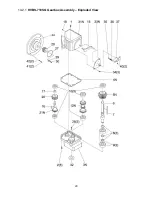
Page 29: ...29 14 2 1 HVBS 710SG Gearbox Assembly Exploded View...
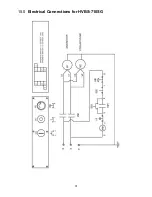
Page 31: ...31 15 0 Electrical Connections for HVBS 710SG...
Page 32: ...32 427 New Sanford Road LaVergne Tennessee 37086 Phone 800 274 6848 www jettools com...

