


© 2016, JCM American Corporation
A - 1
A p p e n d i x A
This section provides troubleshooting instructions
for the GEN5 Printer Unit, and includes the follow-
ing information:
•
Introduction
•
Troubleshooting Overview
•
Fault Table Listings
•
Front Bezel LED Indicators
•
LED Indication Conditions
•
Printer Errors
Introduction
Most Printer issues result from minor causes.
Before replacing any parts, be sure that all assem-
bly and circuit board connectors are properly fitted
with their harnesses properly connected.
Poor performance by the GEN5 Printer is often due
to dust, residue or foreign objects adhering to the
sensors or rollers. Clean the Transport Path first,
then carefully observe the operating state of the
Printer when printing a Configuration Ticket. This
observation is important in locating any causes of
failure and the possible fault location.
Perform all repairs and updates by referring to
Firmware Updating and Testing in Section 6 of this
Manual, and the Disassembly/Reassembly instruc-
tions in Section 4 of this Manual.
Troubleshooting Overview
This product allows the operator to perform fault
diagnosis by checking various Fault Table Listings
against the symptoms. Survey the cause(s) of any
failure occurrences during the process.
After determining the cause of the failure, repair
the unit and replace any appropriate parts deemed
necessary. Then perform the Performance Test.
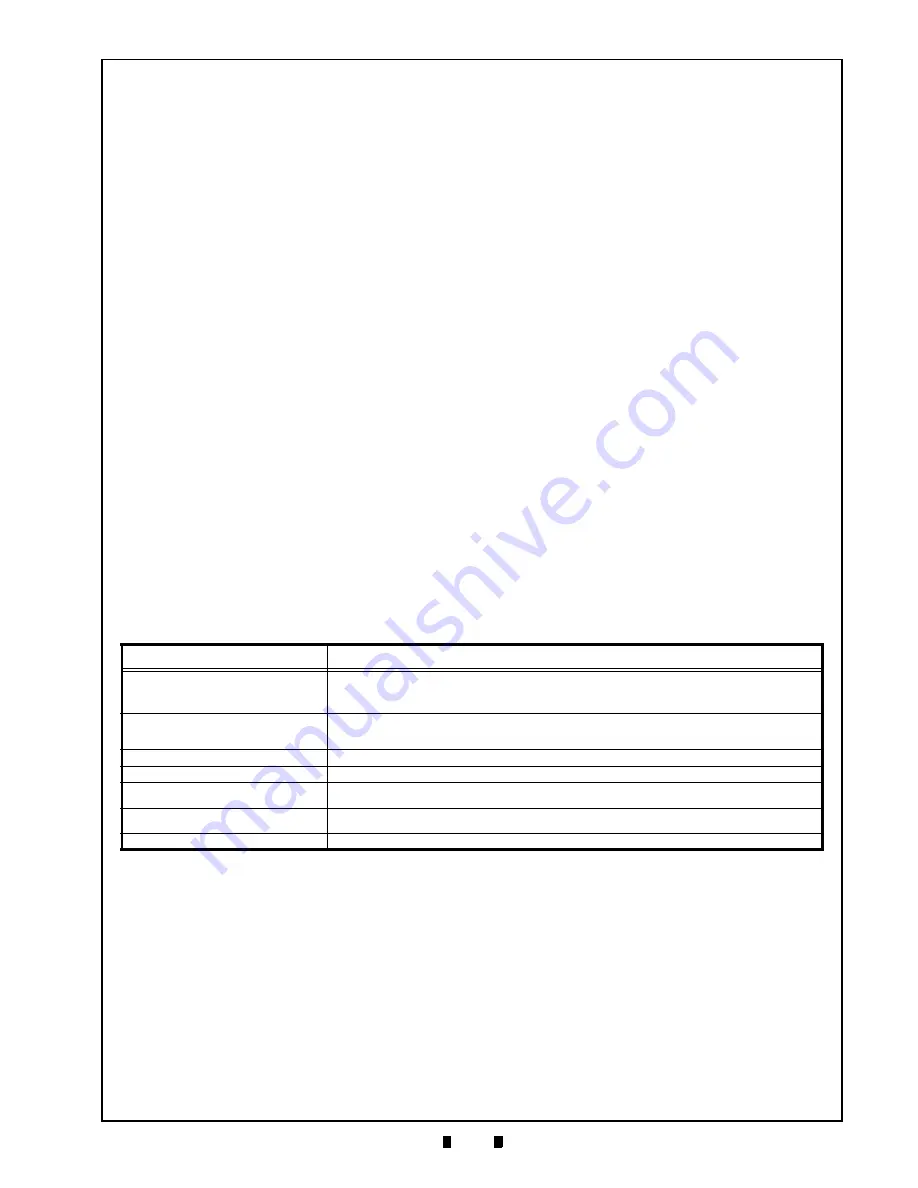
Fault Table Listings
Table A-1 identifies possible GEN5 Printer Unit
fault conditions that can occur, and the necessary
actions required to correct them.
A TROUBLESHOOTING
Table A-1
General Fault Conditions
Symptoms/Error Messages
Corrective Action Required
No Power/
No LEDs Illuminated
Check the Power Supply connection from the Host EGM to the Printer. Make sure the RS-232/USB
Coil Interface Cable is properly connected to the Printer. Press the FEED Button to verify that the
Ticket advances.
No Ticket Detected
Remove and reload the Ticket Stack into the Paper Tray. Check and then clean the Paper Out/Index
Mark Sensor (refer to “Sensors Cleaning Procedure” on page 2-8). The press the FEED button to
verify that the Printer detects the white-colored tickets and black-colored Index Mark.
Paper Jam Detected
Follow the procedure for “Clearing a Ticket Jam” on page 2-7.
Printer Lid Open
Close the Printer Lid.
Firmware Problem (Flushed)
Reload the Firmware.
Refer to Section 6: “Firmware Updating and Testing” on page 6-1 for details.
Hardware Fault Detected
Power cycle the Printer. Then check the Firmware version.
Refer to Section 6: “Firmware Updating and Testing” on page 6-1 for details.
Ticket does not load
Reload the ticket. Refer to “Clearing a Ticket Jam” on page 2-7 for details.


