PR-655/670 User Manual
52
2.
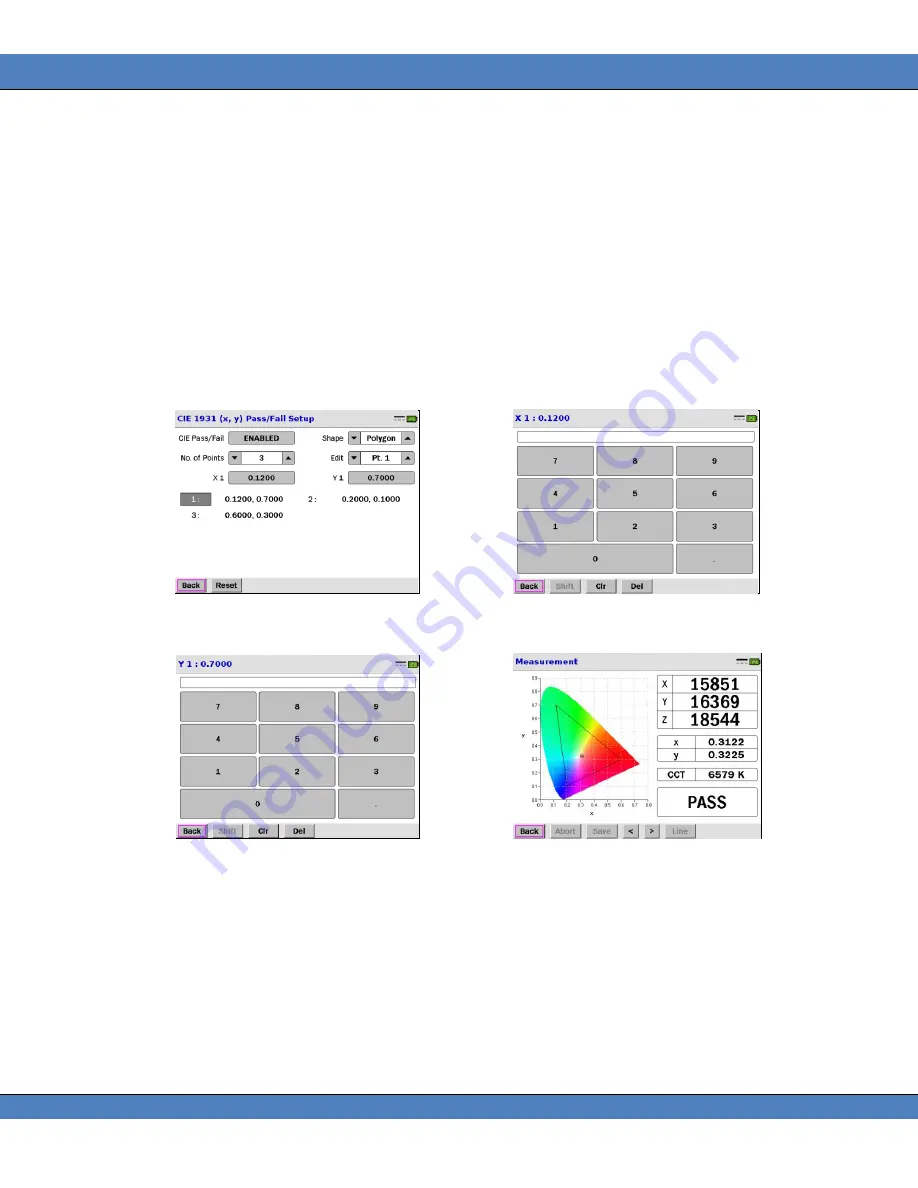
Touch the
▼▲
icons in the
Shape
field until
Polygon
appears.
3.
Select the number of points to define by touching the
▼▲
icons adjacent to the
No. of Points
field. The
Range is 3 to 10 points.
4.
Touch the
▼▲
icons next to the
Edit
field until
Pt. 1
(Point 1) appears.
5.
Touch the gray field next to
X1
to access the data entry screen. Enter the CIE 1931 x value for Point 1
(including the decimal point) and then touch
Back
.
6.
Touch the gray field next to
Y1
to access the data entry screen. Enter the CIE 1931 y value for Point 1
(including the decimal point) and then touch
Back
.
7.
Repeat
Steps 4
–
6
for all remaining points.
Note: The PR-655 / PR-670 automatically connects the first point (Point 1) to the last point (Point 3 in the
example),
→
→
→
8.
Following the measurement, touch the
< >
icons at the bottom of the result screen to scroll to the CIE
diagram screen.
Pass
or
Fail
appears in the lower right hand corner of the screen.


